As you may remember, we purchased our first home in July of 2021 in San Jose del Cabo, Mexico.
As if an international real estate purchase wasn’t exciting enough, we decided to double-down and remodel a few key areas. The bones and the quirks of the house made us fall in love, but a vision hit us as soon as we stepped foot inside to open up the space. It was time to put our own spin on Casa Turner.
We would compare our remodeling experience to riding a new roller-coaster for the first time. You start off a little nervous in anticipation. Then the climb starts (with immediate demolition progress), you reach the top for a deep breath (after a few language barriers and realizing you have limited options being on the tip of Baja Sur), and next thing you know you’re upside down juggling excitement, stress, and “oh my god, what did we get ourselves into?!”
But by the end, the ride came to a smooth stop and we are extremely happy with the outcome. Not sure we’d get back in line to do it all over again, but for now we’re here to share with you the journey of the before, after and all the crazy parts in between of renovating Casa Turner. Make sure you checkout the before & after photos at the end of the blog.

After our first visit to the house, we laid in bed that night Photoshopping our vision of what Casa Turner 2.0 could look like.
THE JOURNEY

FROM VISION TO RENOVATION
We fell in love with this house because we could see ourselves creating a life together in it as our home. After staying in the house on the weekends over the summer, we dreamed up ideas for a few areas we wanted to change. The goal was to prioritize changes around entertaining areas, while also creating a cozy, open-concept feel for our everyday enjoyment. The other homes we saw for sale were “cookie cutter”, so with this renovation we could really embrace the unique qualities of the house and add to it, making it our own.
IDEAS & INSPO

Joyce & Johanna of Custom Made AI
Kyle has an amazing skillset of taking an architectural design idea and putting it pencil-to-paper. However, we felt the need to validate our dream renovation with a professional home design team to bring the full vision to reality.
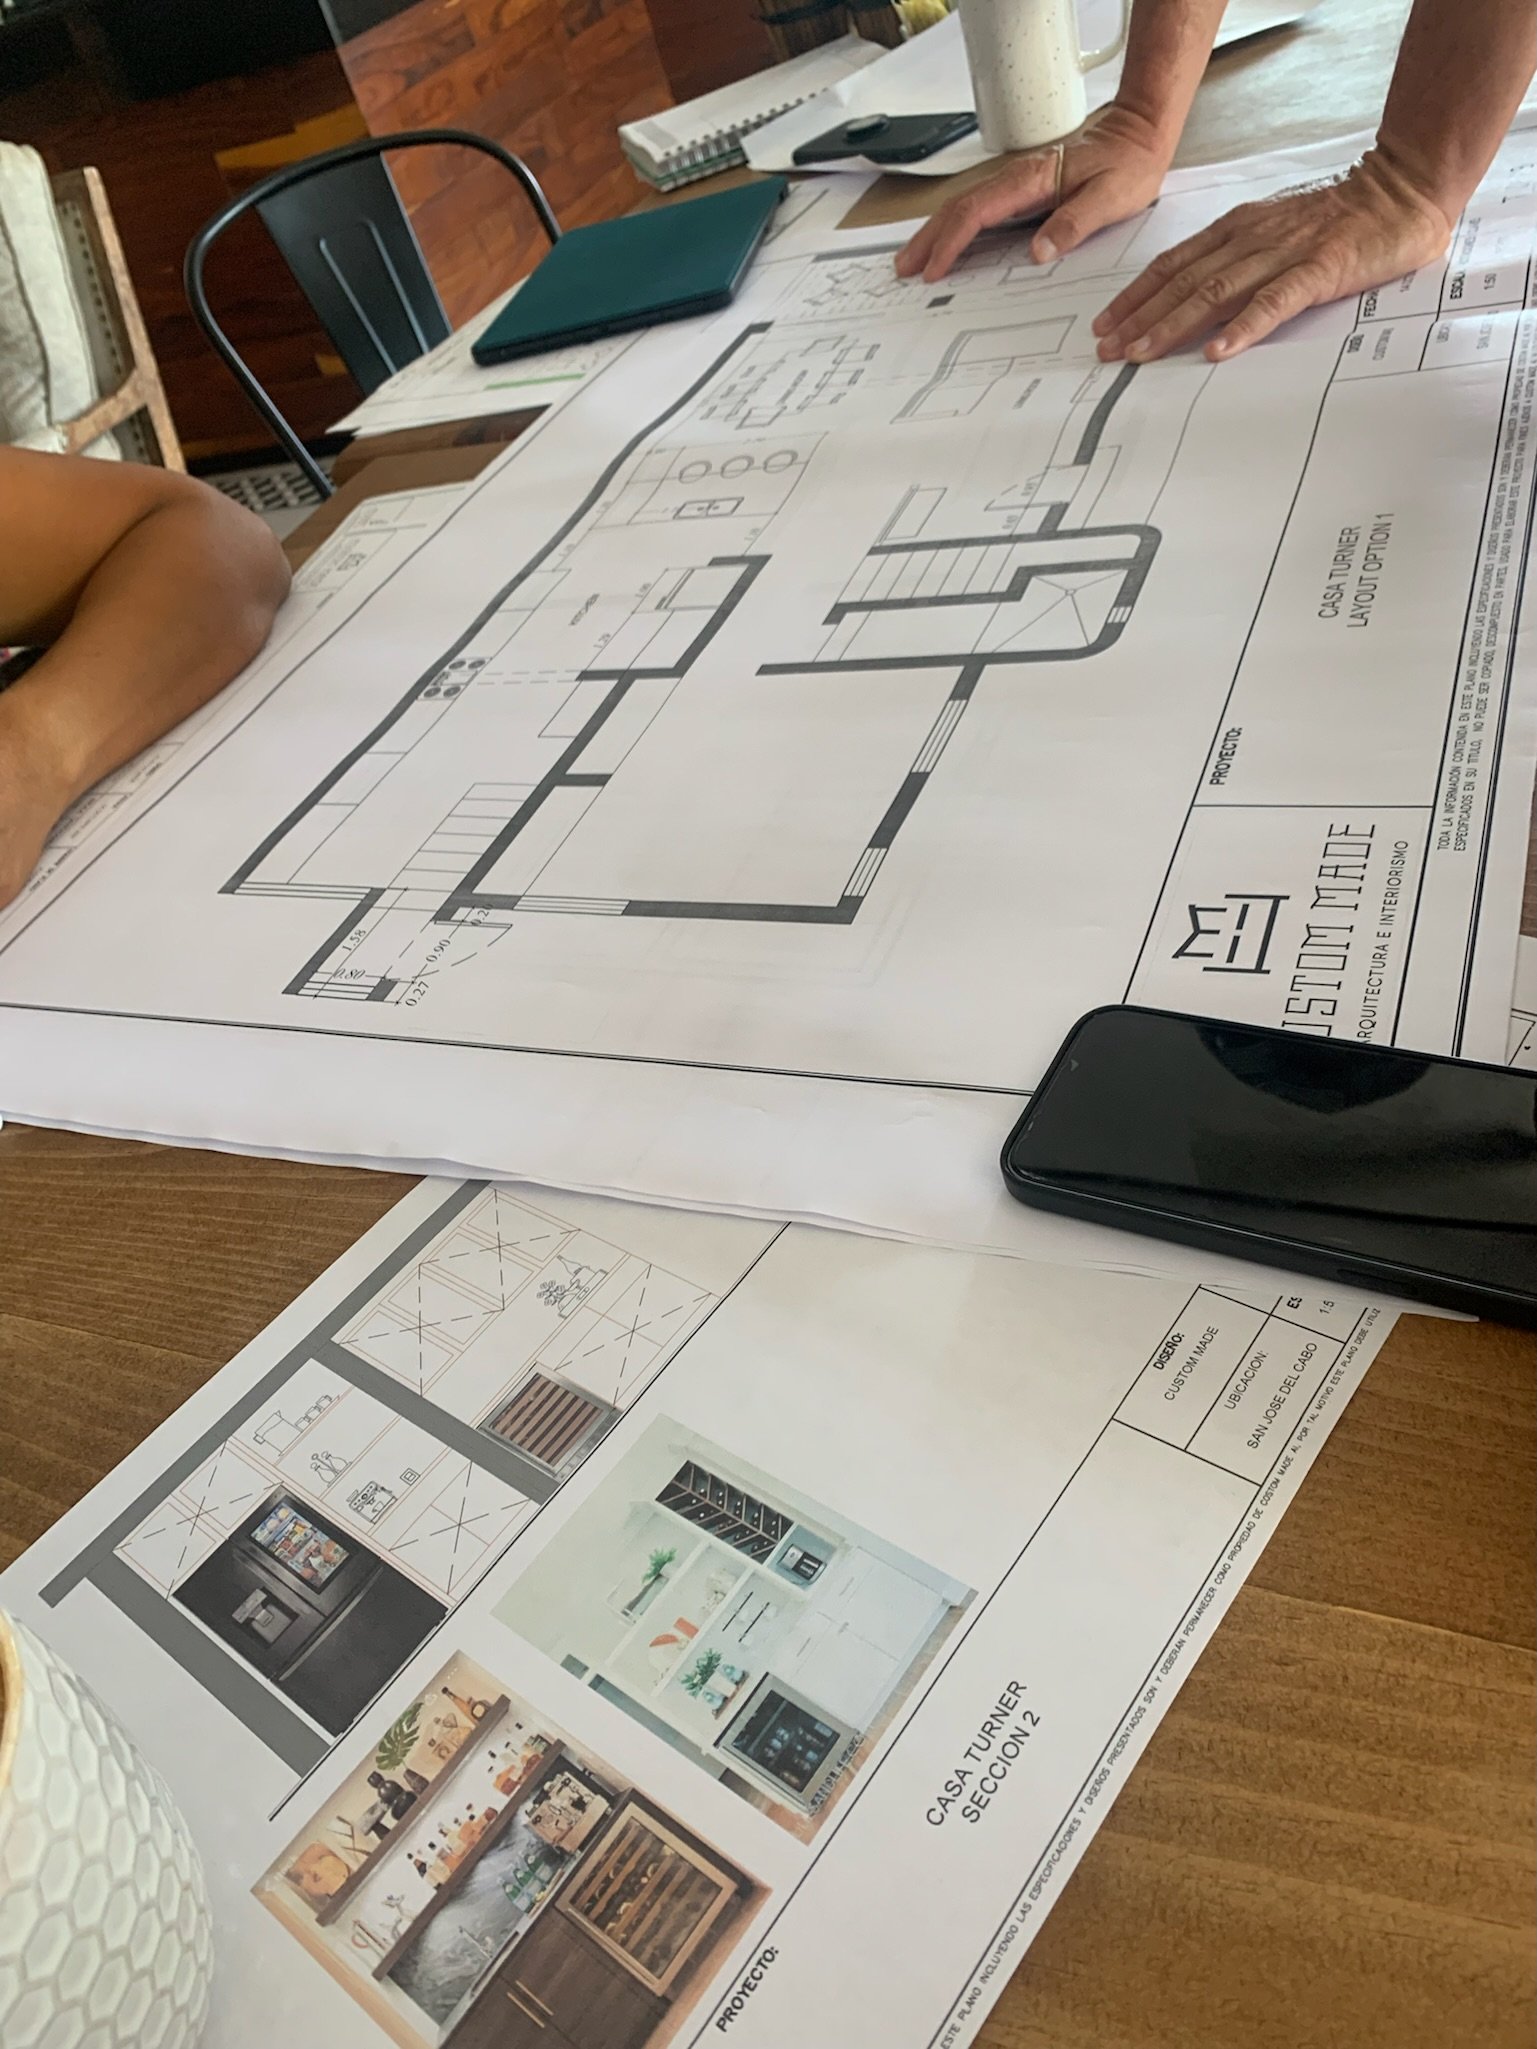
After a few interviews with design companies around town, we found the right team, Joyce and Johanna, of CustomMade Architecture & Interiors. Joyce was the brains behind the architectural plans and Johanna helped with all of the interior design. They also had the construction connection we would later hire.


During our initial meeting, we reviewed our wish list which was created via a PowerPoint “Inspiration Board”. This helped align our design team see our (Type A) vision so they could work their magic and put it into reality (and within budget). This also helped us set up the “phases” of our project so we could do our best not biting off everything all at once.


FROM INSPO TO GAME PLAN
After a few meetings with the design team over the summer, we decided September 2022 would be the month for reno to begin — let’s goooo! As with most set plans, they seemed to quickly evolve, straying from what we thought we were going to do, but all in the best way.
PLANNING THE BIGGEST CHANGES (SO FAR)
The first big planned change was to remove the large kitchen cabinet/center beam, which doubled as structural support. By eliminating this structure, it would open up our entryway, create easier kitchen flow, and allow us to introduce a large kitchen island. Given this change would required a new, metal beam in the ceiling for reinforced support, we knew it would be pricey, but a must for us to execute on an open floor plan vision.
The second change was to enclose the mud room in the back of our house. This would give us more space in the kitchen for function and storage as well as higher ceilings in the newly enclosed back area.
The original stairs would be slightly rerouted and take you from inside the new kitchen to the outside back patio for easy access and entertaining.

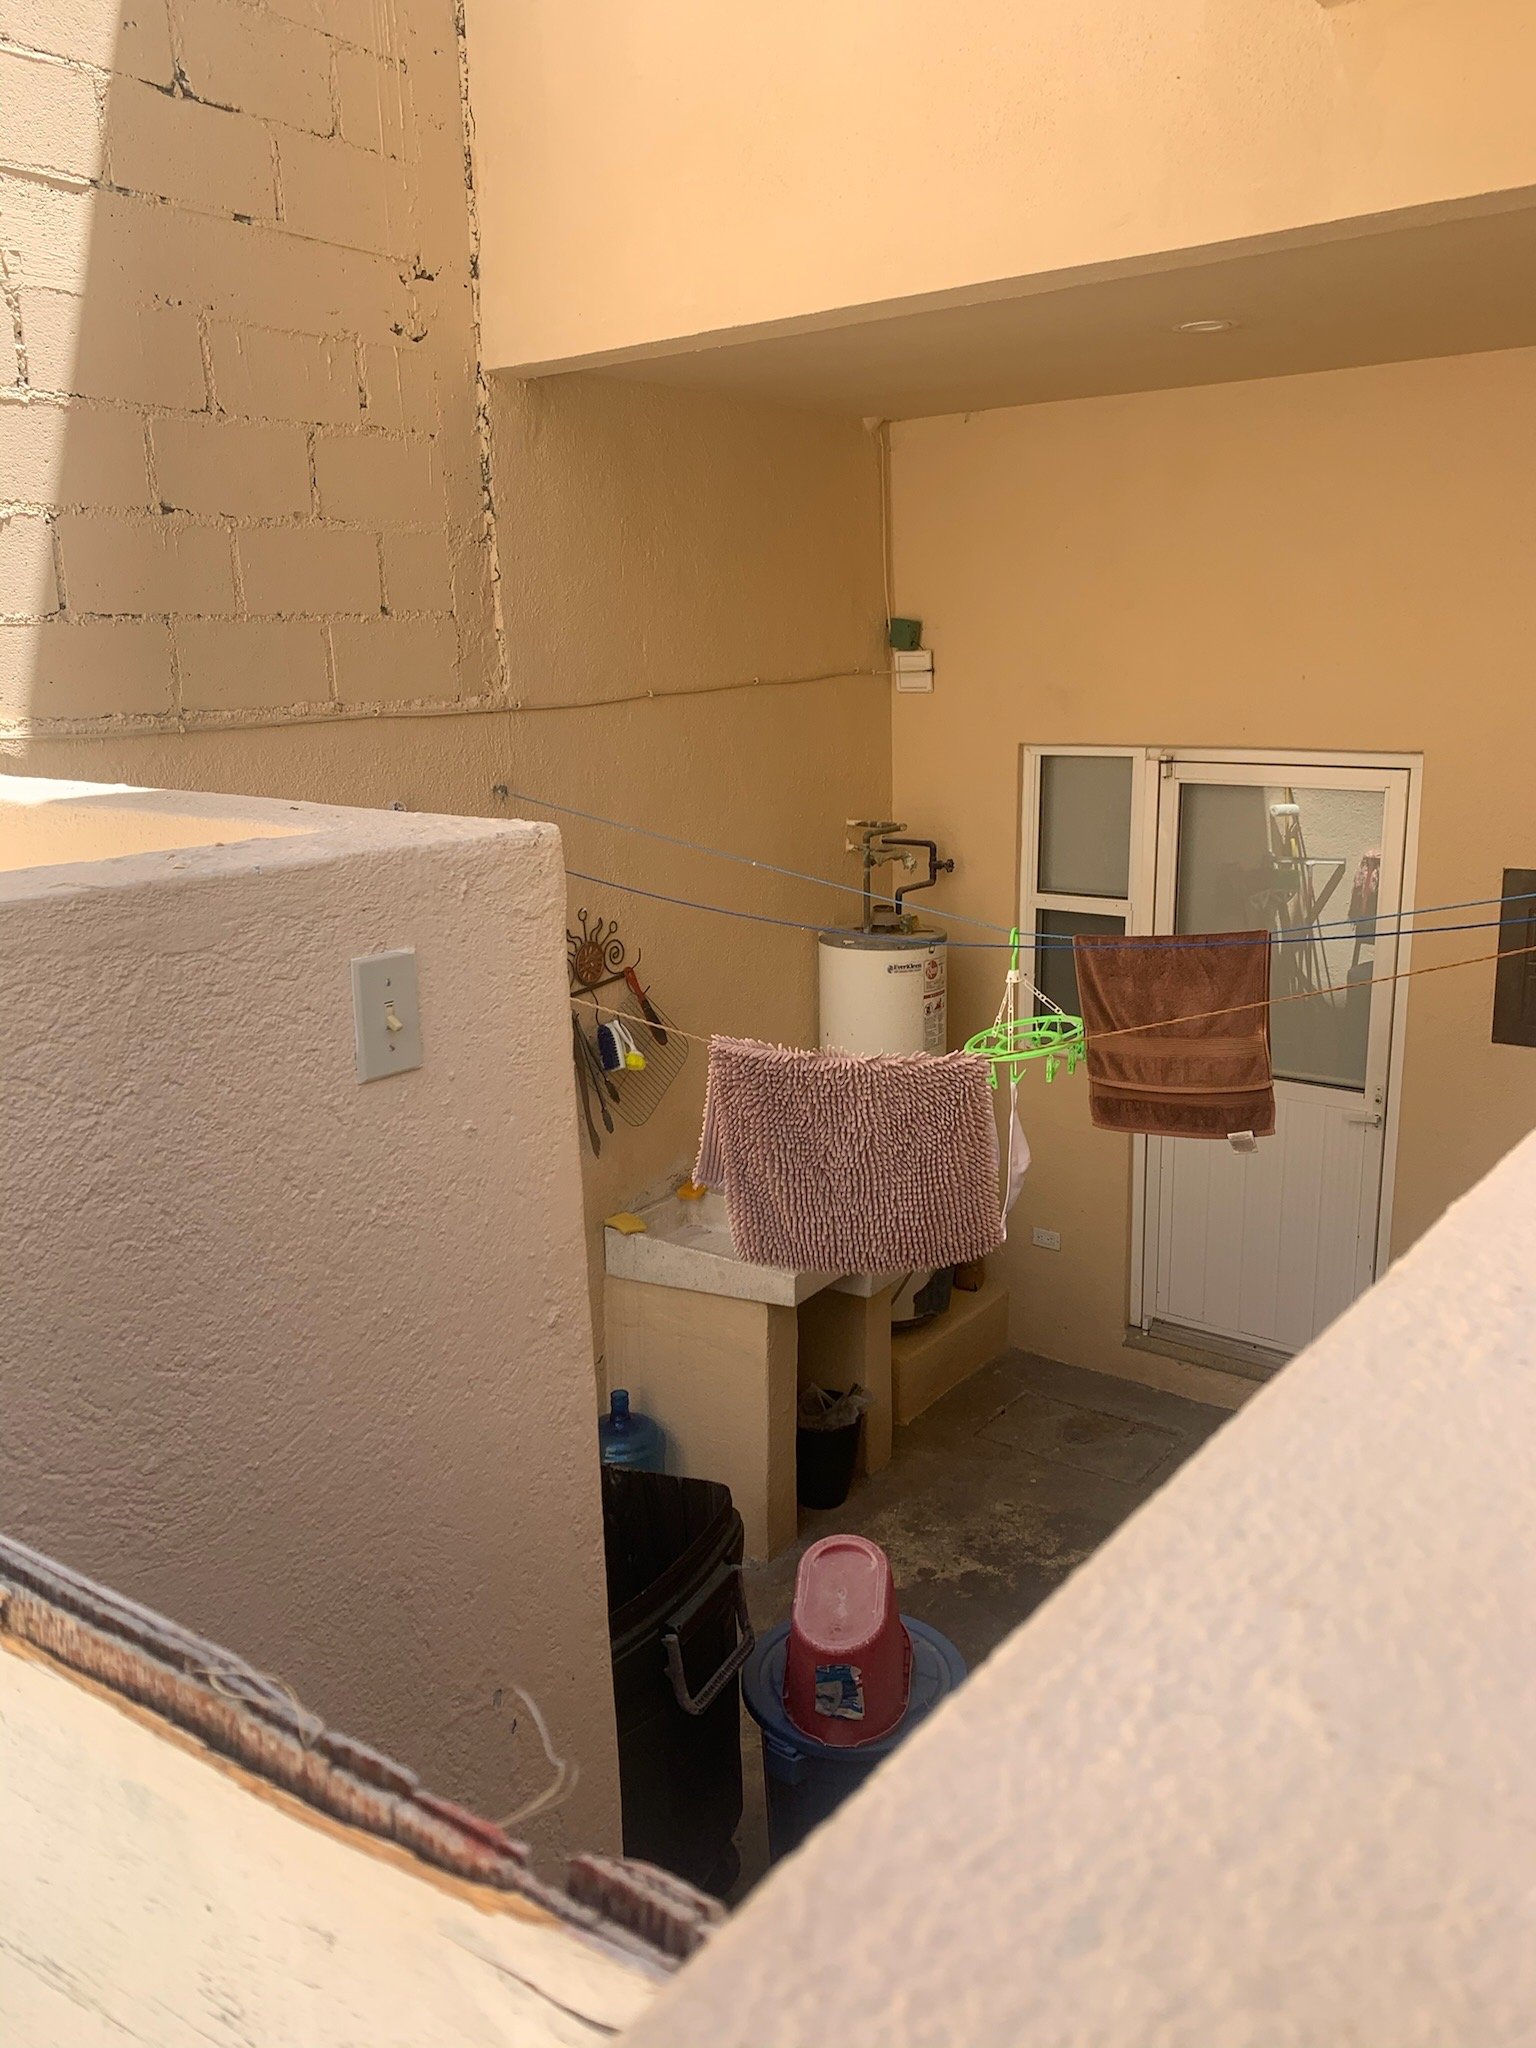

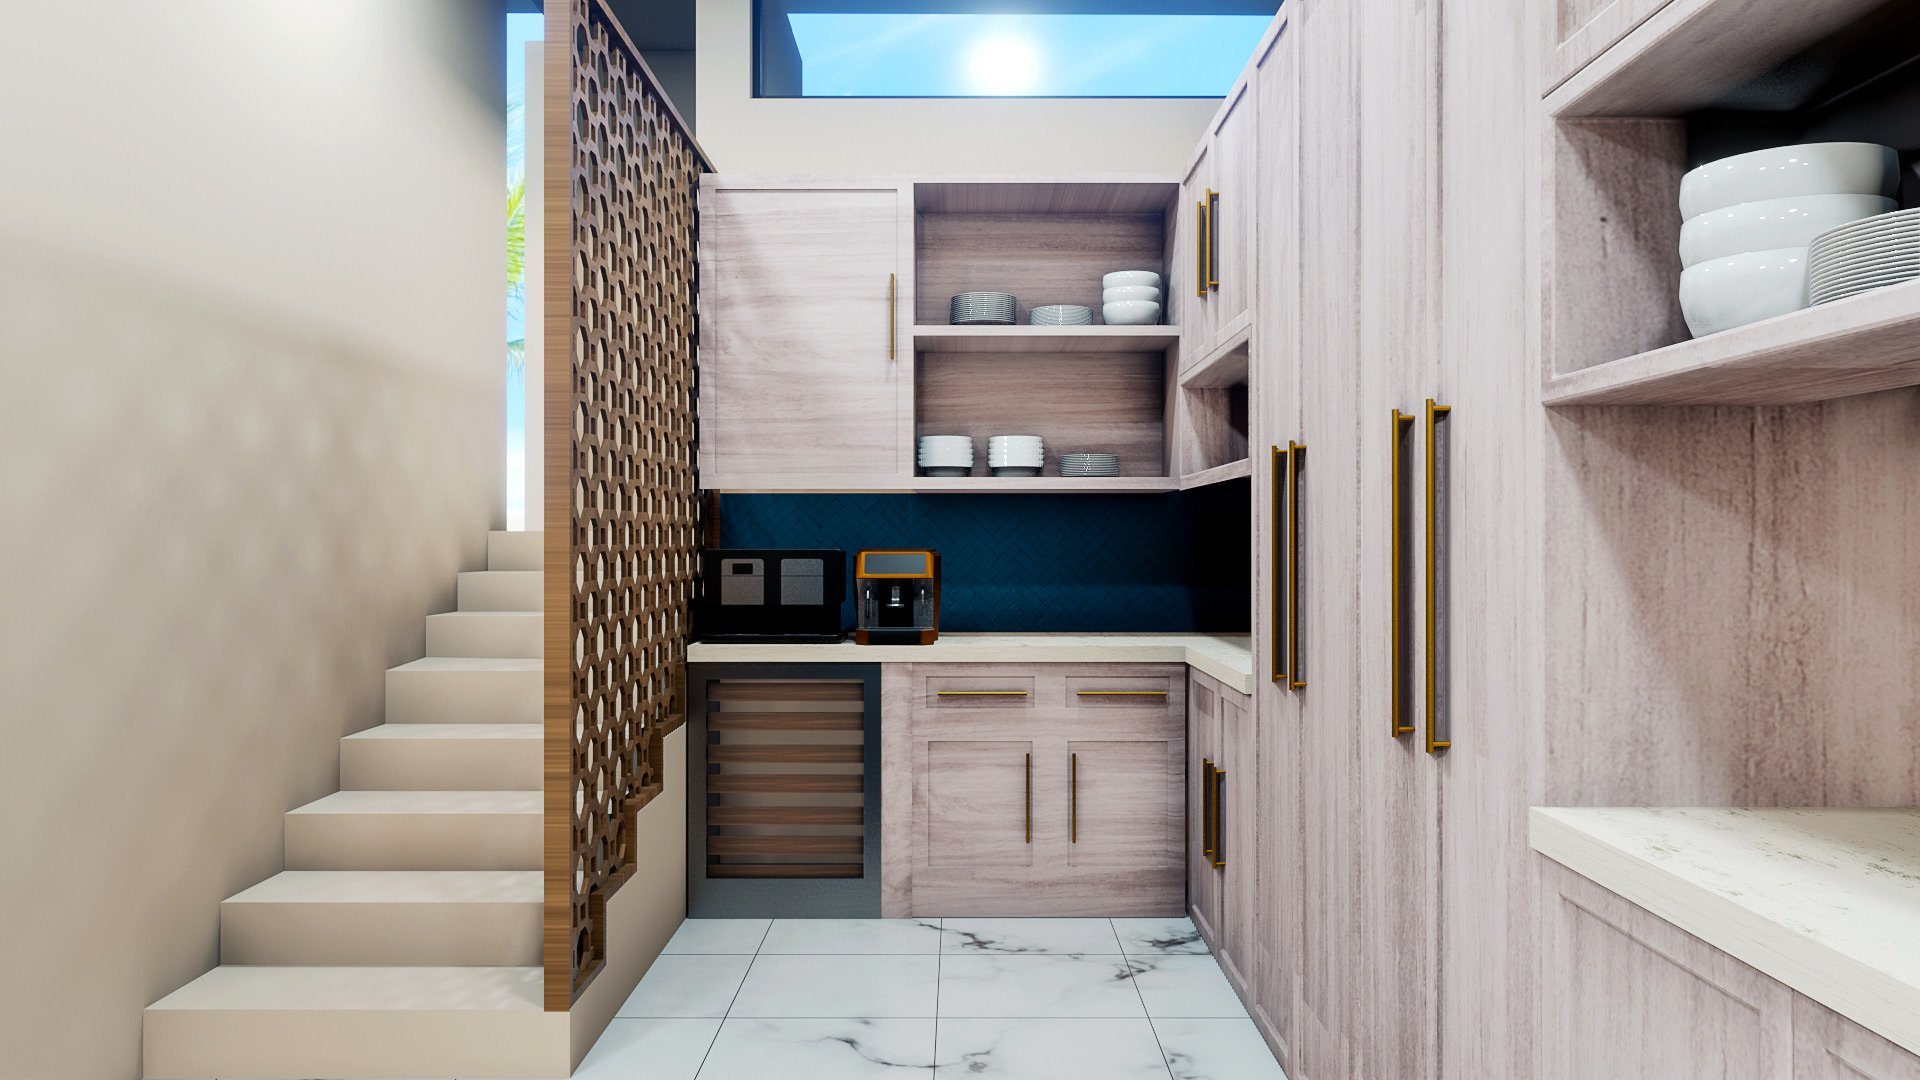
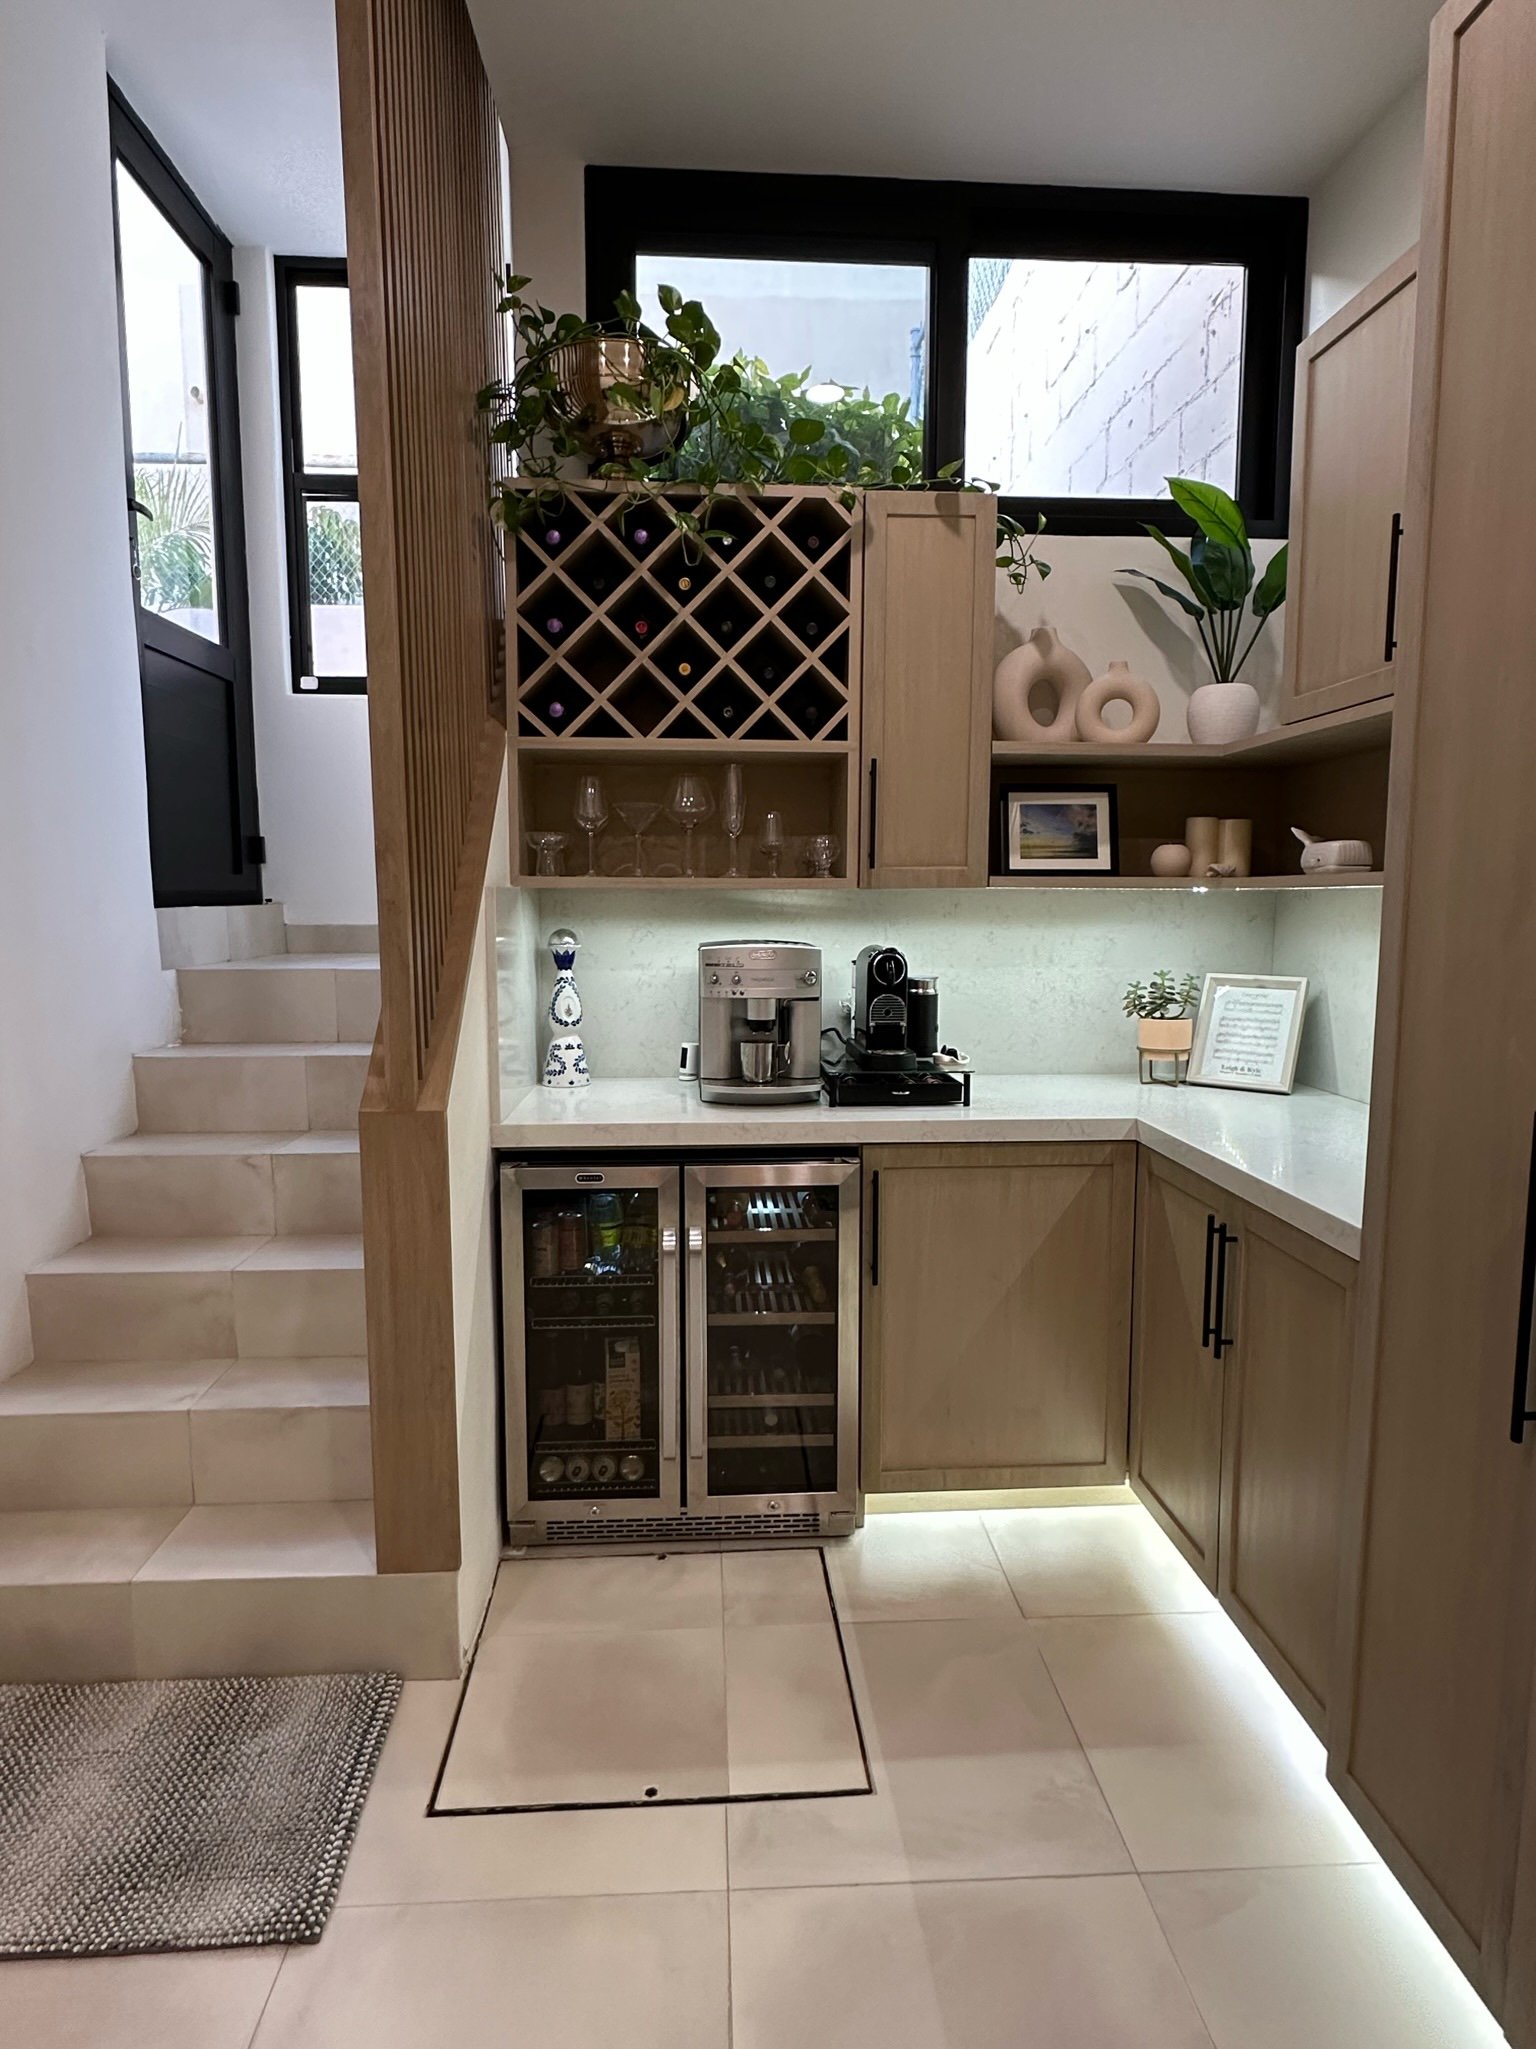
The vision for the new space was to have a view of the back coffee & wine bar from our kitchen island barstools. Above this area, a high window would be added to let in natural light from the high ceilings to the new space. The additional room would allow for new tall cabinetry, great for cleaning supplies, a pullout food pantry and a wine fridge for “cool drinks” (as Kyle would say).
The kicker in all of this was that the outdoor mud room is where the previous owner had the laundry. They had an outdoor washer and a line-dry system. Washer and dryer in the kitchen? Doable, but not our preferred choice. This forced us to find a new location inside the house for these so we got to the drawing board with our team.

A LITTLE DETOUR
While we planned to save our bedroom until “Phase 2” of our reno, the plan evolved to include the upstairs master bathroom. This snuck into “Phase 1” so we had a place for the washer and dryer (Pro Tip: put your laundry appliances where you put your clothes away — win win!).
We dove into this unexpected part of the renovation right away, demolishing the bulky and elevated tub and toilet areas (a bit slippery and dangerous!), single sink vanity (they say a happy marriage involves two bathroom sinks), and closet (dark space and teeny tiny storage options).
Let’s recap: Phase 1 now consists of almost the entire first floor with structural changes, larger kitchen, and a brand new extended master bathroom with laundry.
But we’re having so much fun dreaming and seeing this come to life… why stop there?
A BIG DETOUR
As these plans evolved, new ideas continued to flow in. Not soon after, the opportunity was identified (thanks to Kyle’s Dad) to take advantage of more open-concept living space. To do so, the existing living room walls would be knocked out and new ones would go up. This would allow us to enclose the front patio, bringing that square footage indoors, adding on more square footage of entertaining space.


It was a curve ball and we knew it would be a large incremental cost, but it seemed like a no-brainer given all the other construction we were about to embark into. We kept hearing “if you can, do it now so you don’t regret it later”.
Floor-to-ceiling sliders would allow for amazing natural lighting. With a new corner window to match the size of the sliders, a first floor ocean view from the living room would be captured (previously only visible if you stepped out on the front patio).
You can say we got in a bit over our heads, but looking back, all of these changes have made our lives (in which we spend A LOT of time at home), so much better. It was all worth it in the end. Plus construction dust is no joke and getting a majority of it done in Phase 1 was a blessing in disguise. Not sure we’d want to embark on the original Phase 2 plan at any point soon to avoid the madness of construction.
BRINGING THE GAME PLAN TO LIFE
Something we were most excited about were the floor plans and 3D mockups Custom Made put together. It’s easy to talk all of the details out during meetings, but the visual element was a game changer to actually see what the house could look like. Below were the first iterations of the design process. You’ll see more of these at the end of the blog in the ‘planning’ photo sections.
Shout out to Kyle too, as he used his own skills to create our home within Live Home 3D, which you’ll also see exterior renderings from at the end of the blog. His vision and skill really helped us solidify putting our plans into action and being confident we were making the right decisions with our team along the way. It was fun to use this program to play around with ideas and visualize what could happen in real-time.


demo day!
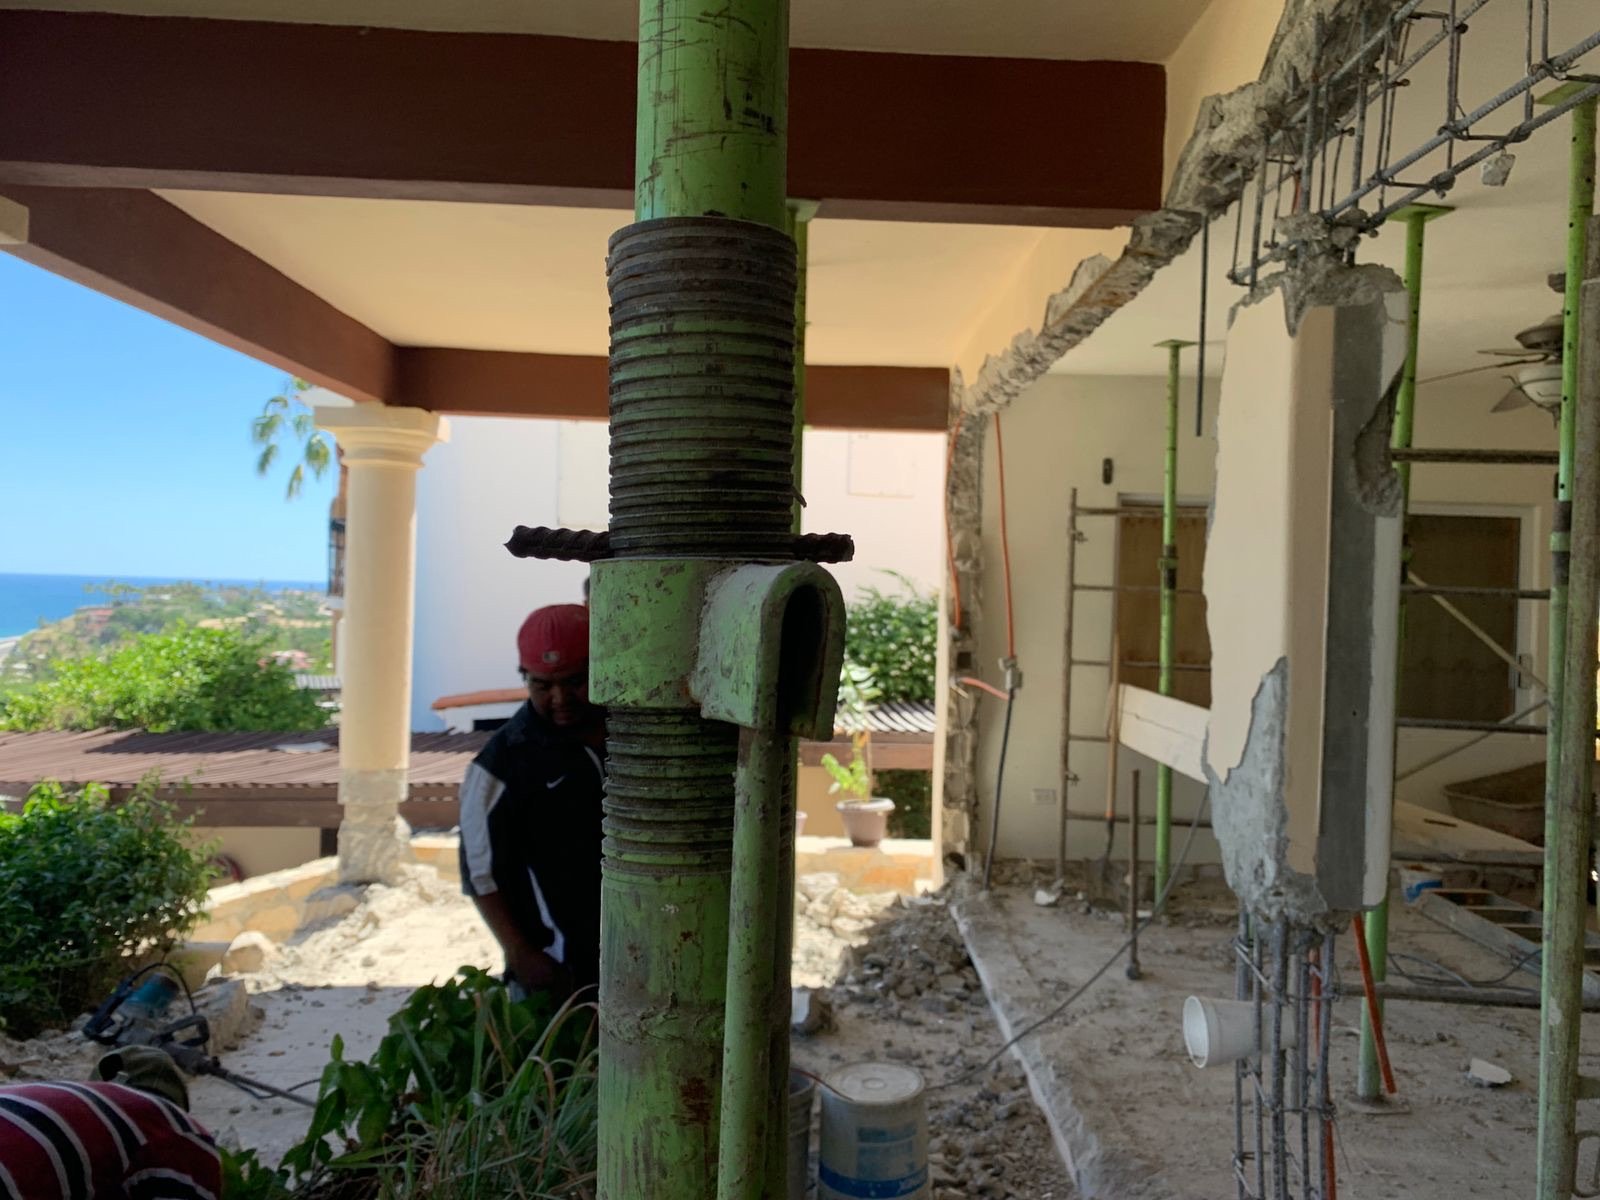
As Phase 1 plans were now locked in, it was time for Demo Day! Demolition started at the end of September 2021 with the goal of moving in 6 months later on March 1, 2022. Thankfully we were able to continue renting our townhome in San Lucas to avoid the inconveniences of the construction. Demo takes a ton of man power due to most Cabo homes being built of solid concrete. Knowing the noise that would come with this renovation, living in the home was not something we were willing to do, especially with us both working full-time jobs from home.
A trip back to Colorado had been planned to visit family, and of course ended up coinciding with the week demo began. Looking back, not our greatest idea to still go on the trip. The house was sold to us furnished and while we saved what we liked, and sold what we didn’t, we underestimated how much stuff was in the way of construction. In the days leading up to our trip, we drove up to the house several times to shove as much furniture, kitchen items and decor into the guest rooms that would be locked off. There were quite a few things that didn’t get properly cleared out of the house in time for demo day, so a few pieces of indoor furniture quickly became outside furniture. With the dust and sun exposure, sadly those pieces either were tossed or donated. Let’s just things happened REALLY fast on the demo side and it was hard to catch up.

Can you spot the dining room table under this mess?

Bringing the outdoors inside, quite literally!
The team began to bust out the center beam, then the front patio walls, floors and eventually the kitchen. When we came back from our one-week trip to visit the house, it was unrecognizable. We joked about how we had a “ring alarm” sign in the front garden, while the entire front side our of our house was now open to the street.
From there, we came back and forth often to see the progress. Trust was a huge part of the process, which we had in our contractor and team, but we were glad to only be 30 minutes away. We caught a few areas in construction, likely due to miscommunications in direction (or a loss in translation, #MexicoLife), since the process was moving so quickly.

Adios kitchen cabinet support beam! The window next to the door would be filled with concrete.

No more kitchen door!
Construction started at 8am and went through 530pm everyday, except for half days on Saturdays and an off day of Sunday. The team had a security guard who would sleep in the house every night to watch over the tools and equipment. The workers would take siestas every day from 1-2pm, which we walked in on a few times when we visited. We would drop off little snack-packs and cold drinks to show our appreciation of their hard work.

Bathroom extension in progress! Our future shower view & new toilet area.

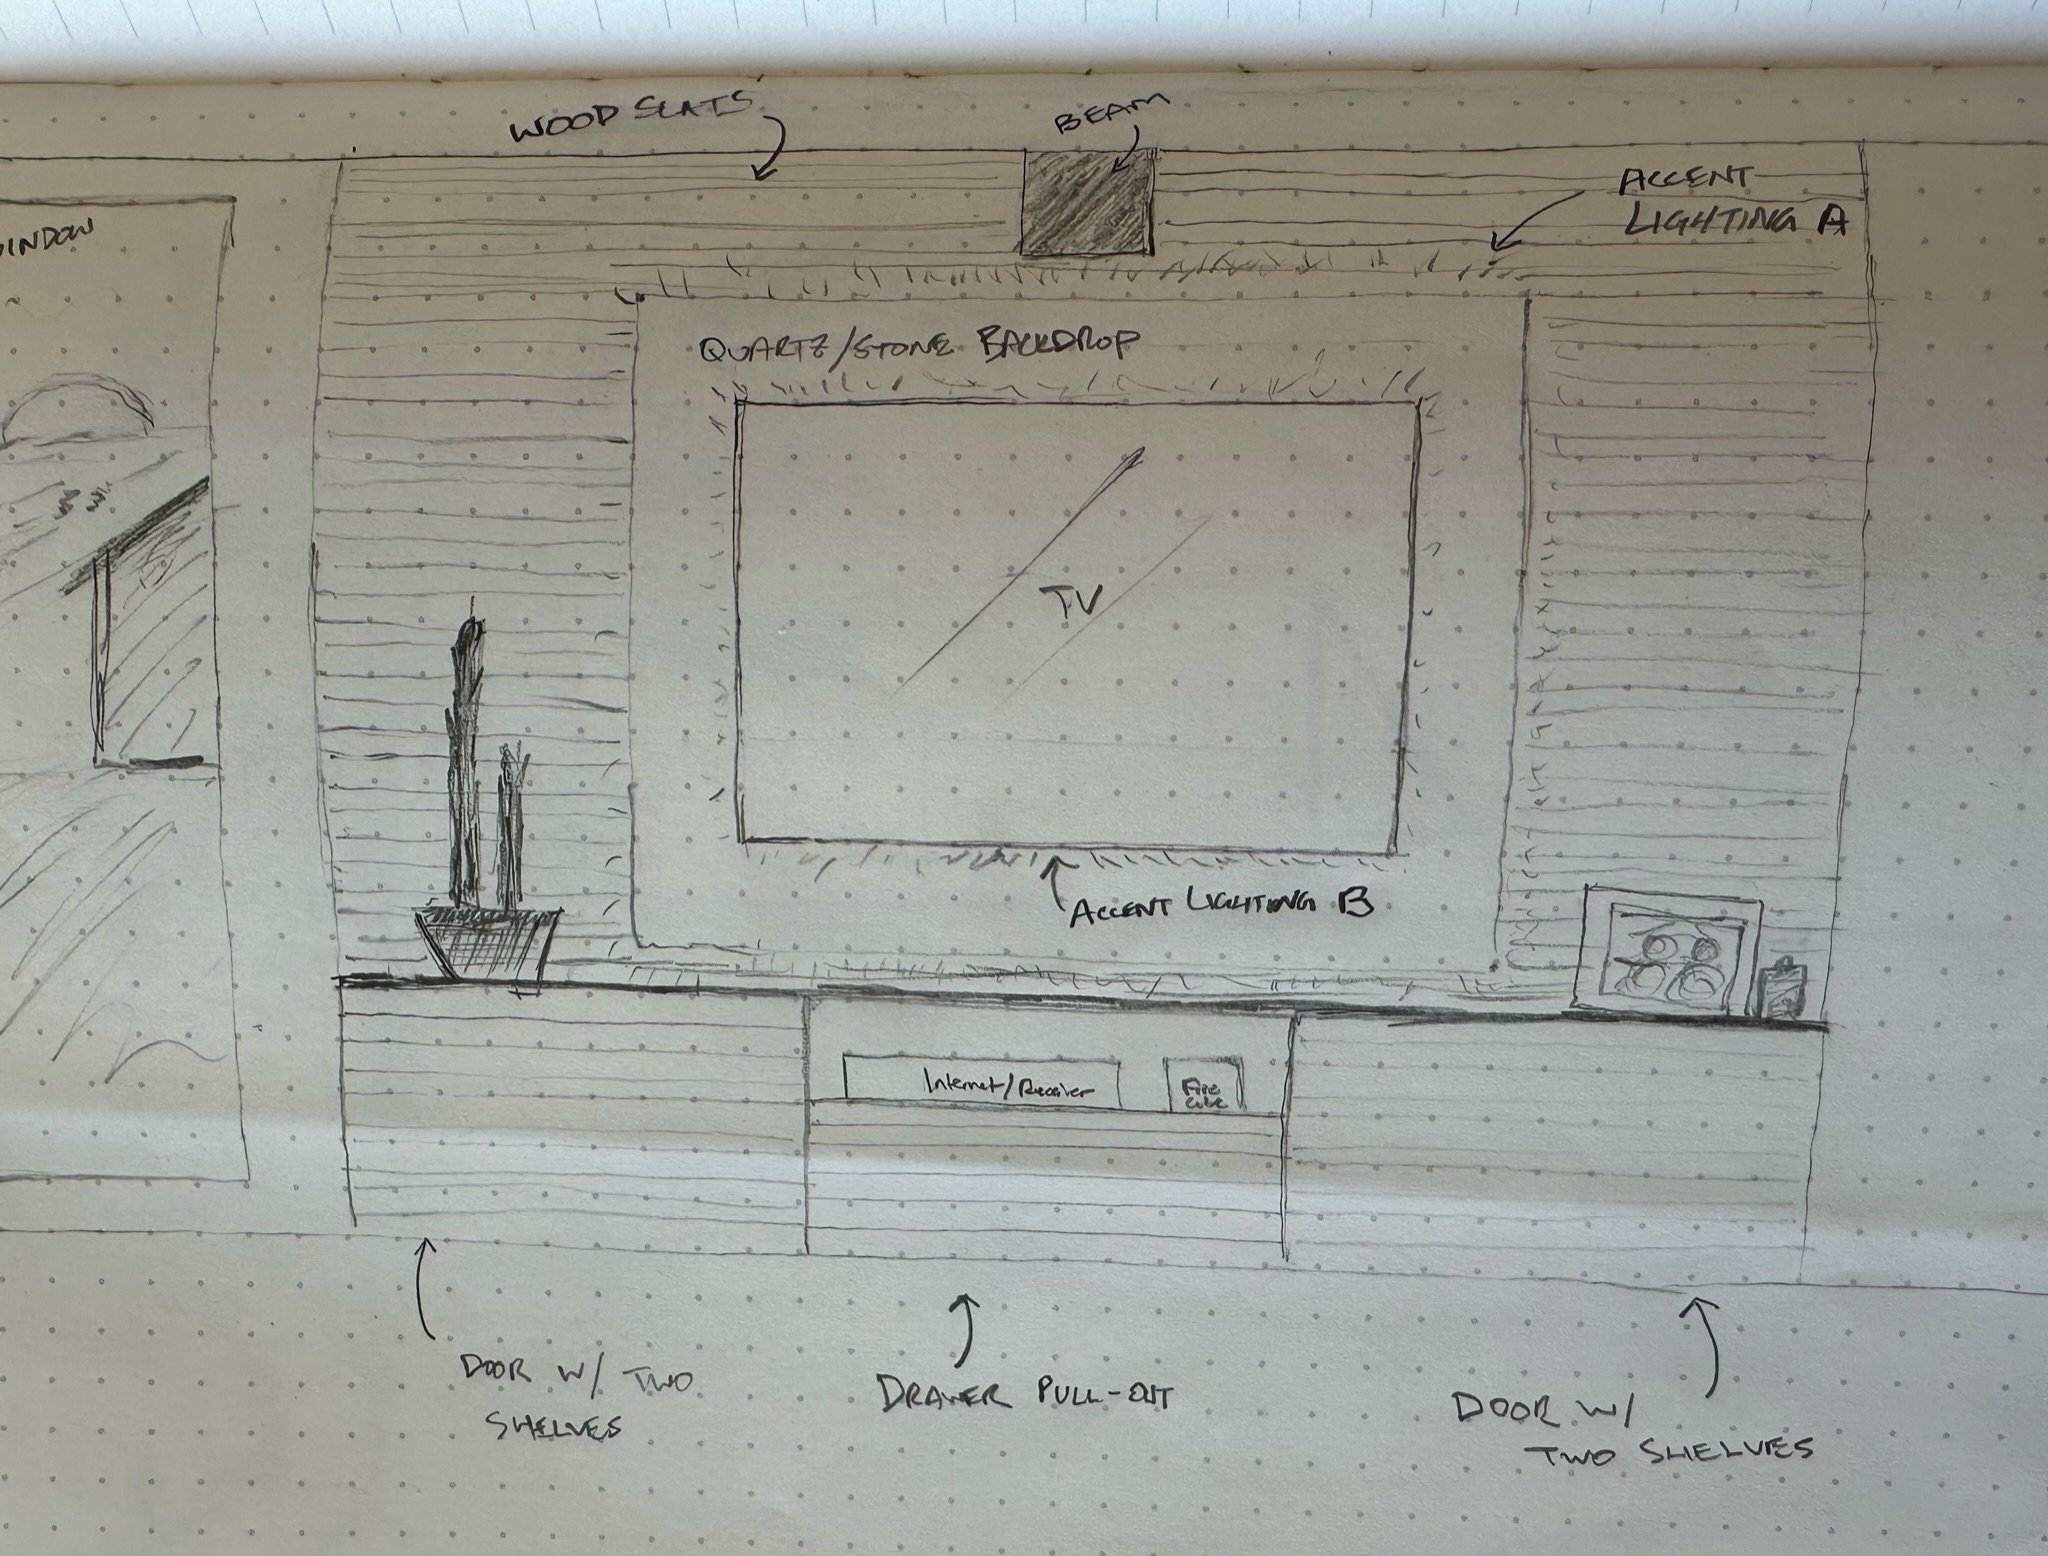
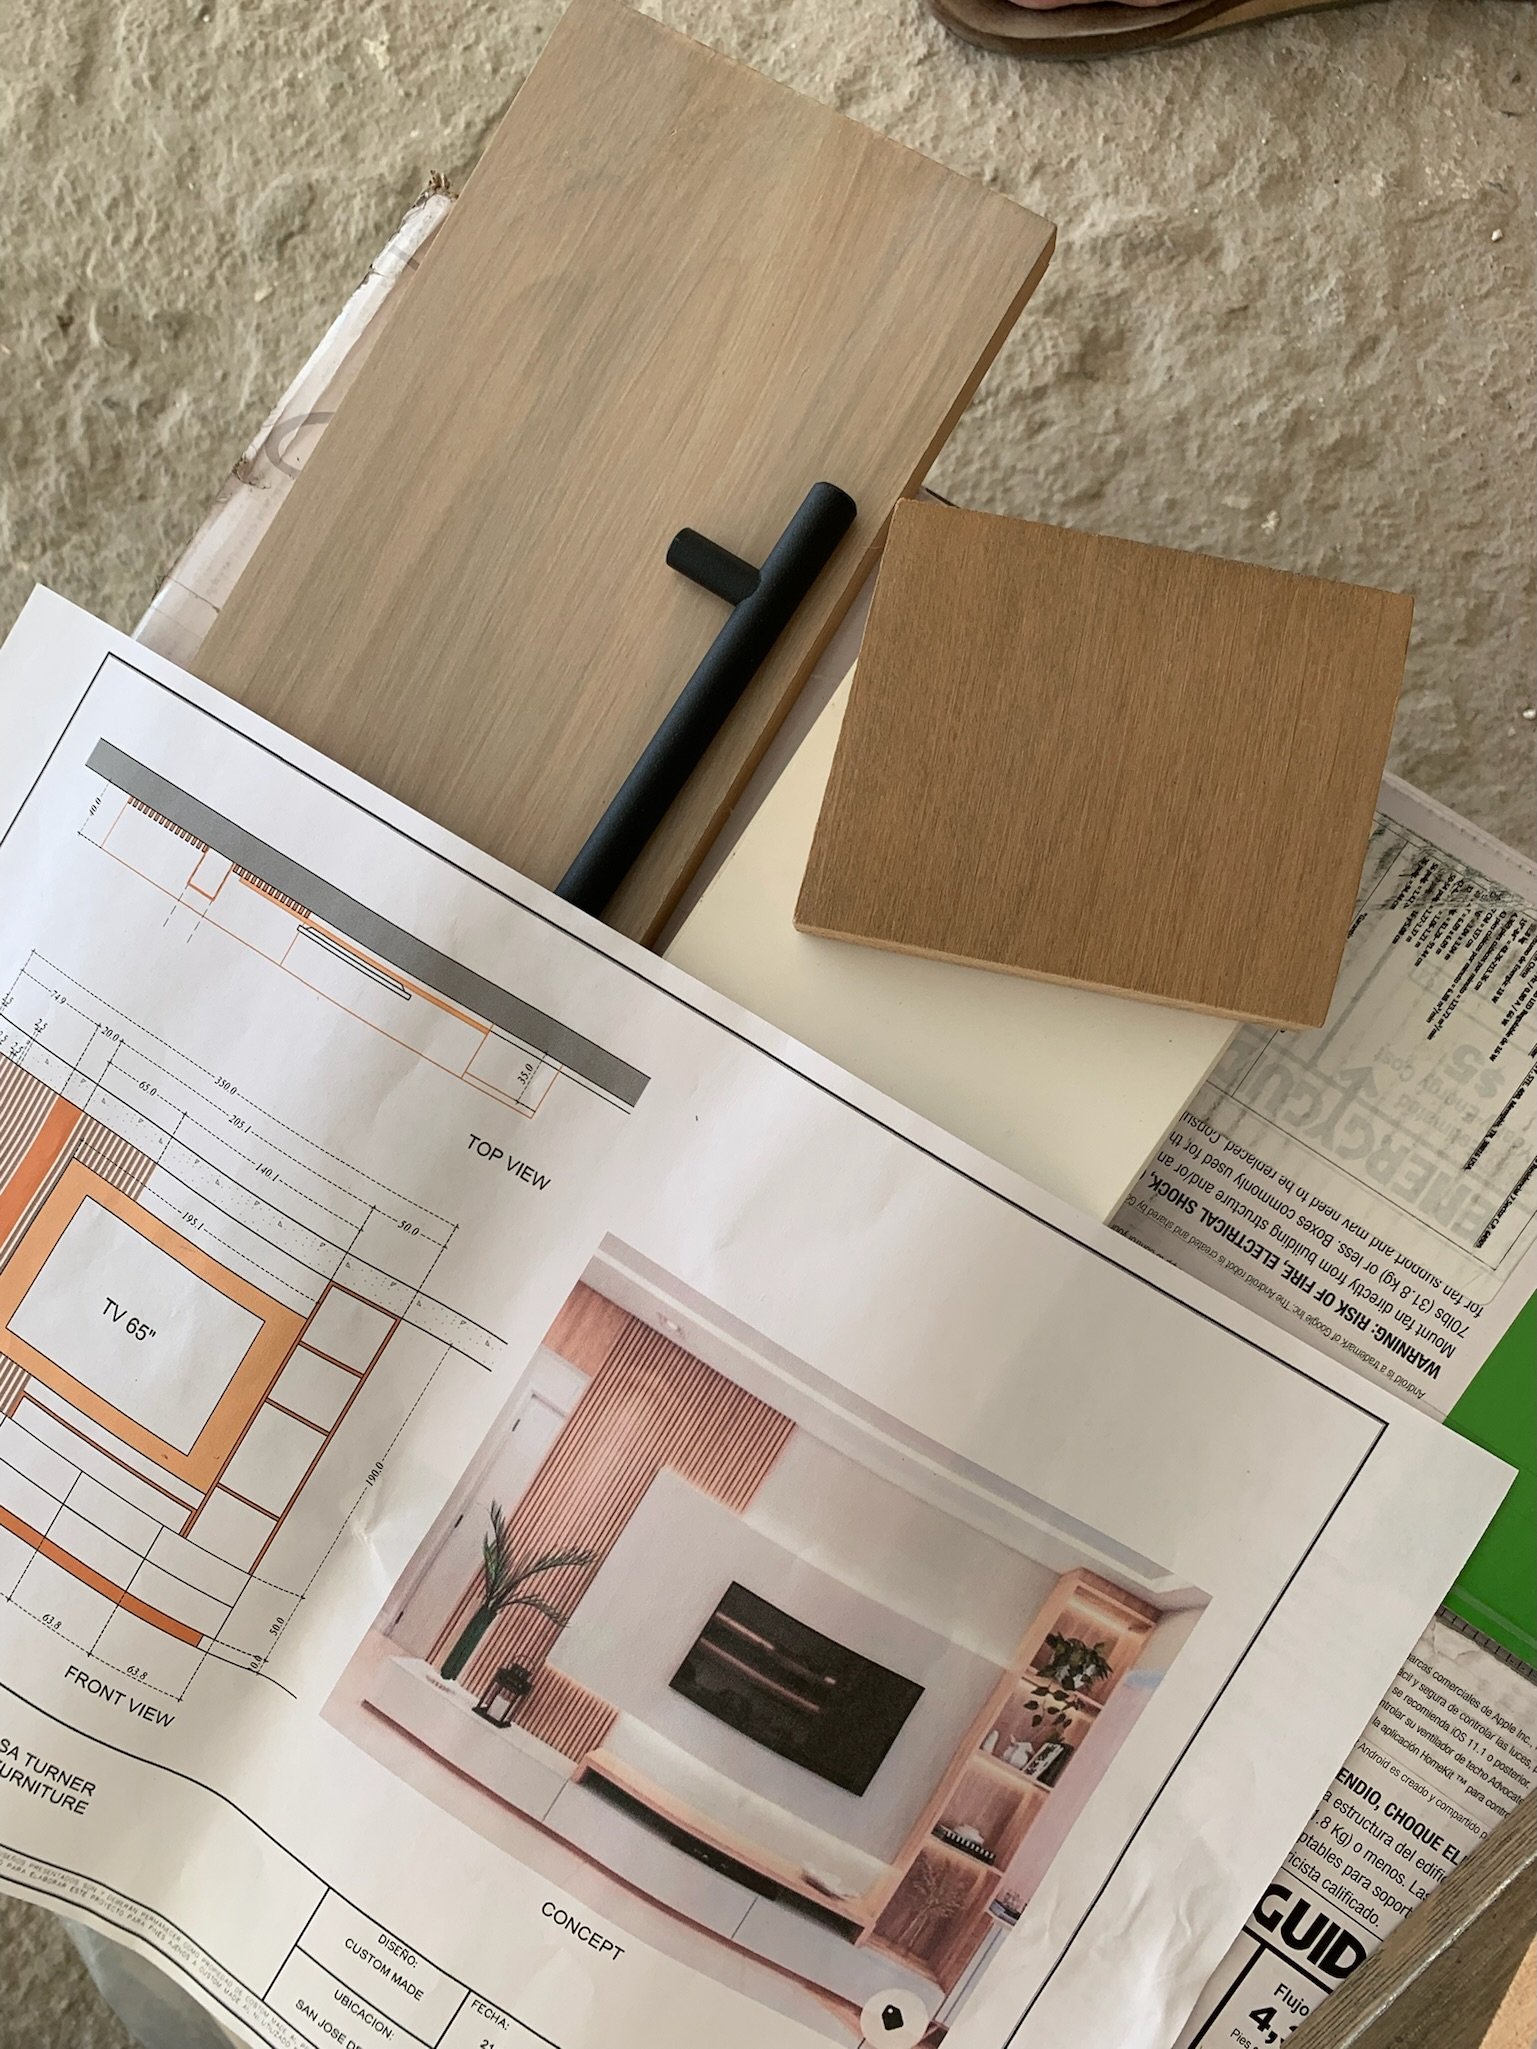
Planning out where the custom entertainment center would be installed.

Hello open-concept living!
ANALYSIS PARALYSIS

Anyone remember the great porcelain tile debate?
As the construction pushed on, we focused on the details with our team at Custom Made AI. The decisions were the hardest part for us — SO MANY to make at one time.
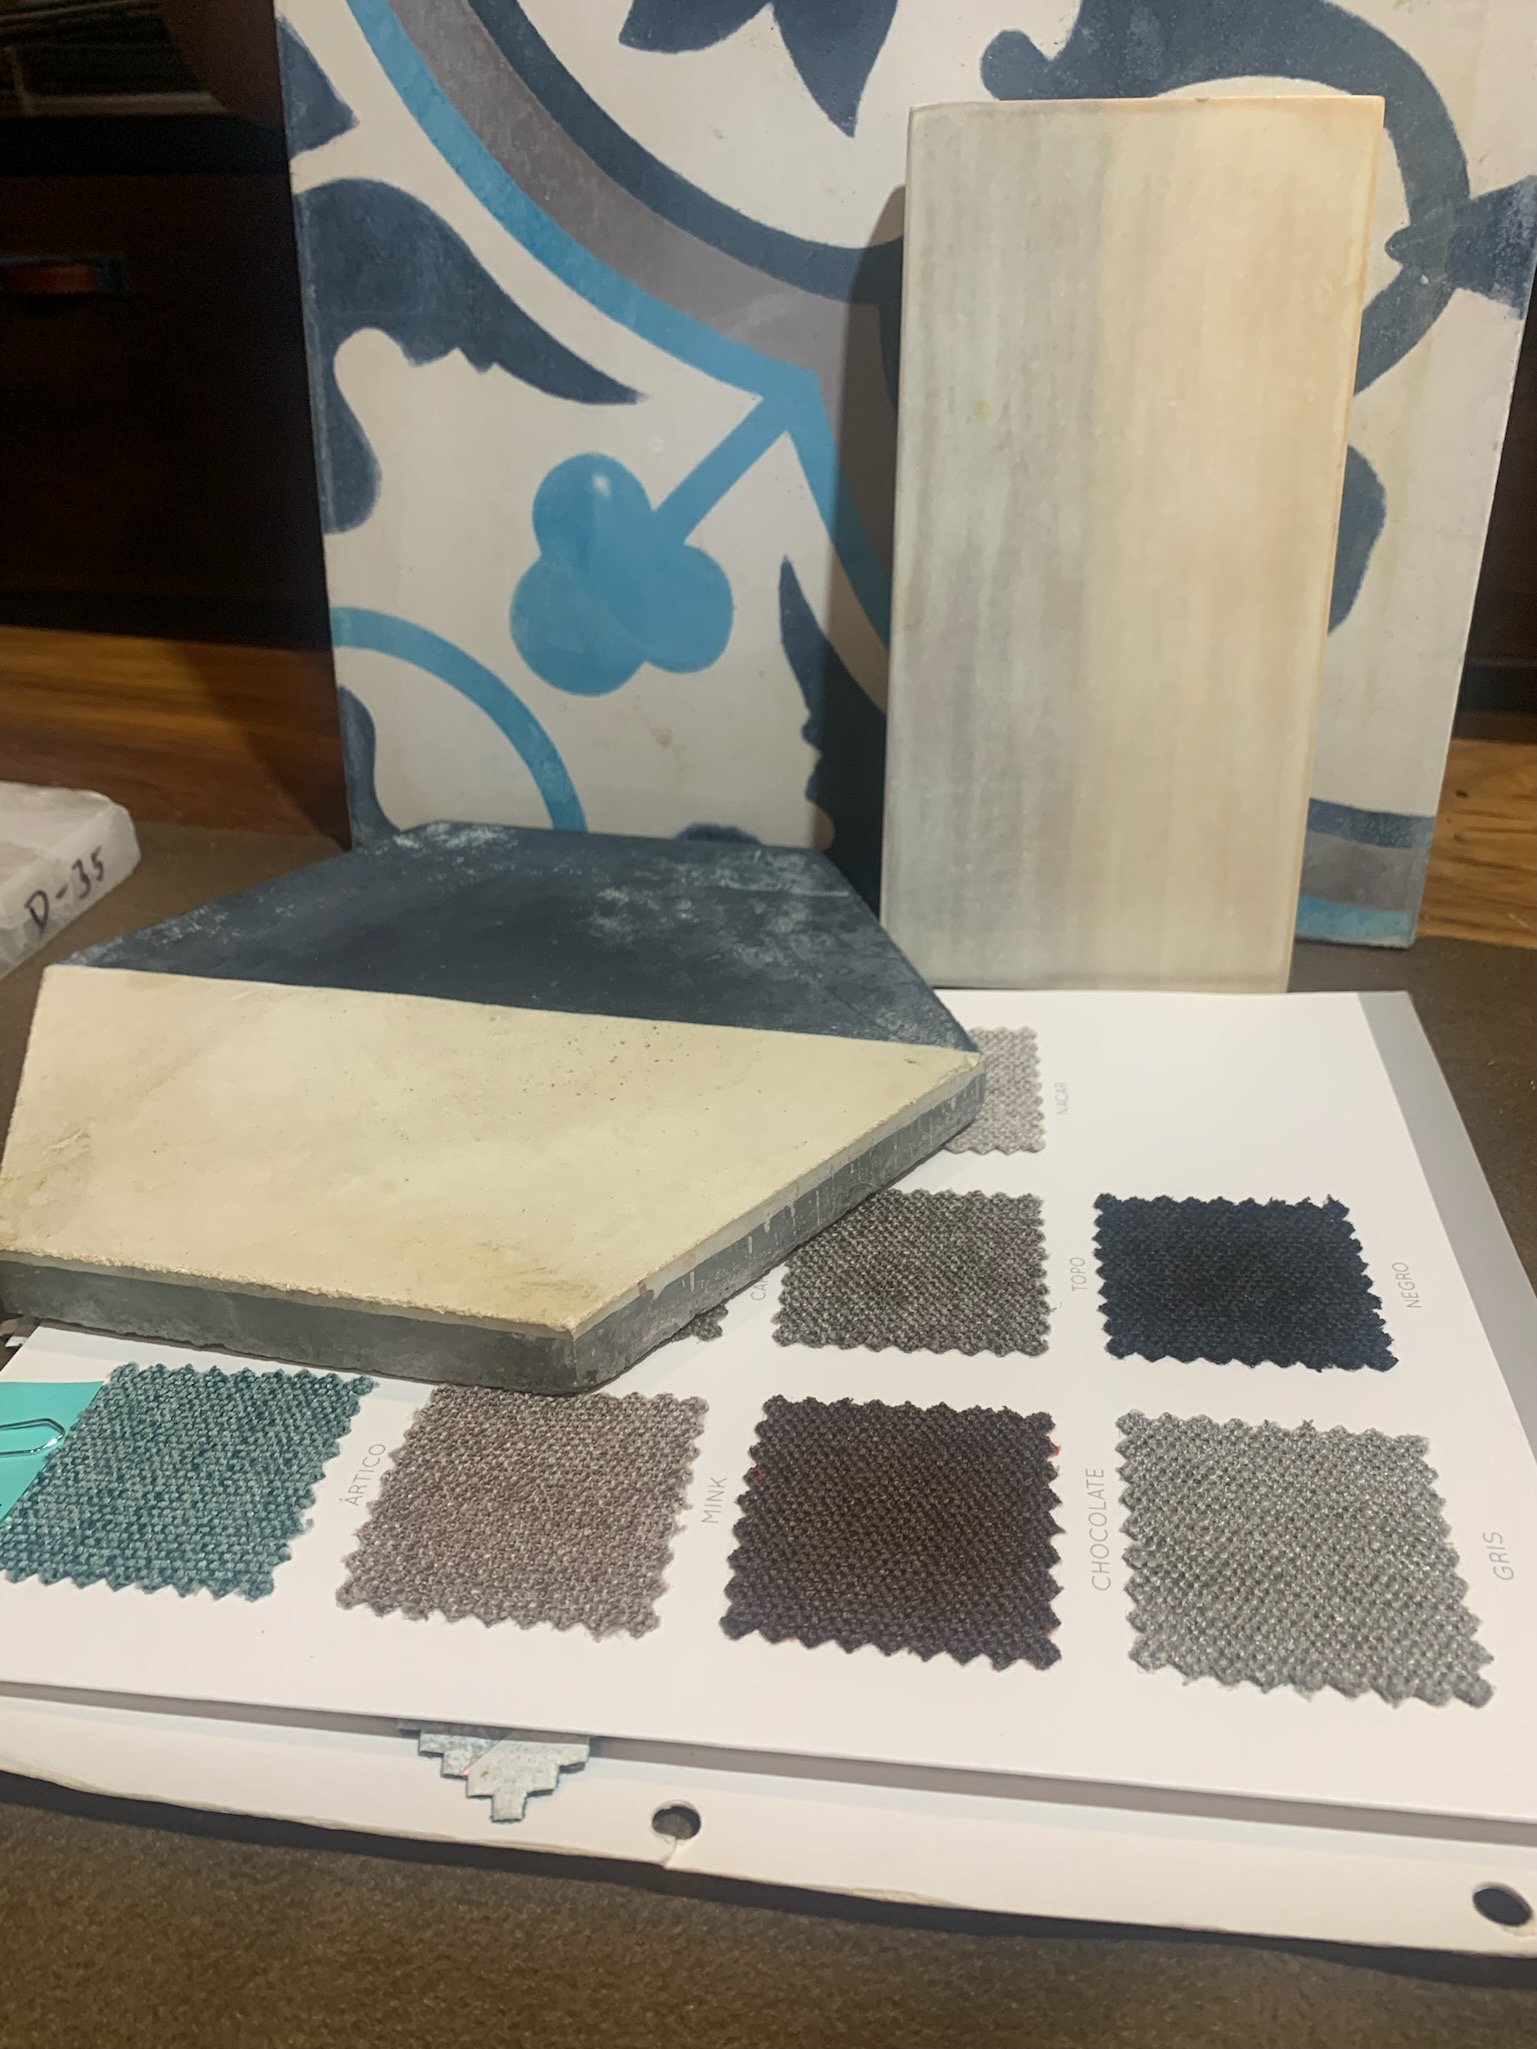
Between PowerPoints and Pinterest boards, we would second guess our choices as we made them (the perfectionist in both of us getting to our heads). From floor tile to grout colors, kitchen island and backsplash materials, wood types, handle types, outdoor paint and indoor paint — it was a lot. We tried to keep it fun and not overthink, but it did get overwhelming at times.
We opted for neutral tones over colored backsplashes and tile. While we loved the “Mexico feel” in a few of the options presented to us, we decided to stick to our standard style verses make it feel like a vacation home. When we’re ready for that phase, we can add color into the house via paint, wallpaper, decor and accessories later on.
Slowly we checked each box, one by one. While this may be typical in most renos, we were challenged due to needing to go to the local stores, Spanglish our way through the conversations to explain what we needed and ensure we were ordering the right thing and that it was within budget.
The design team helped us along the way, but we did a lot on our own too. We spent lots of time going back to Interceramic, Grupo Tenerife, Comex and Home Depot to finalize our materials. On top of working our full time jobs, trying to maintain a social life and ensure we were not holding up any pieces of the process with our needed decisions, we were quite stressed but kept our eyes on the prize.

A visit to Grupo Tenerife

Paint from Comex

Lights from Ann Illuminacion

Blinds by Technoline w/ Sandra Garza
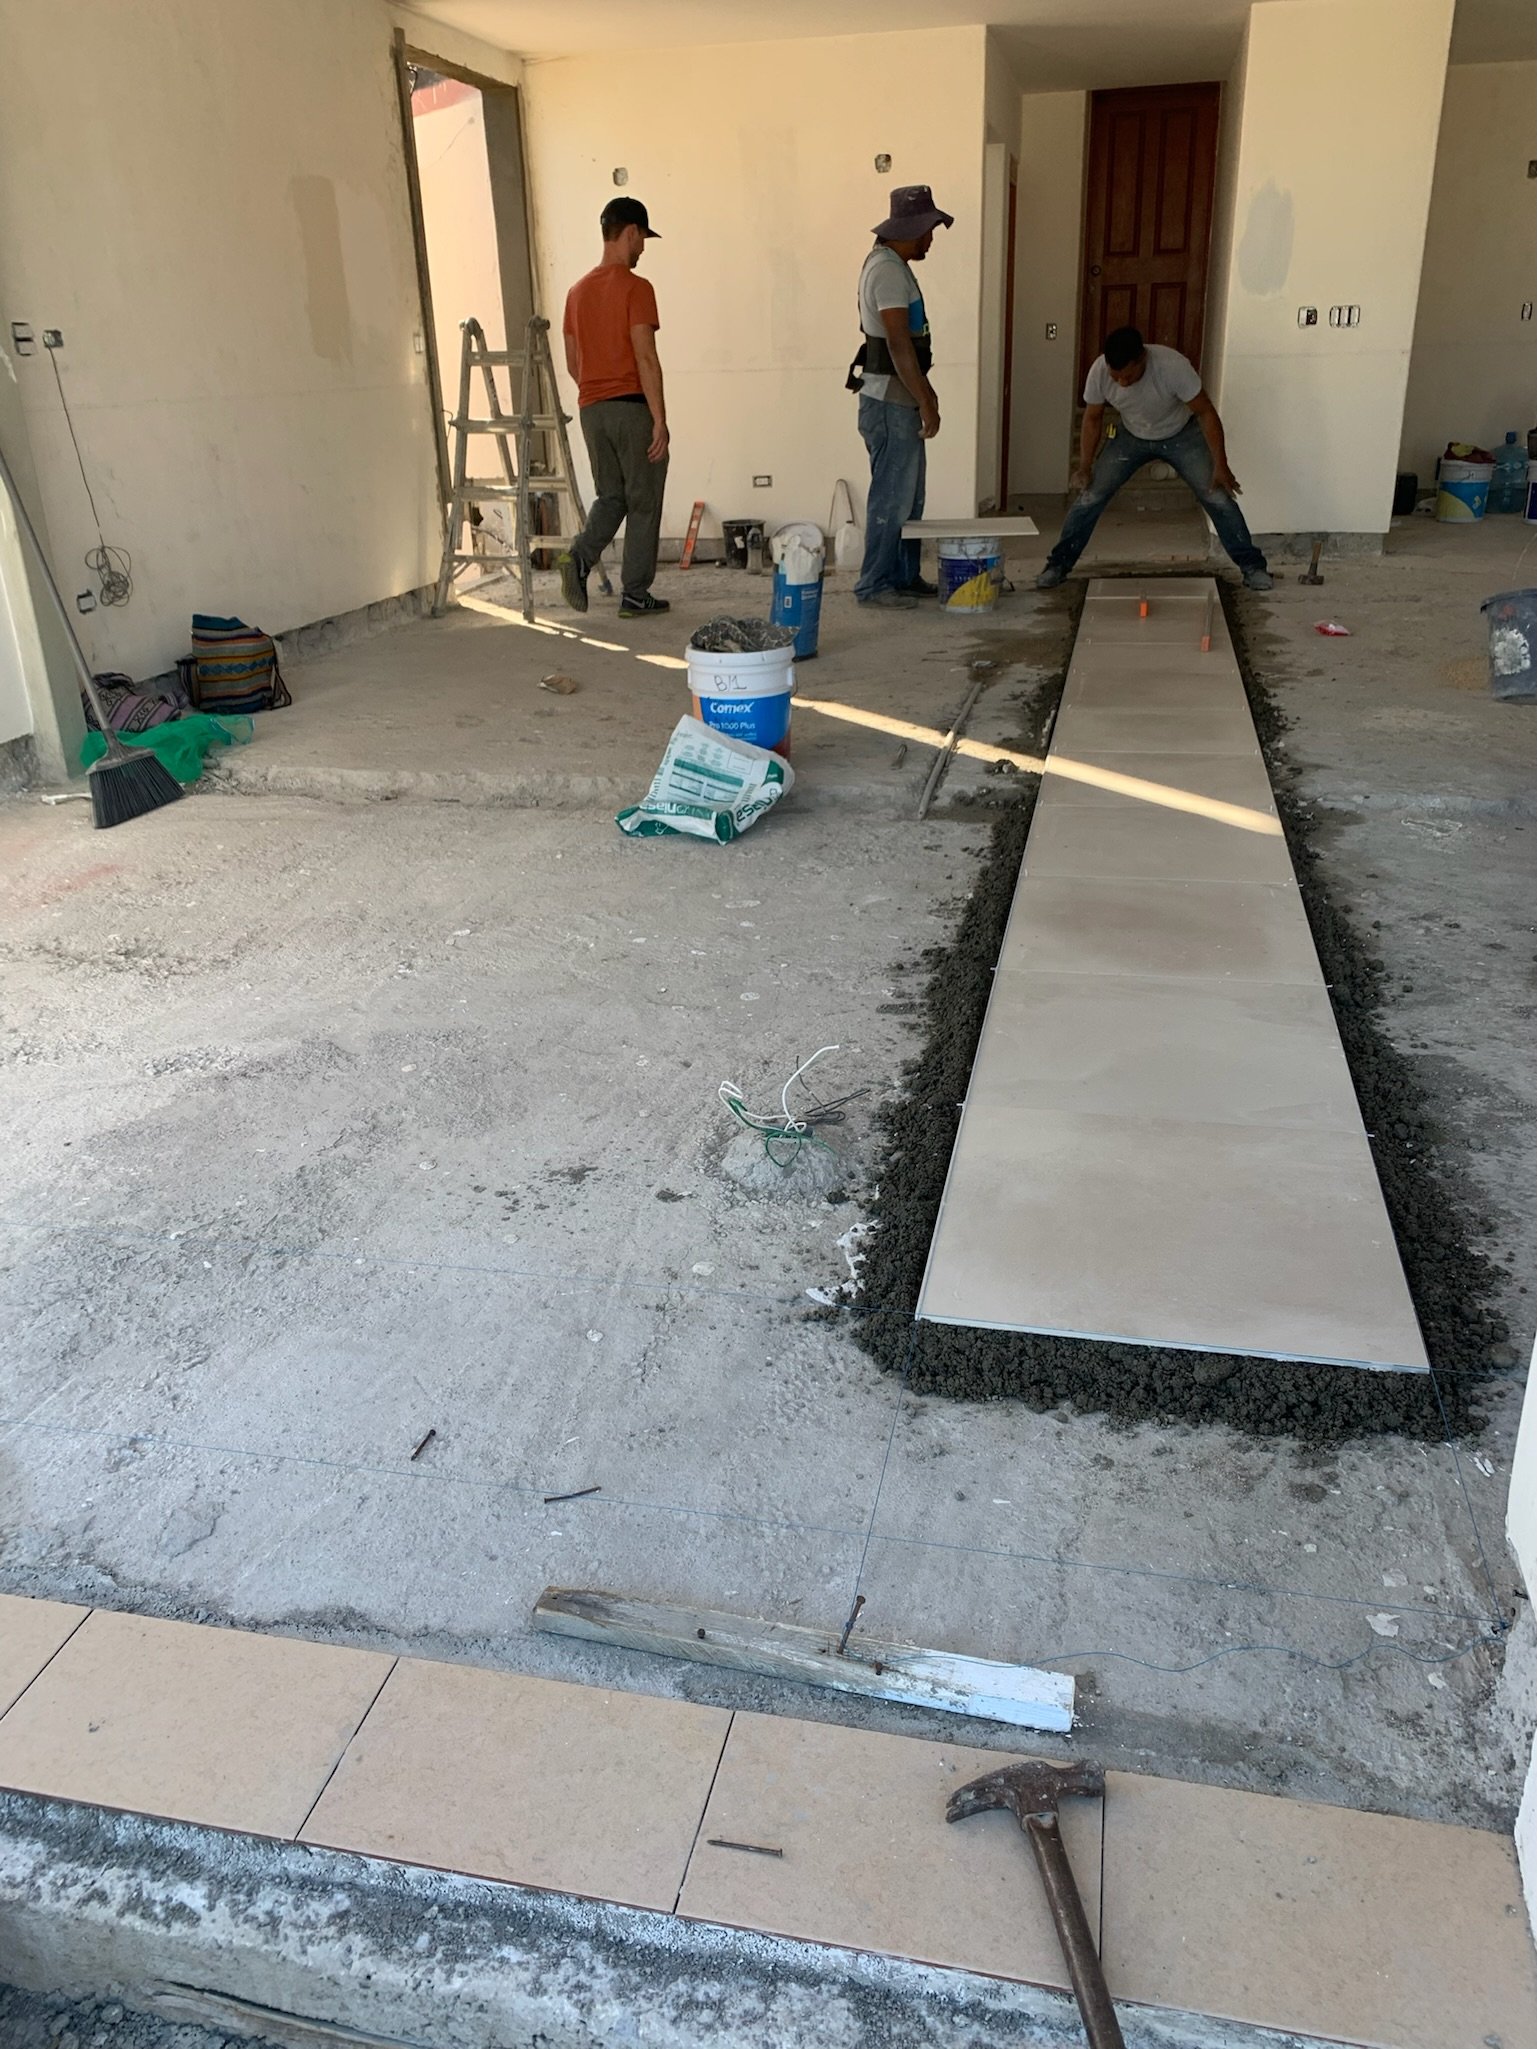
The ‘concrete’ style tile we chose going in from Interceramic.

It was exciting to see Casa Turner start to come together. It felt like an empty concrete box for so long, but as tile got installed, paint started to dry and cabinetry began to be installed, the reality of moving in to our dream home felt closer.
Our new LG appliances arrived from the border, as we ordered them on Black Friday from the US and had them shipped down. This was super exciting — a brand new oven, dishwasher, refrigerator and washer/dryer. All things we never had on our own since renting the last 7 years together. Piece by piece, we were (almost!) ready for move-in.
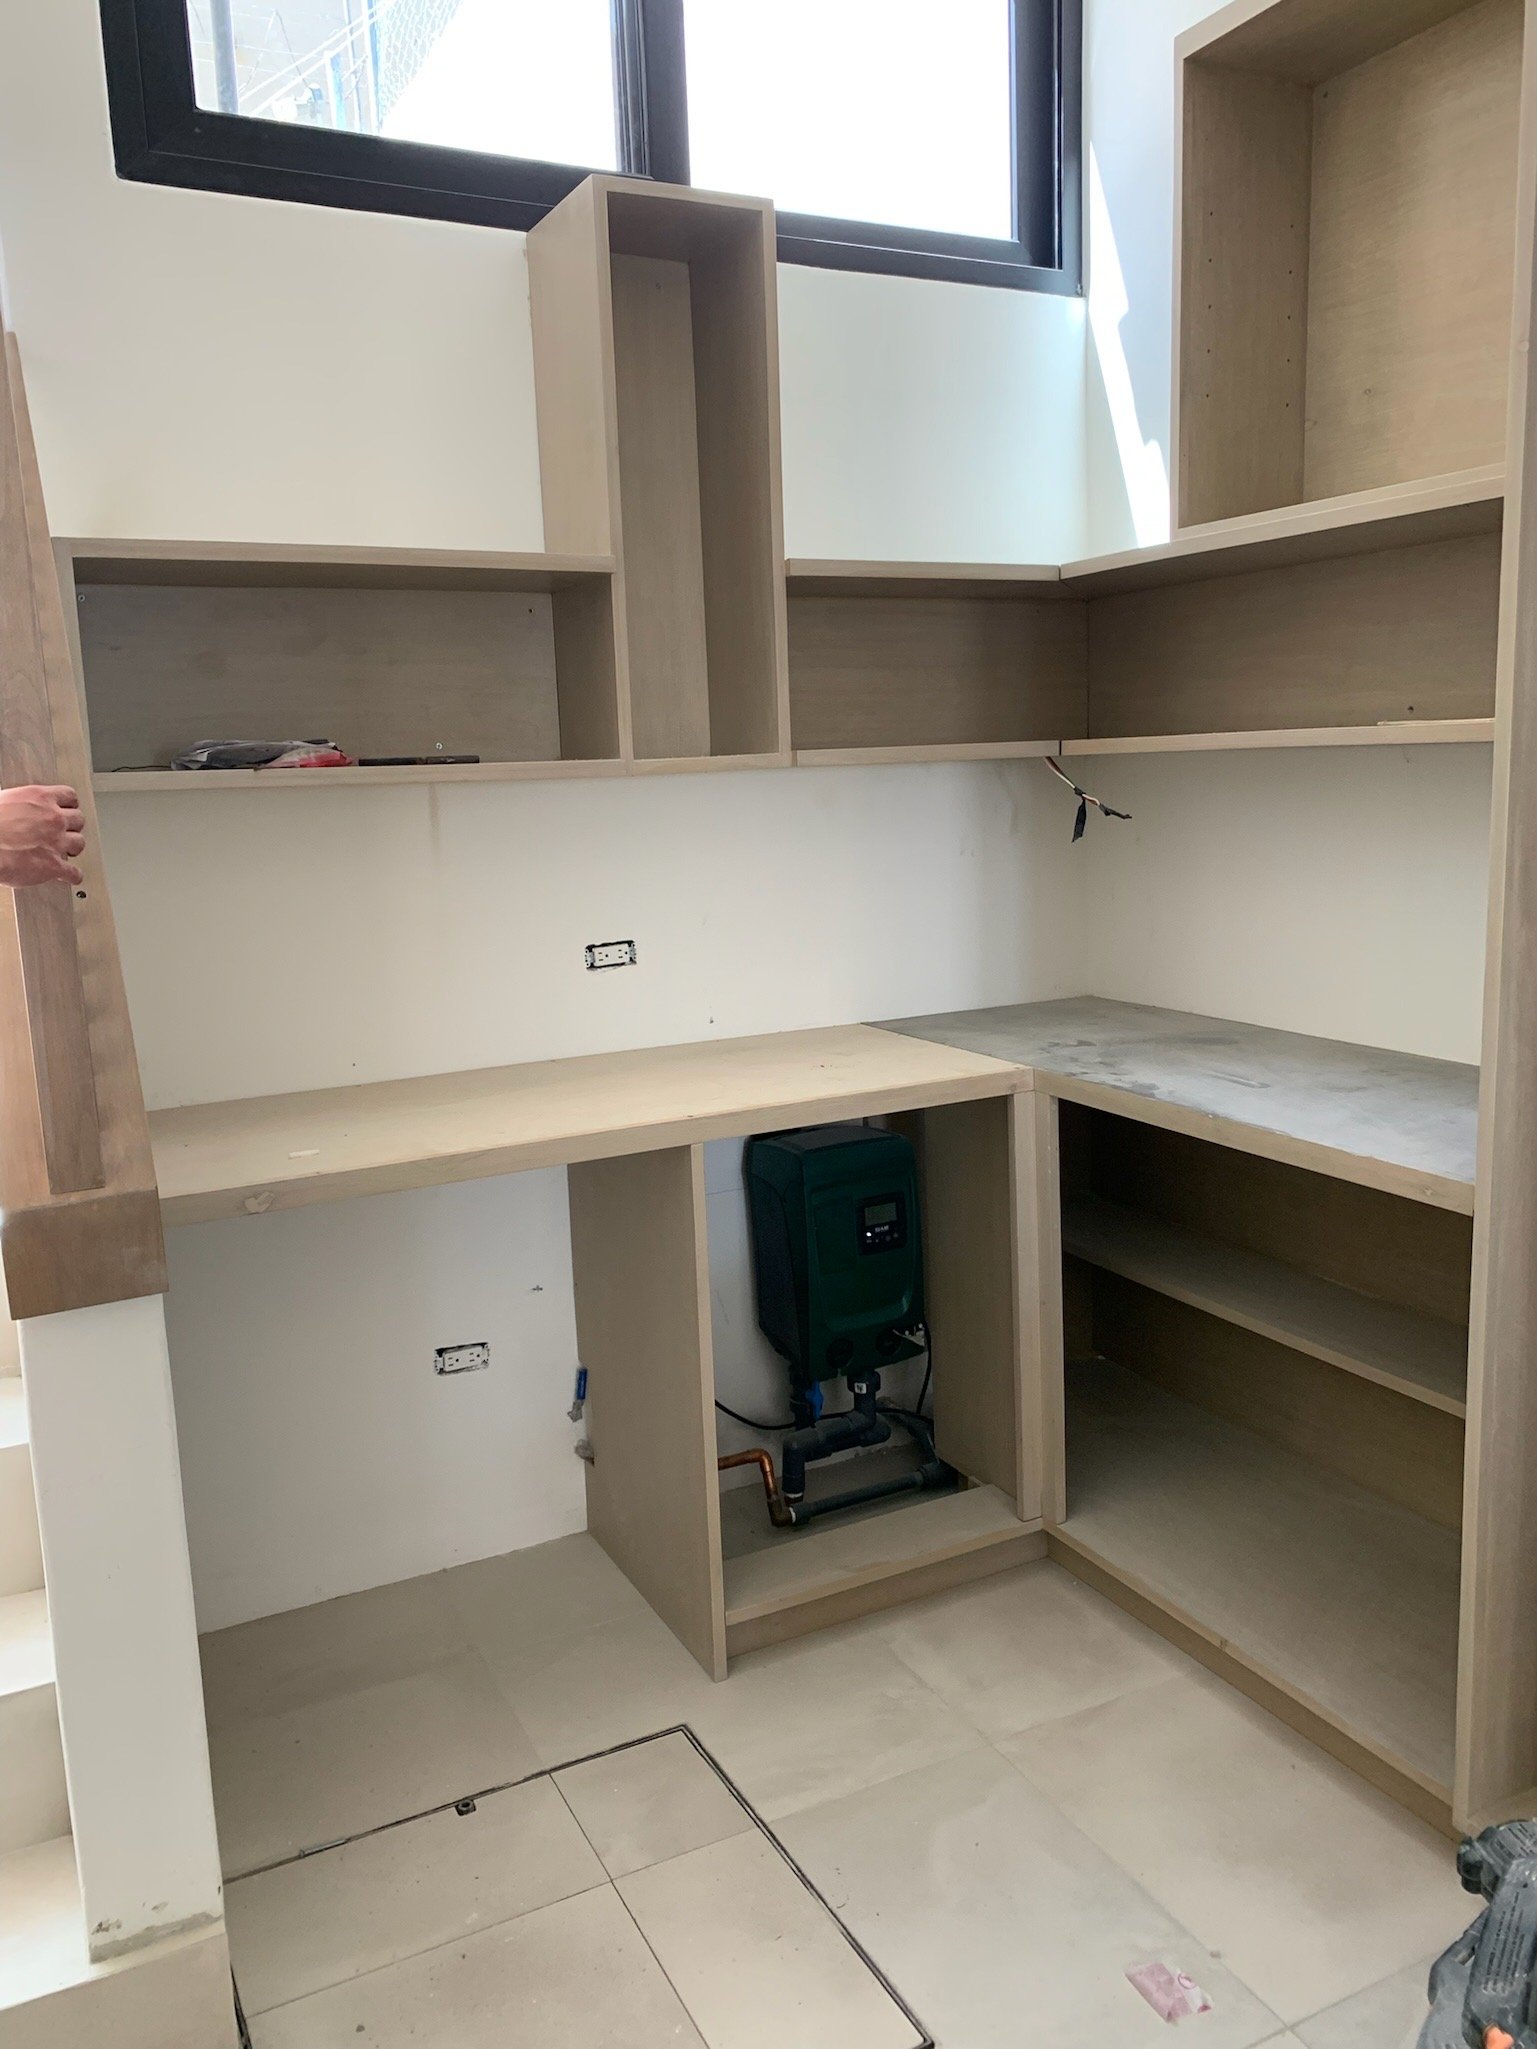
Coffee & Wine Bar
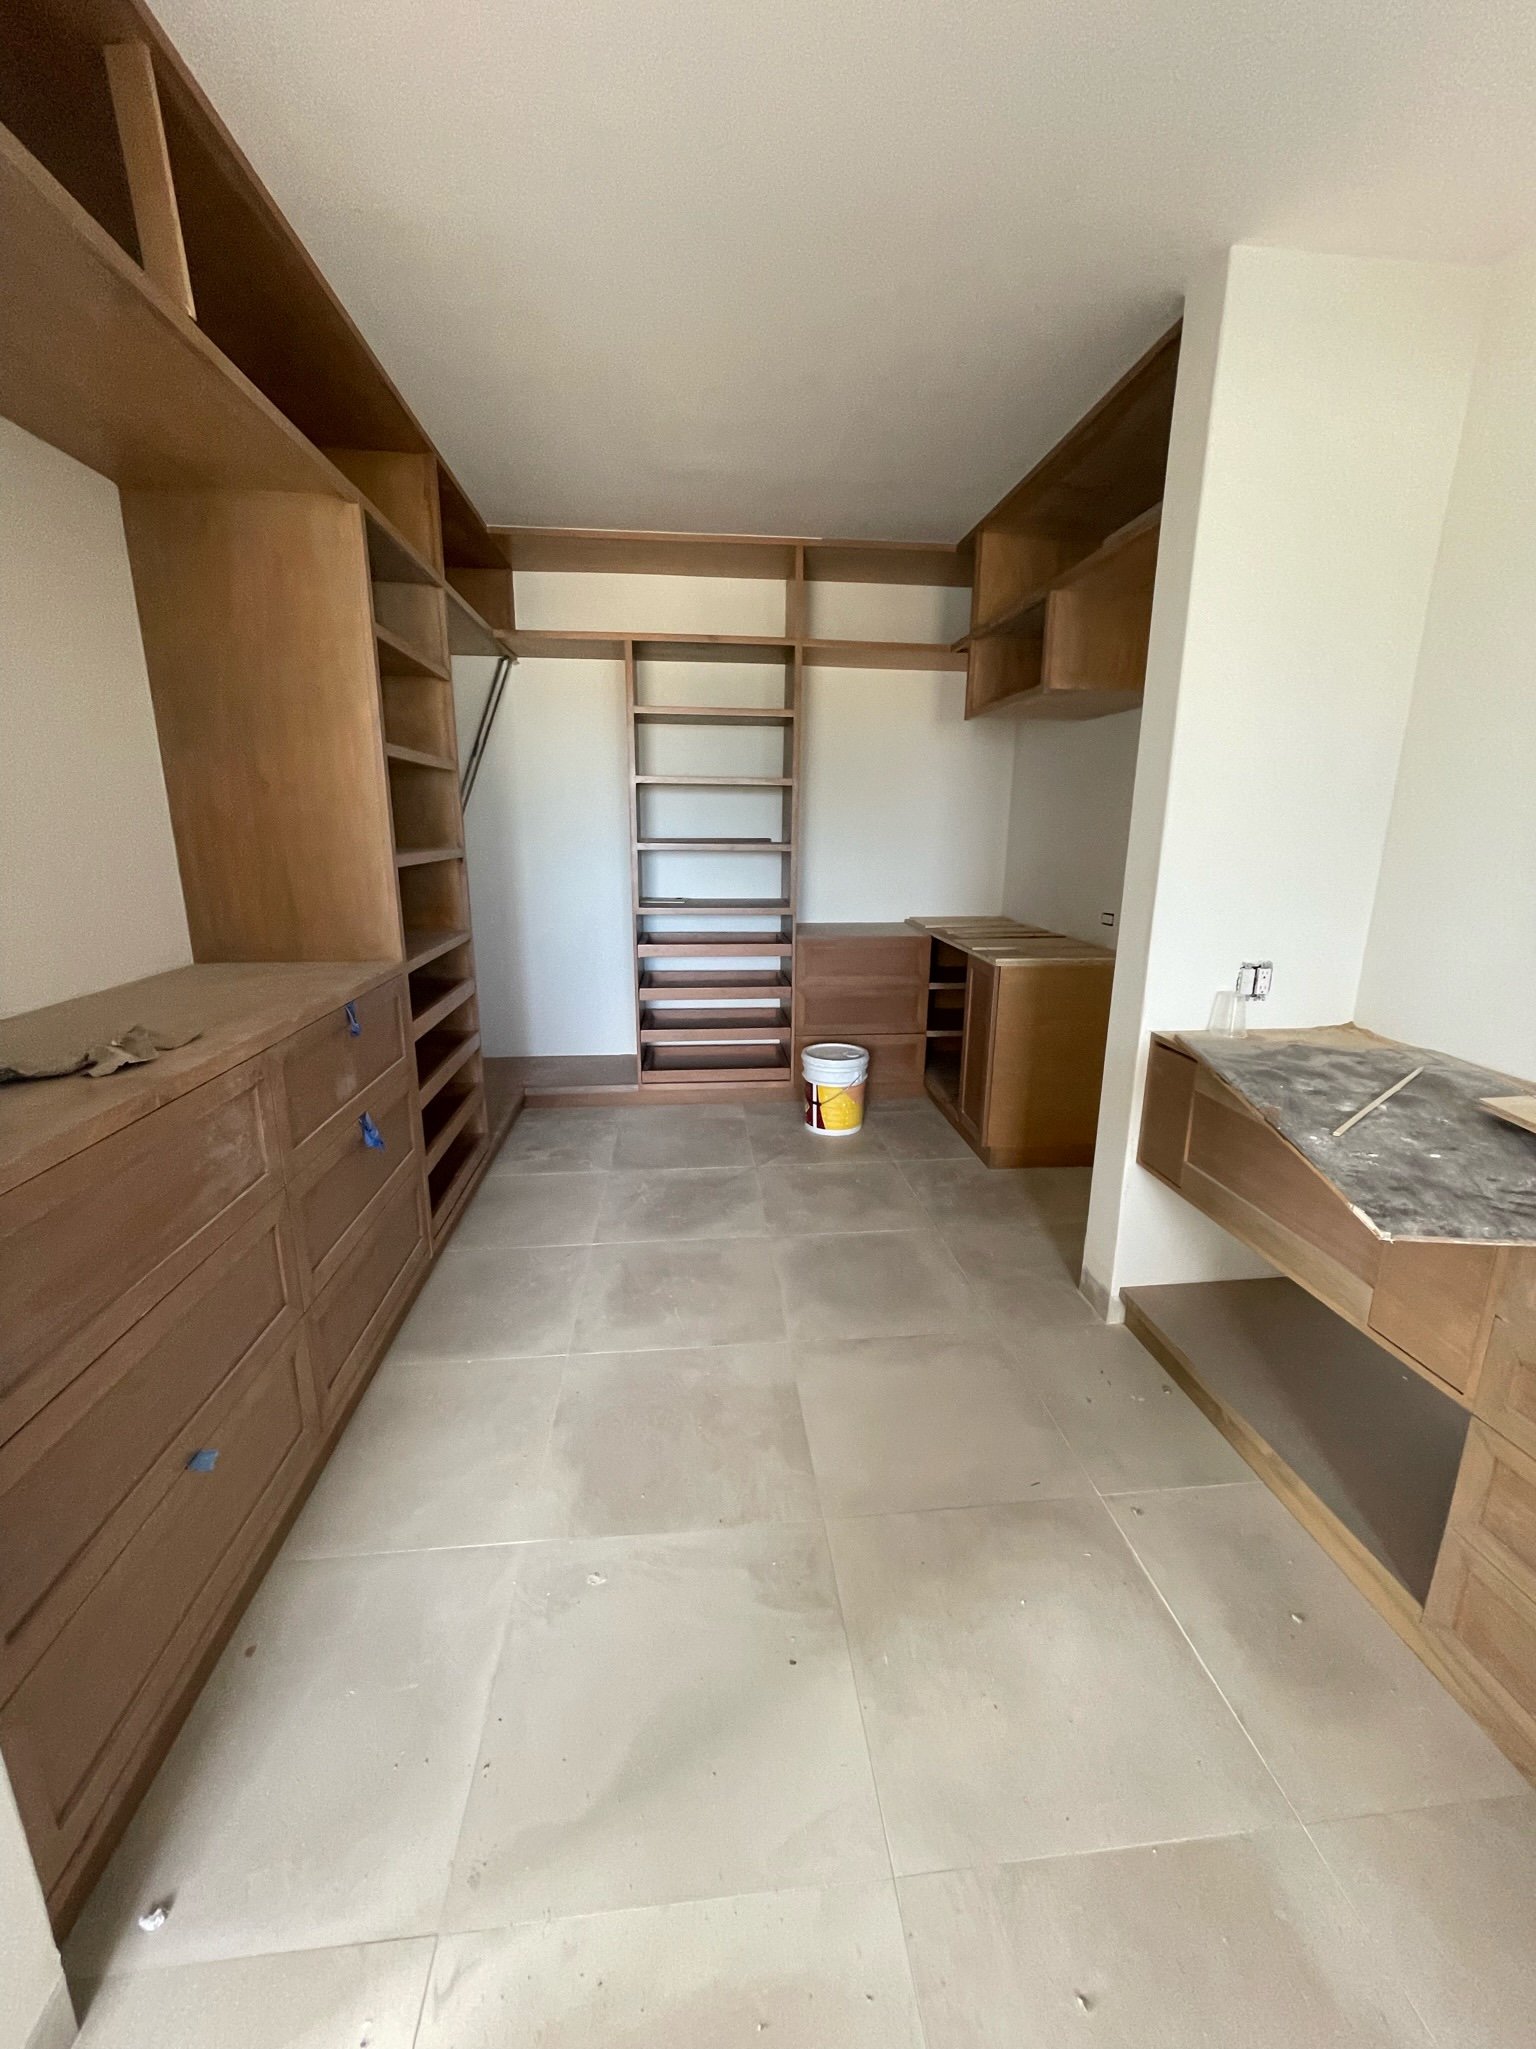
Main Bedroom Closet

Main Bathroom & Laundry

“Let’s do a renovation” they said. “It will be fun”, they said.
MOVE-IN READY (ALMOST)!

After a one month delay, and a total of seven months of construction, our move-in was scheduled for April 1st, 2022. It felt surreal we would finally be able to move in all of our belongings. We said adios to our home in San Lucas, packed up the car, and drove 30 minutes north to begin our lives in our new home.

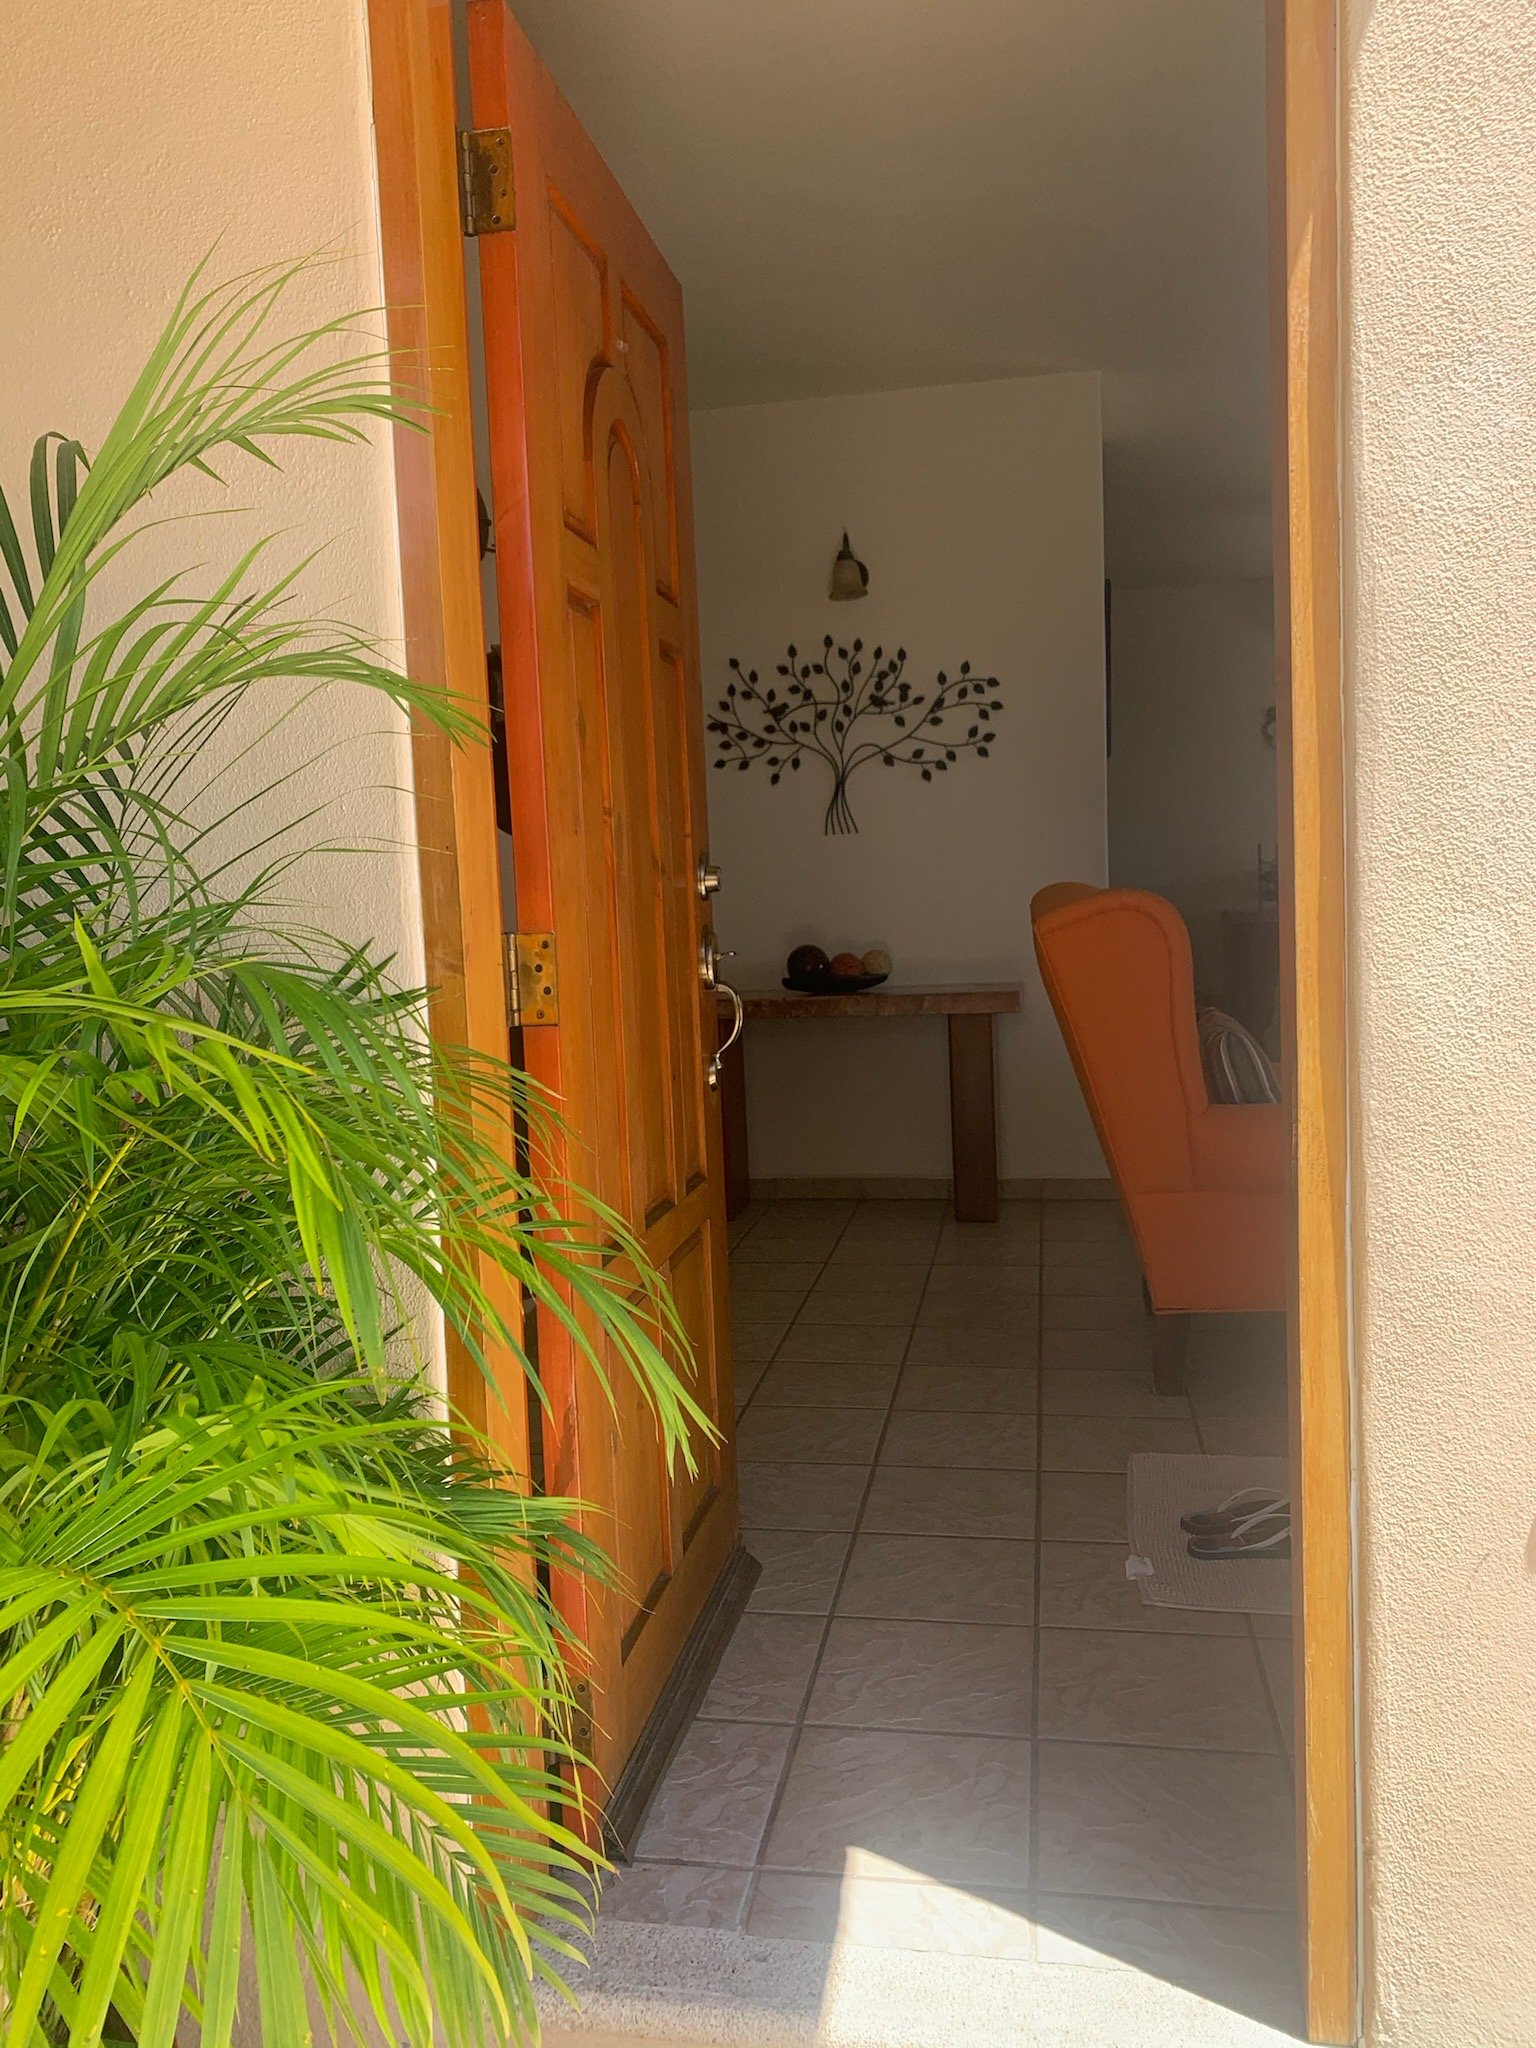
The one project we worked on outside of our contractor was the front door. We went a little rogue to try and find a custom door that was within budget, which we kicked ourselves for later. They say you get what you pay for, right? Right. The carpenter we hired proved to be very, VERY slow at his craft. Some may say he was on Mexico time.
When you’re in the whirlwind of a renovation, you start to lose track of time when all things are happening at once. We can laugh about it now, and often do, thinking about our text to him and asking for a photo update of the door and getting a picture back, which may as well have shown a living, breathing tree in the forest.
With this guy on our watch (that we weren’t paying attention to), we moved into the house without a front door. Whoops. A long 3 weeks later, it finally arrived (a little less quality and different color than we expected, but nonetheless, a working door). Our makeshift screen door, table and bin collection was moved out. Security at it’s finest.

What we wanted.

What showed up.

Not pictured here: Our keyless Yale security lock with codes to use for various people who enter our home (dog sitter, cleaner, etc.)
Life in the house
From move in in April through the end of the year, we completed many more projects on our list.

Unpacking the storage unit bins & boxes!
In May, we got automatic blinds installed in the living room and main bedroom.
In June, our custom bathroom mirror with back-lit lighting arrived.
In July, we buckled down and invested in hurricane shutter protection for all the new doors and windows on the front side of our house (ouch, this one hurt but was oh-so necessary to protect our investment).
After a long three years of talking about what to do with our items in the storage unit, and filling our suitcases with as much as we could every trip back to Denver, we decided it was time to clear it out. We hired Geoff from US Border Movers who had his team pack up the unit and drive our things all the way from Denver down to Cabo safely.


It was weird to see our previous life of items we’ve been operating without (just fine) for three years, but it was nice to be in possession of all our belongings again and have this chapter officially closed out. It also was perfect timing as our bins of Christmas decor were part of the delivery! Our first Christmas in a house we own. It was a long (and expensive) year, but it all came together. We’re very happy.
The Before & After
Just over one year since our move-in, we’re finally ready to share the part (we hope) you have all been waiting for… THE BEFORE & AFTER! Please enjoy the before, planning, during and after photos of the journey of Casa Turner.
outside view

Photo from the real-estate listing.
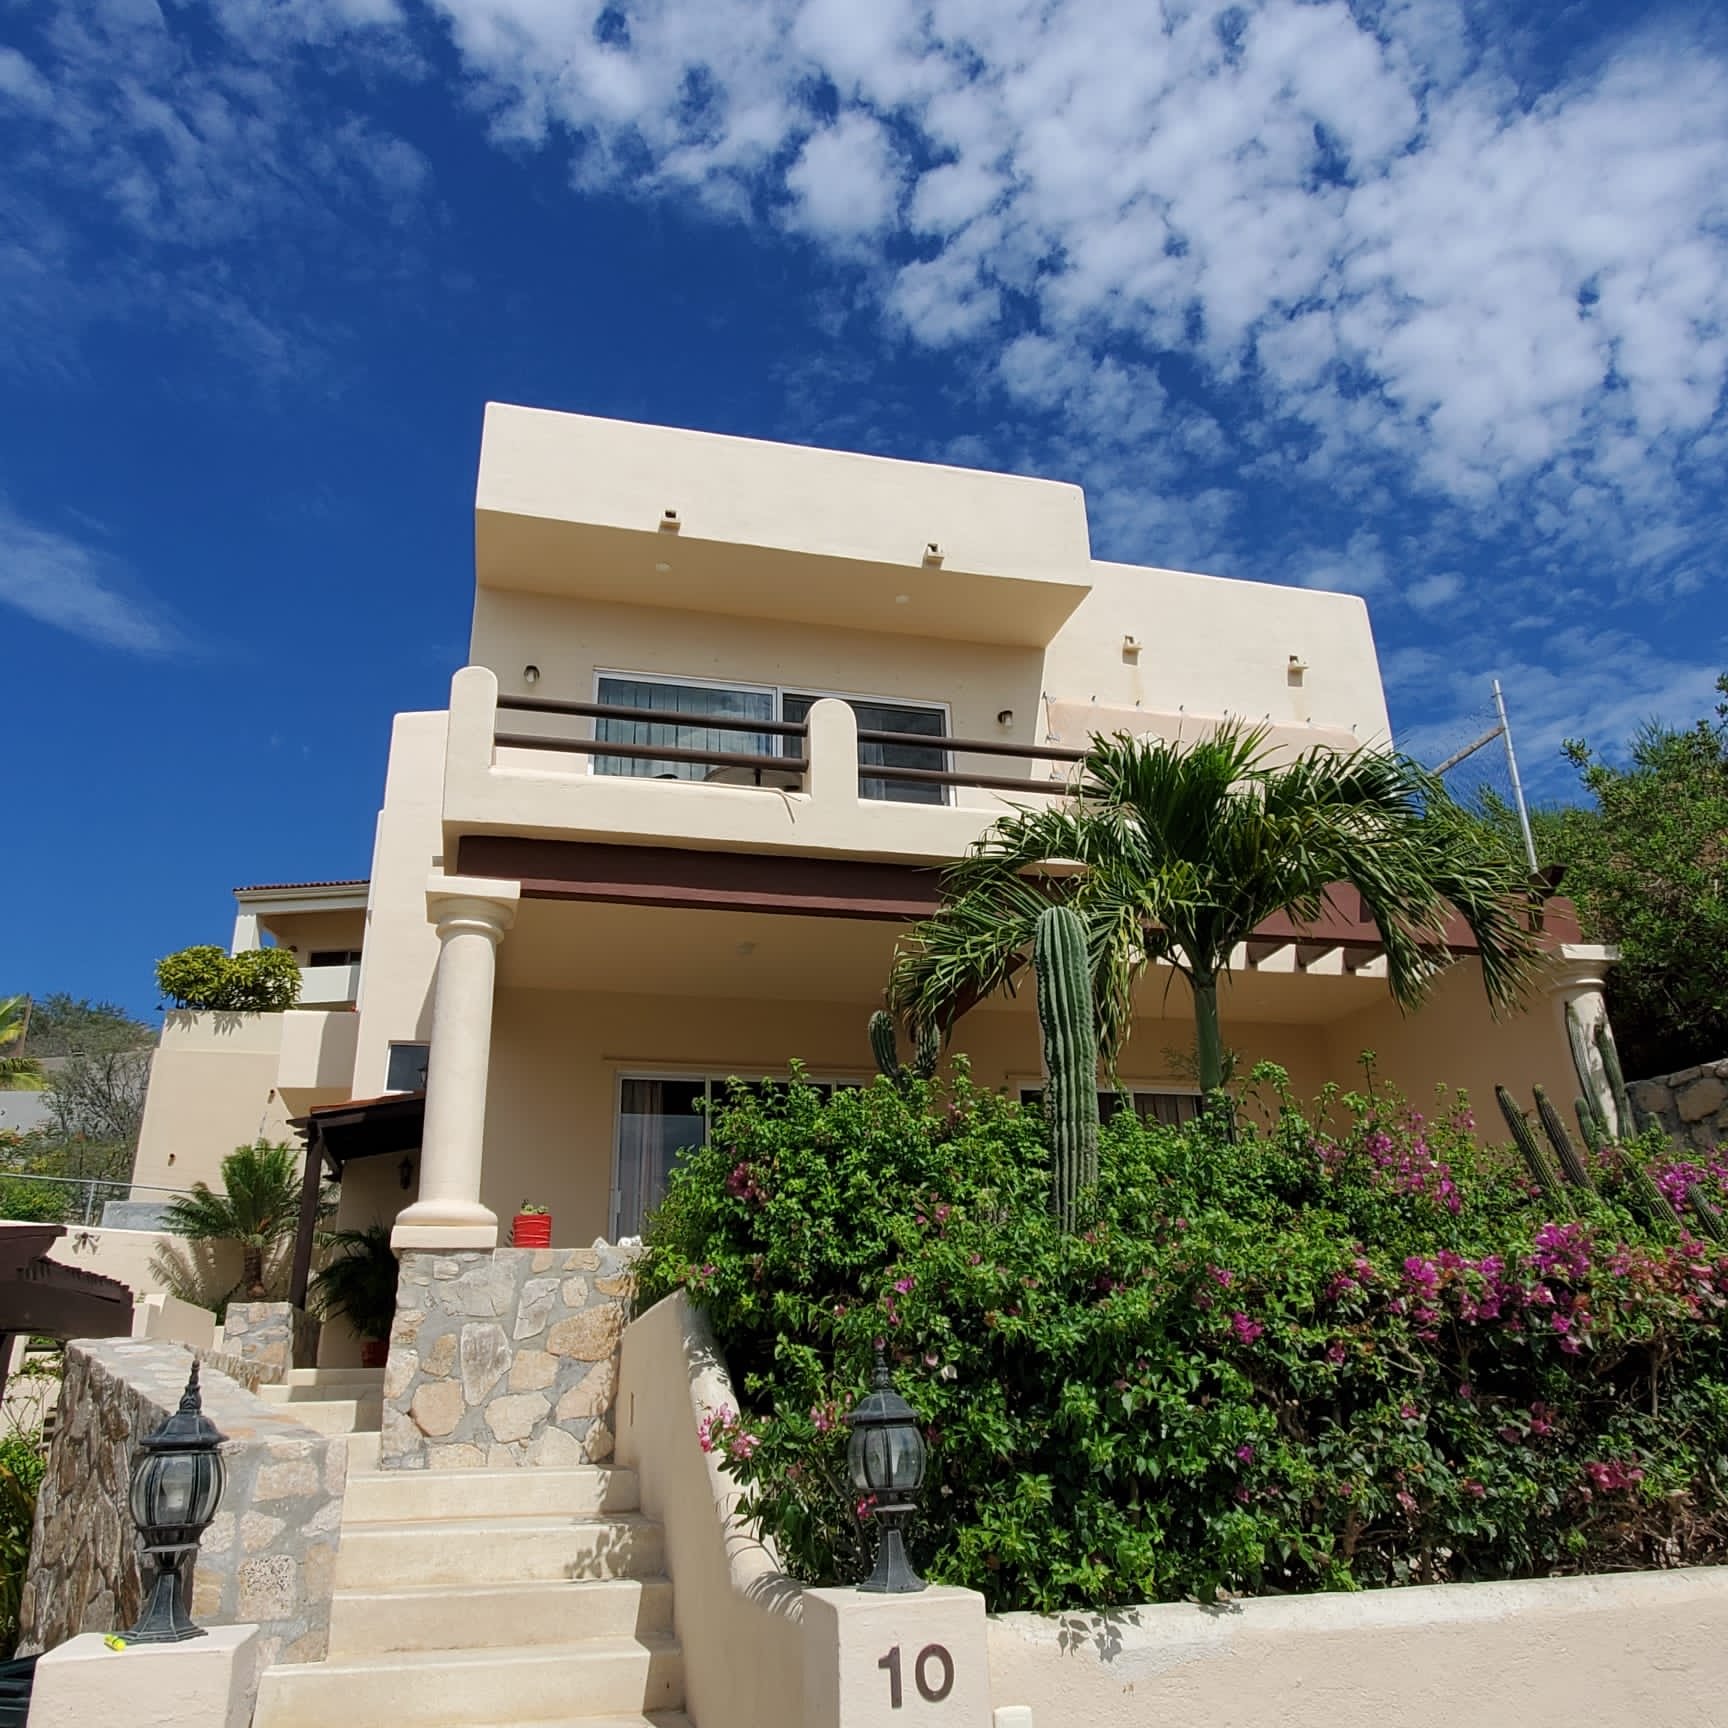
BEFORE

DURING

AFTER (PRE-PATIO)
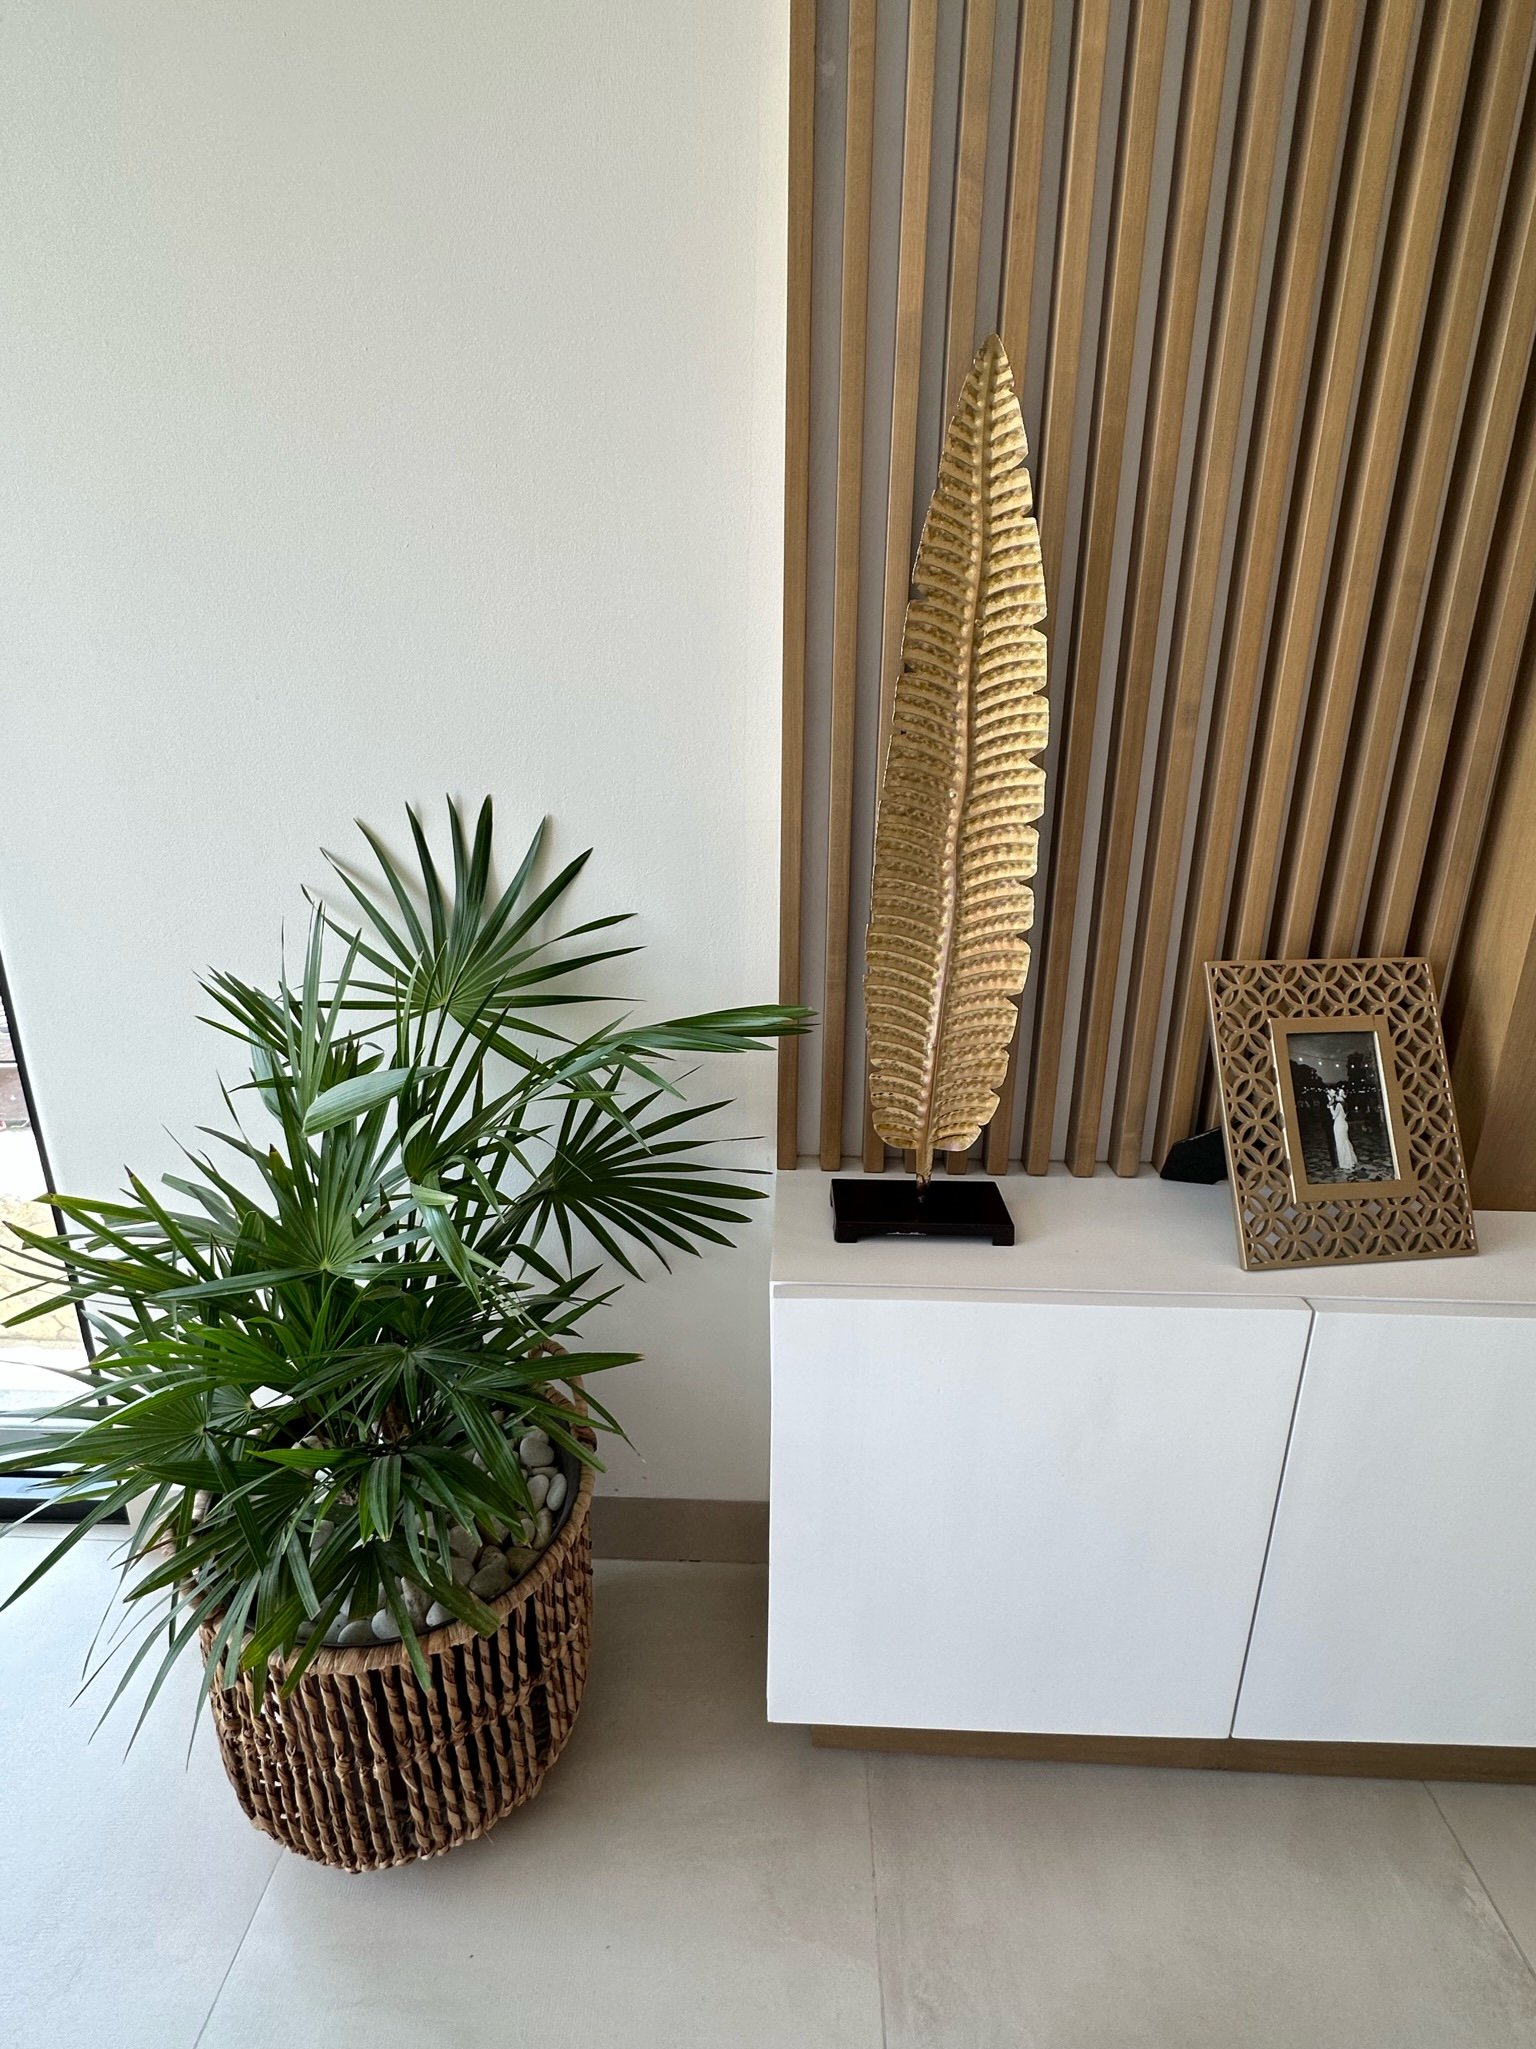
ENTRY

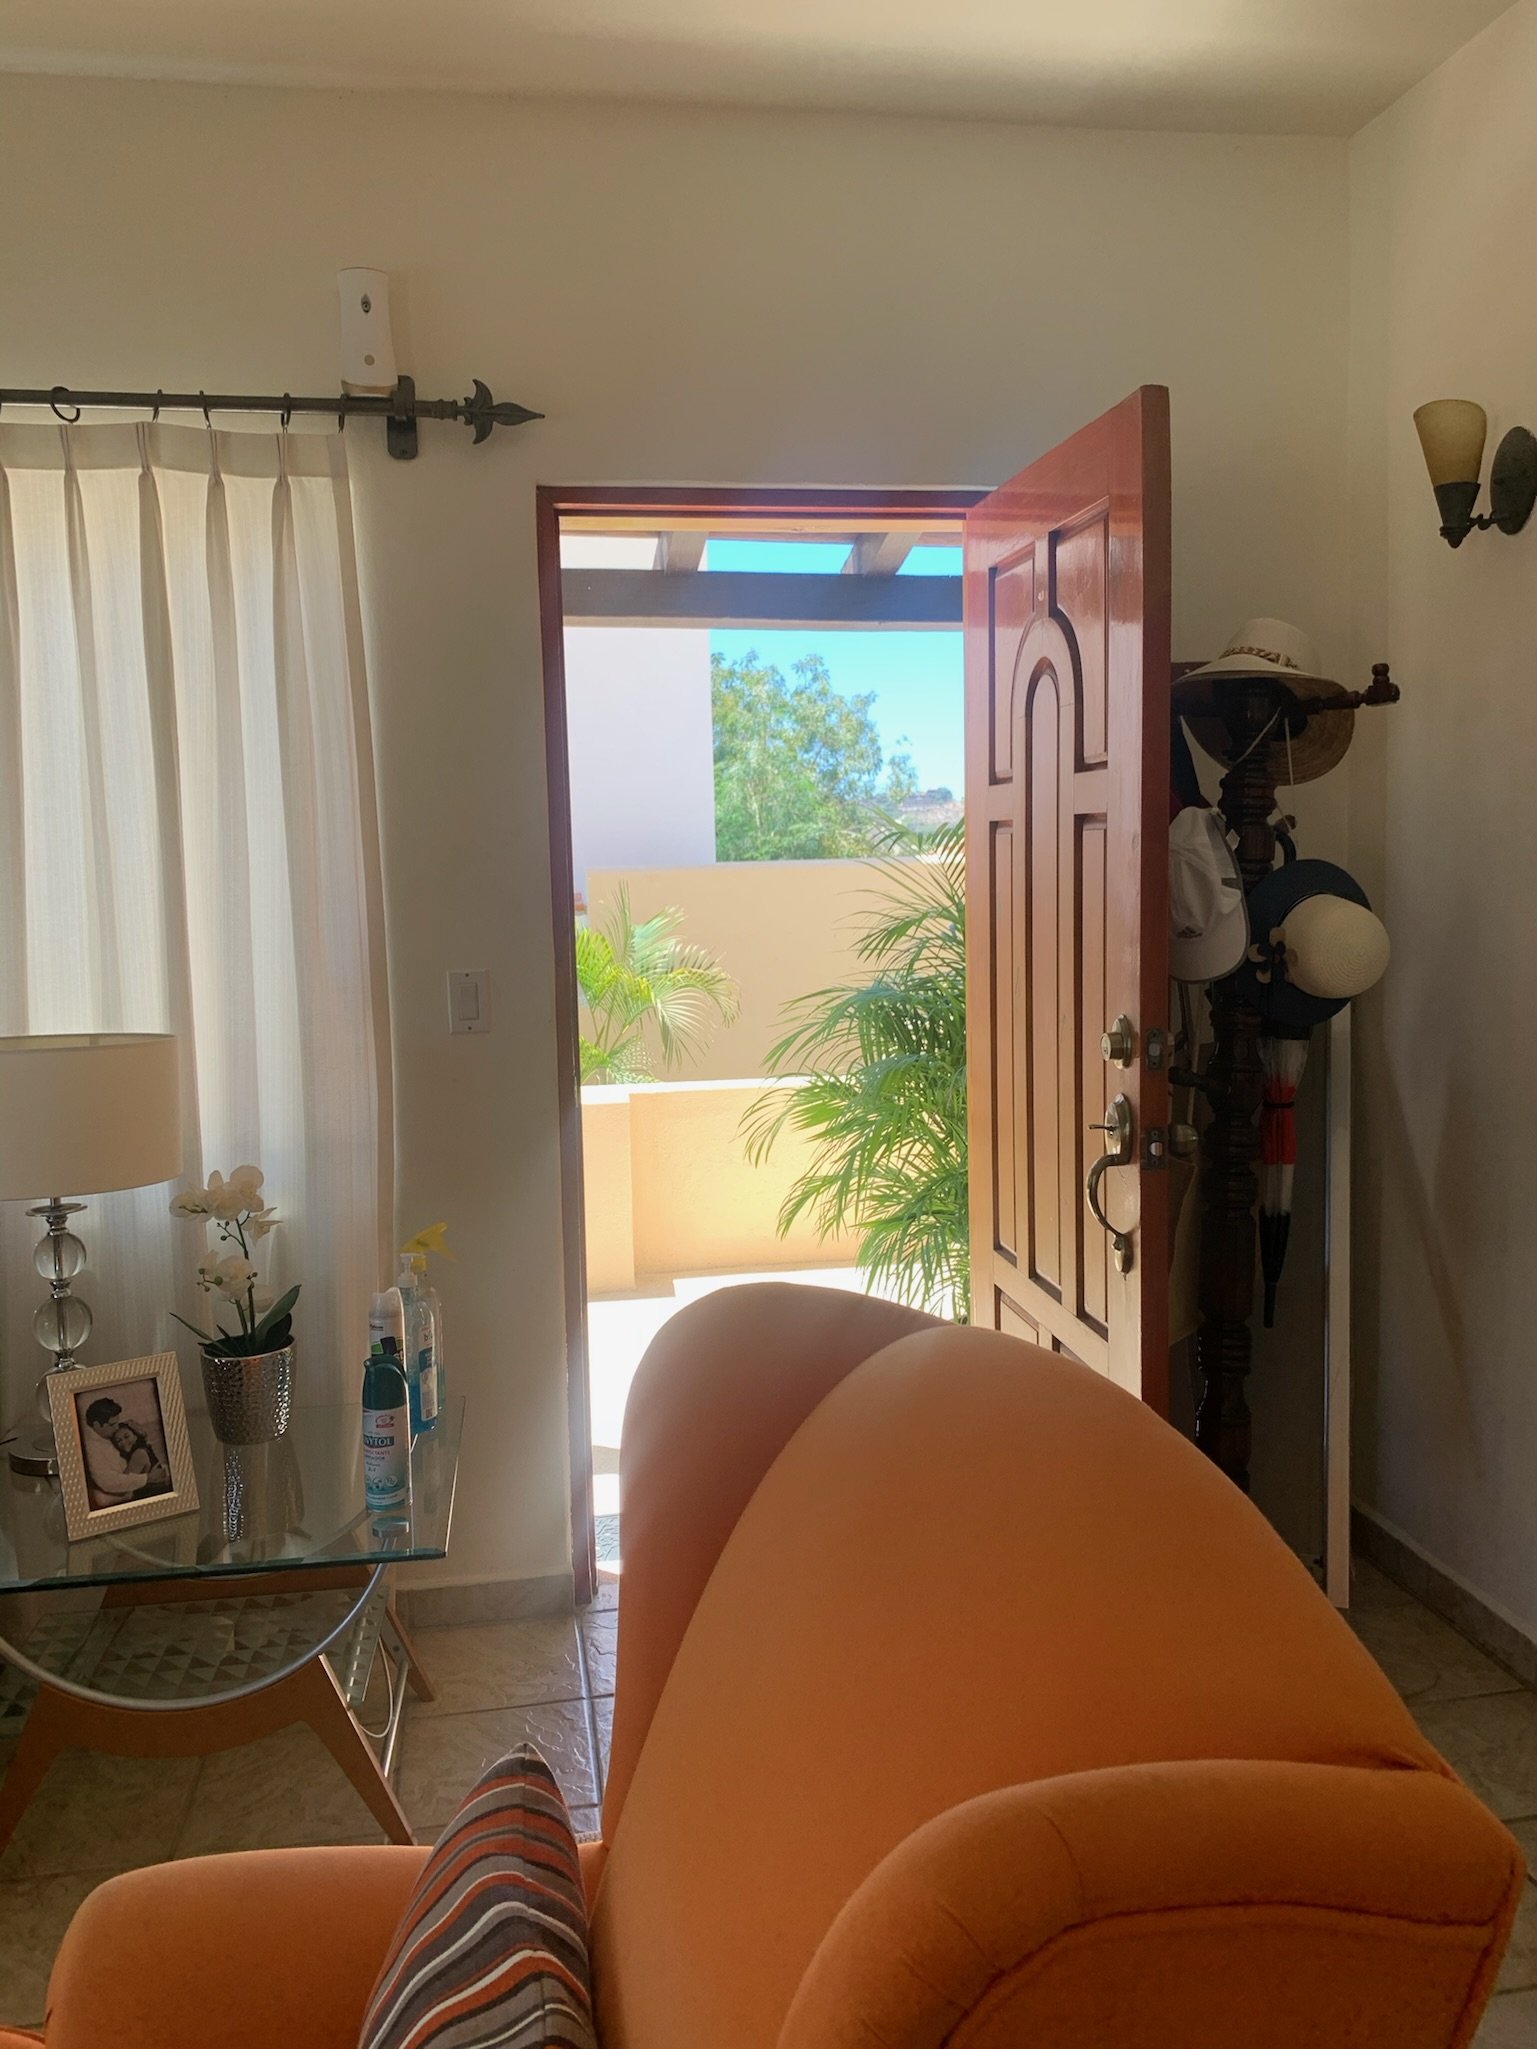


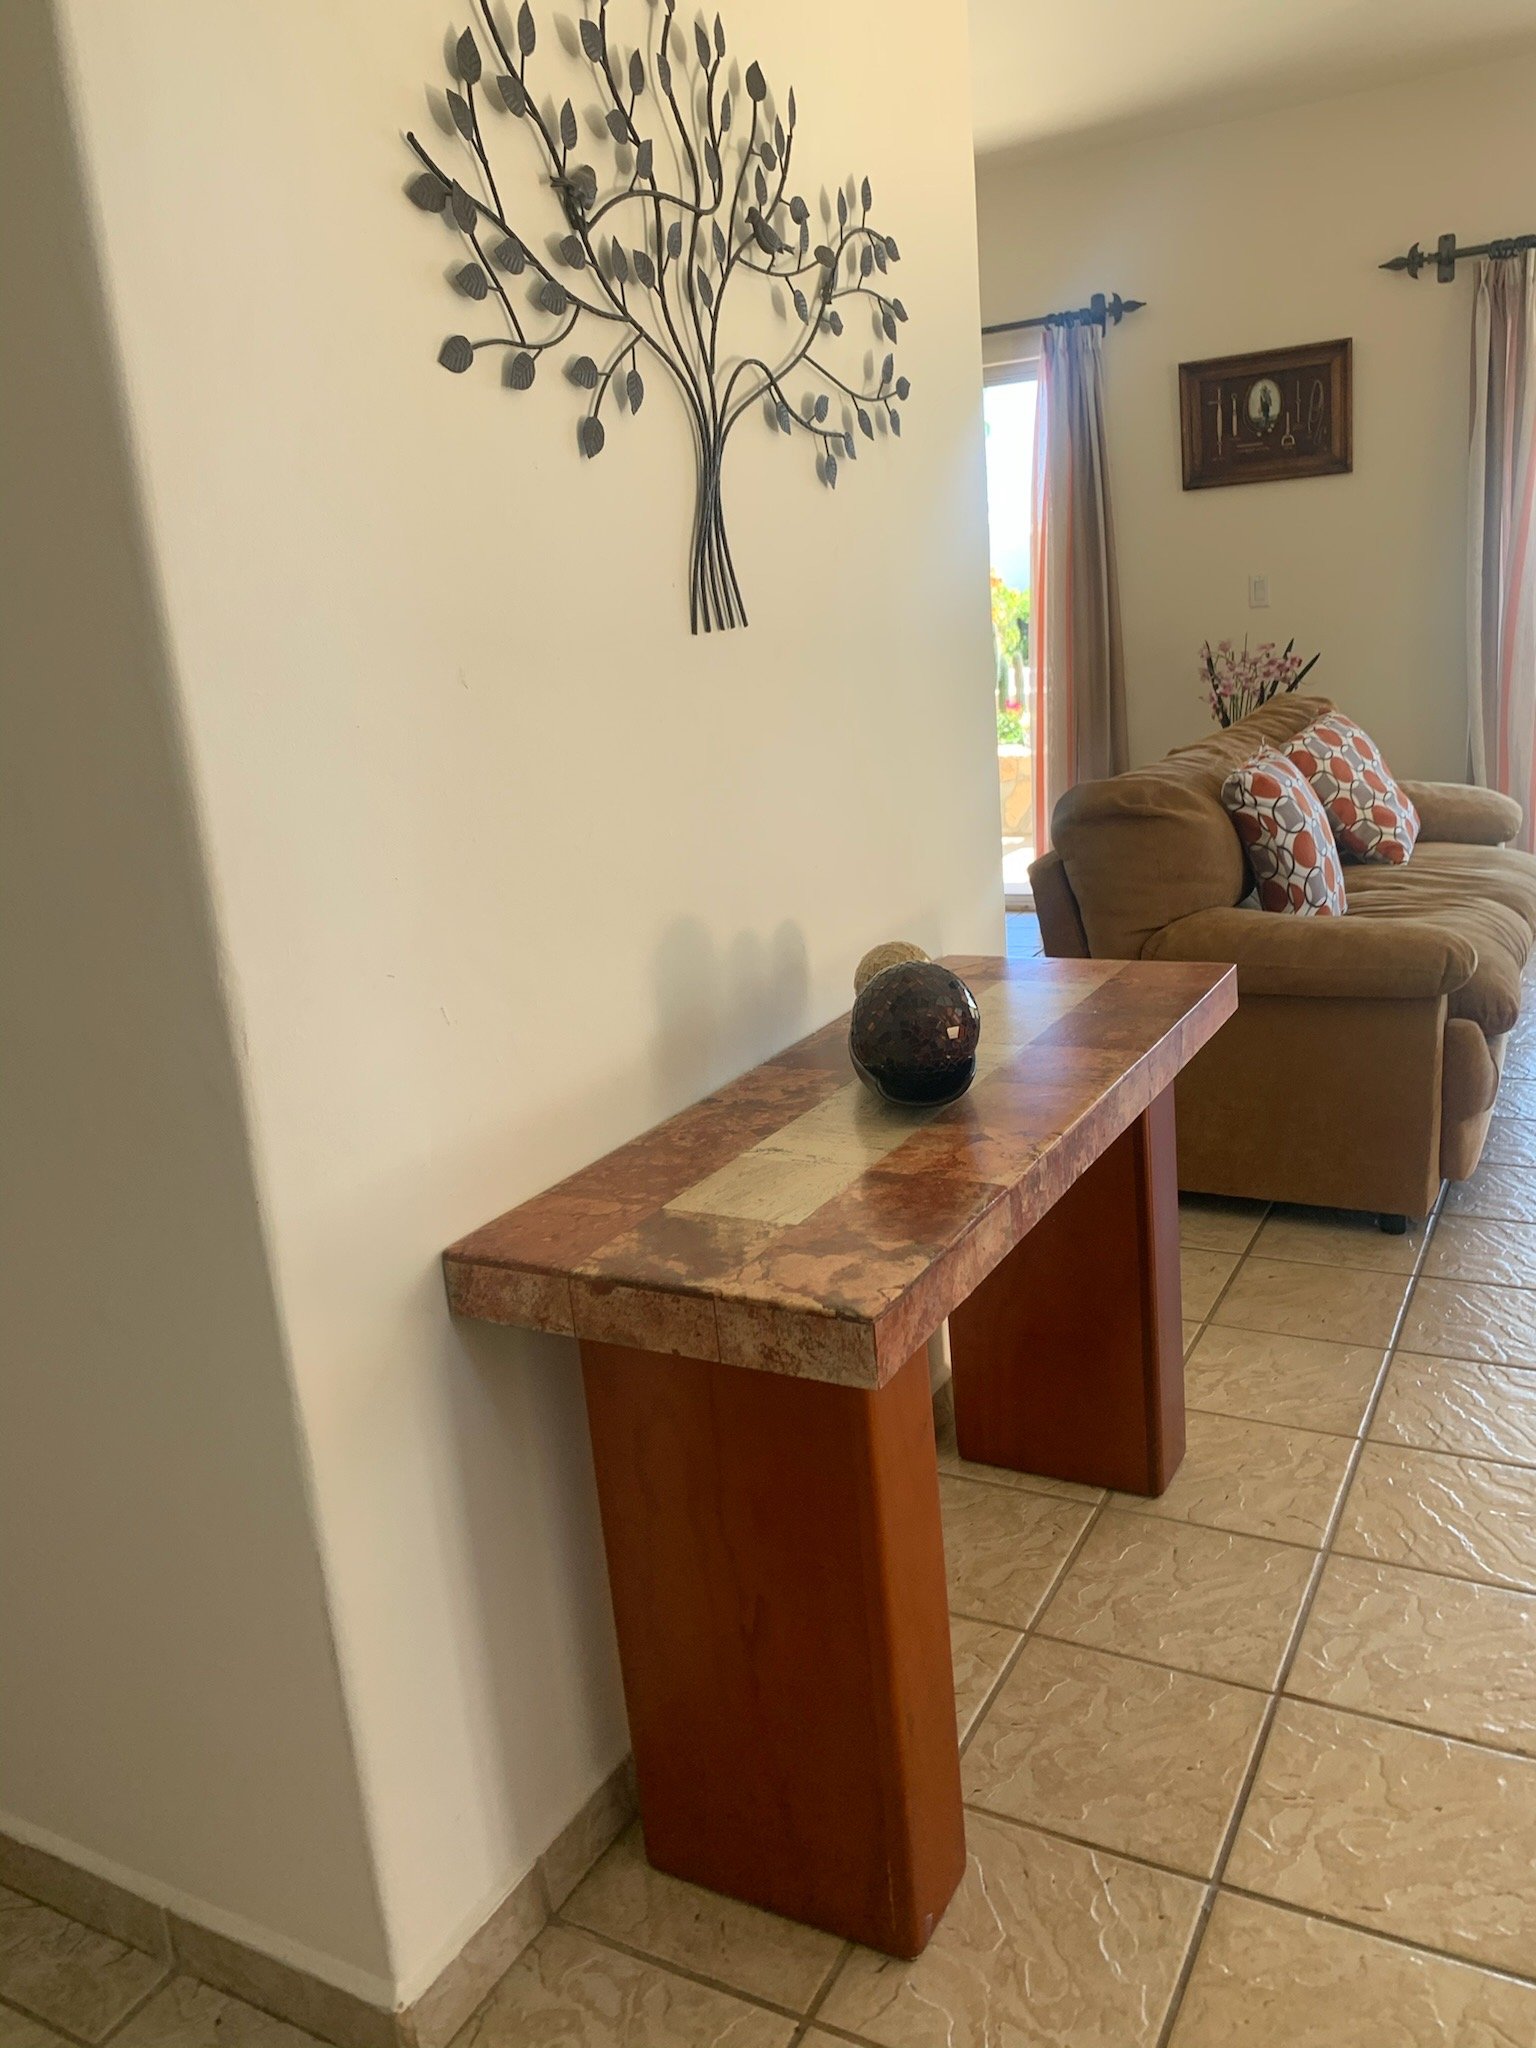
Living
By now you know what went down in the living room for the reno. The owner left 99% of this furniture and decor. The spikey arrow curtain rods, browns and oranges hurt the soul, so we were very excited to brighten it up and make it feel more neutral and inviting.

BEFORE

PLANNING

DURING

AFTER >>

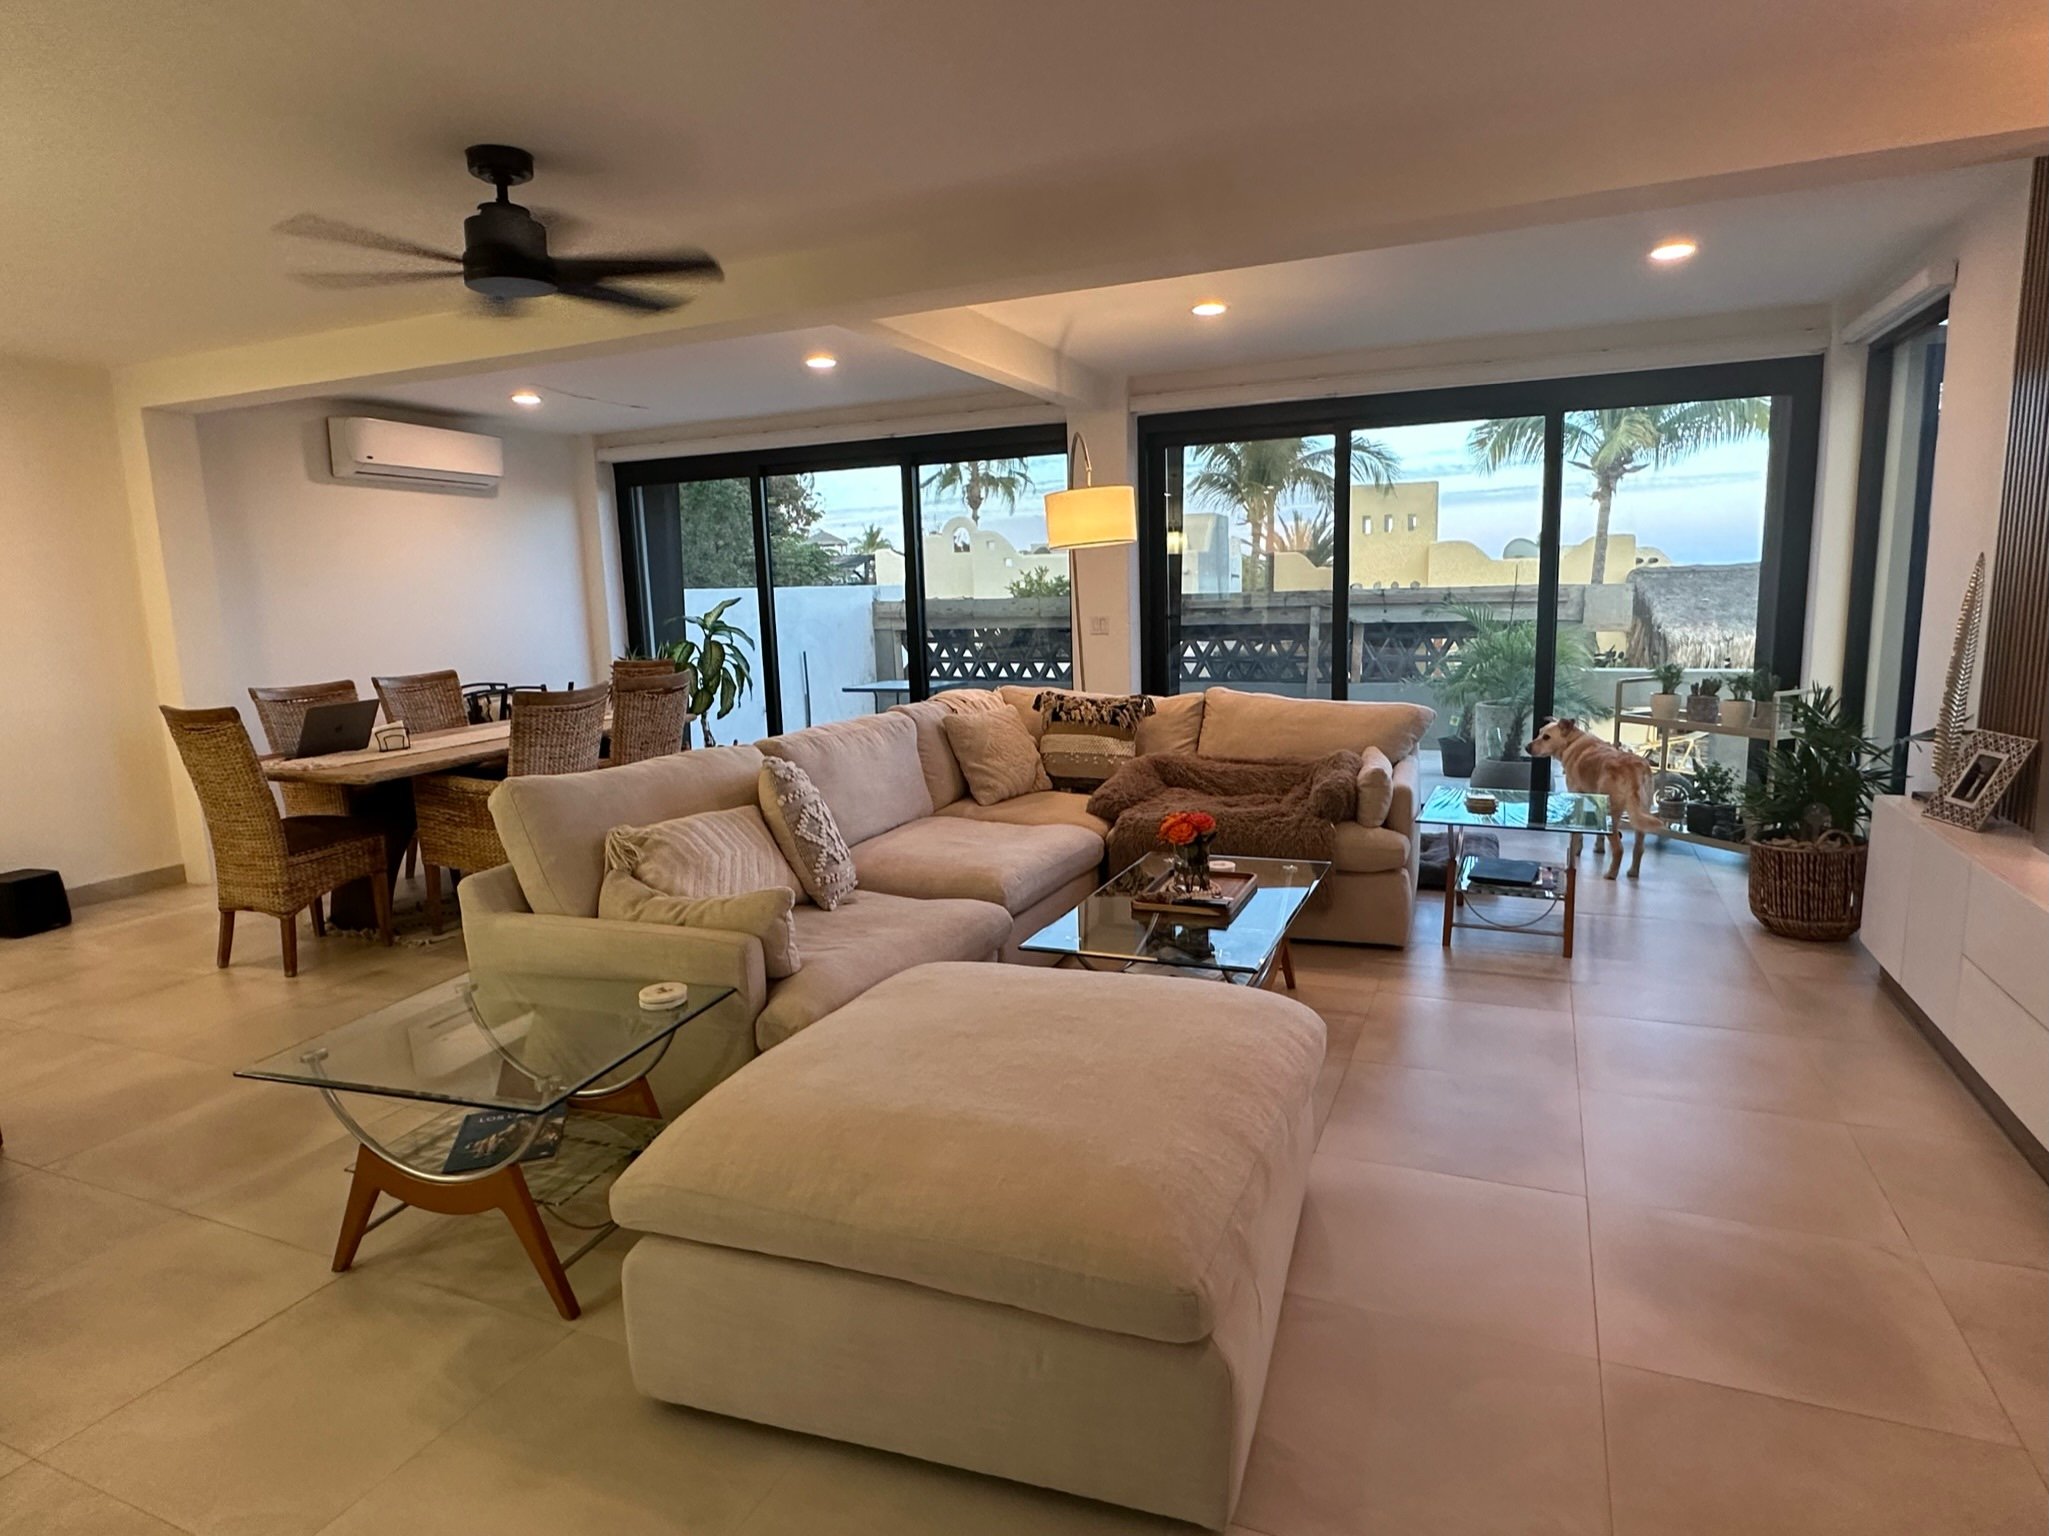
We found this couch at Ashley Furniture — they have a small Cabo showroom and ship down furniture from San Diego to Baja Sur. The glass end and coffee tables came with the house and kinda match, so they’ll stay around for now.
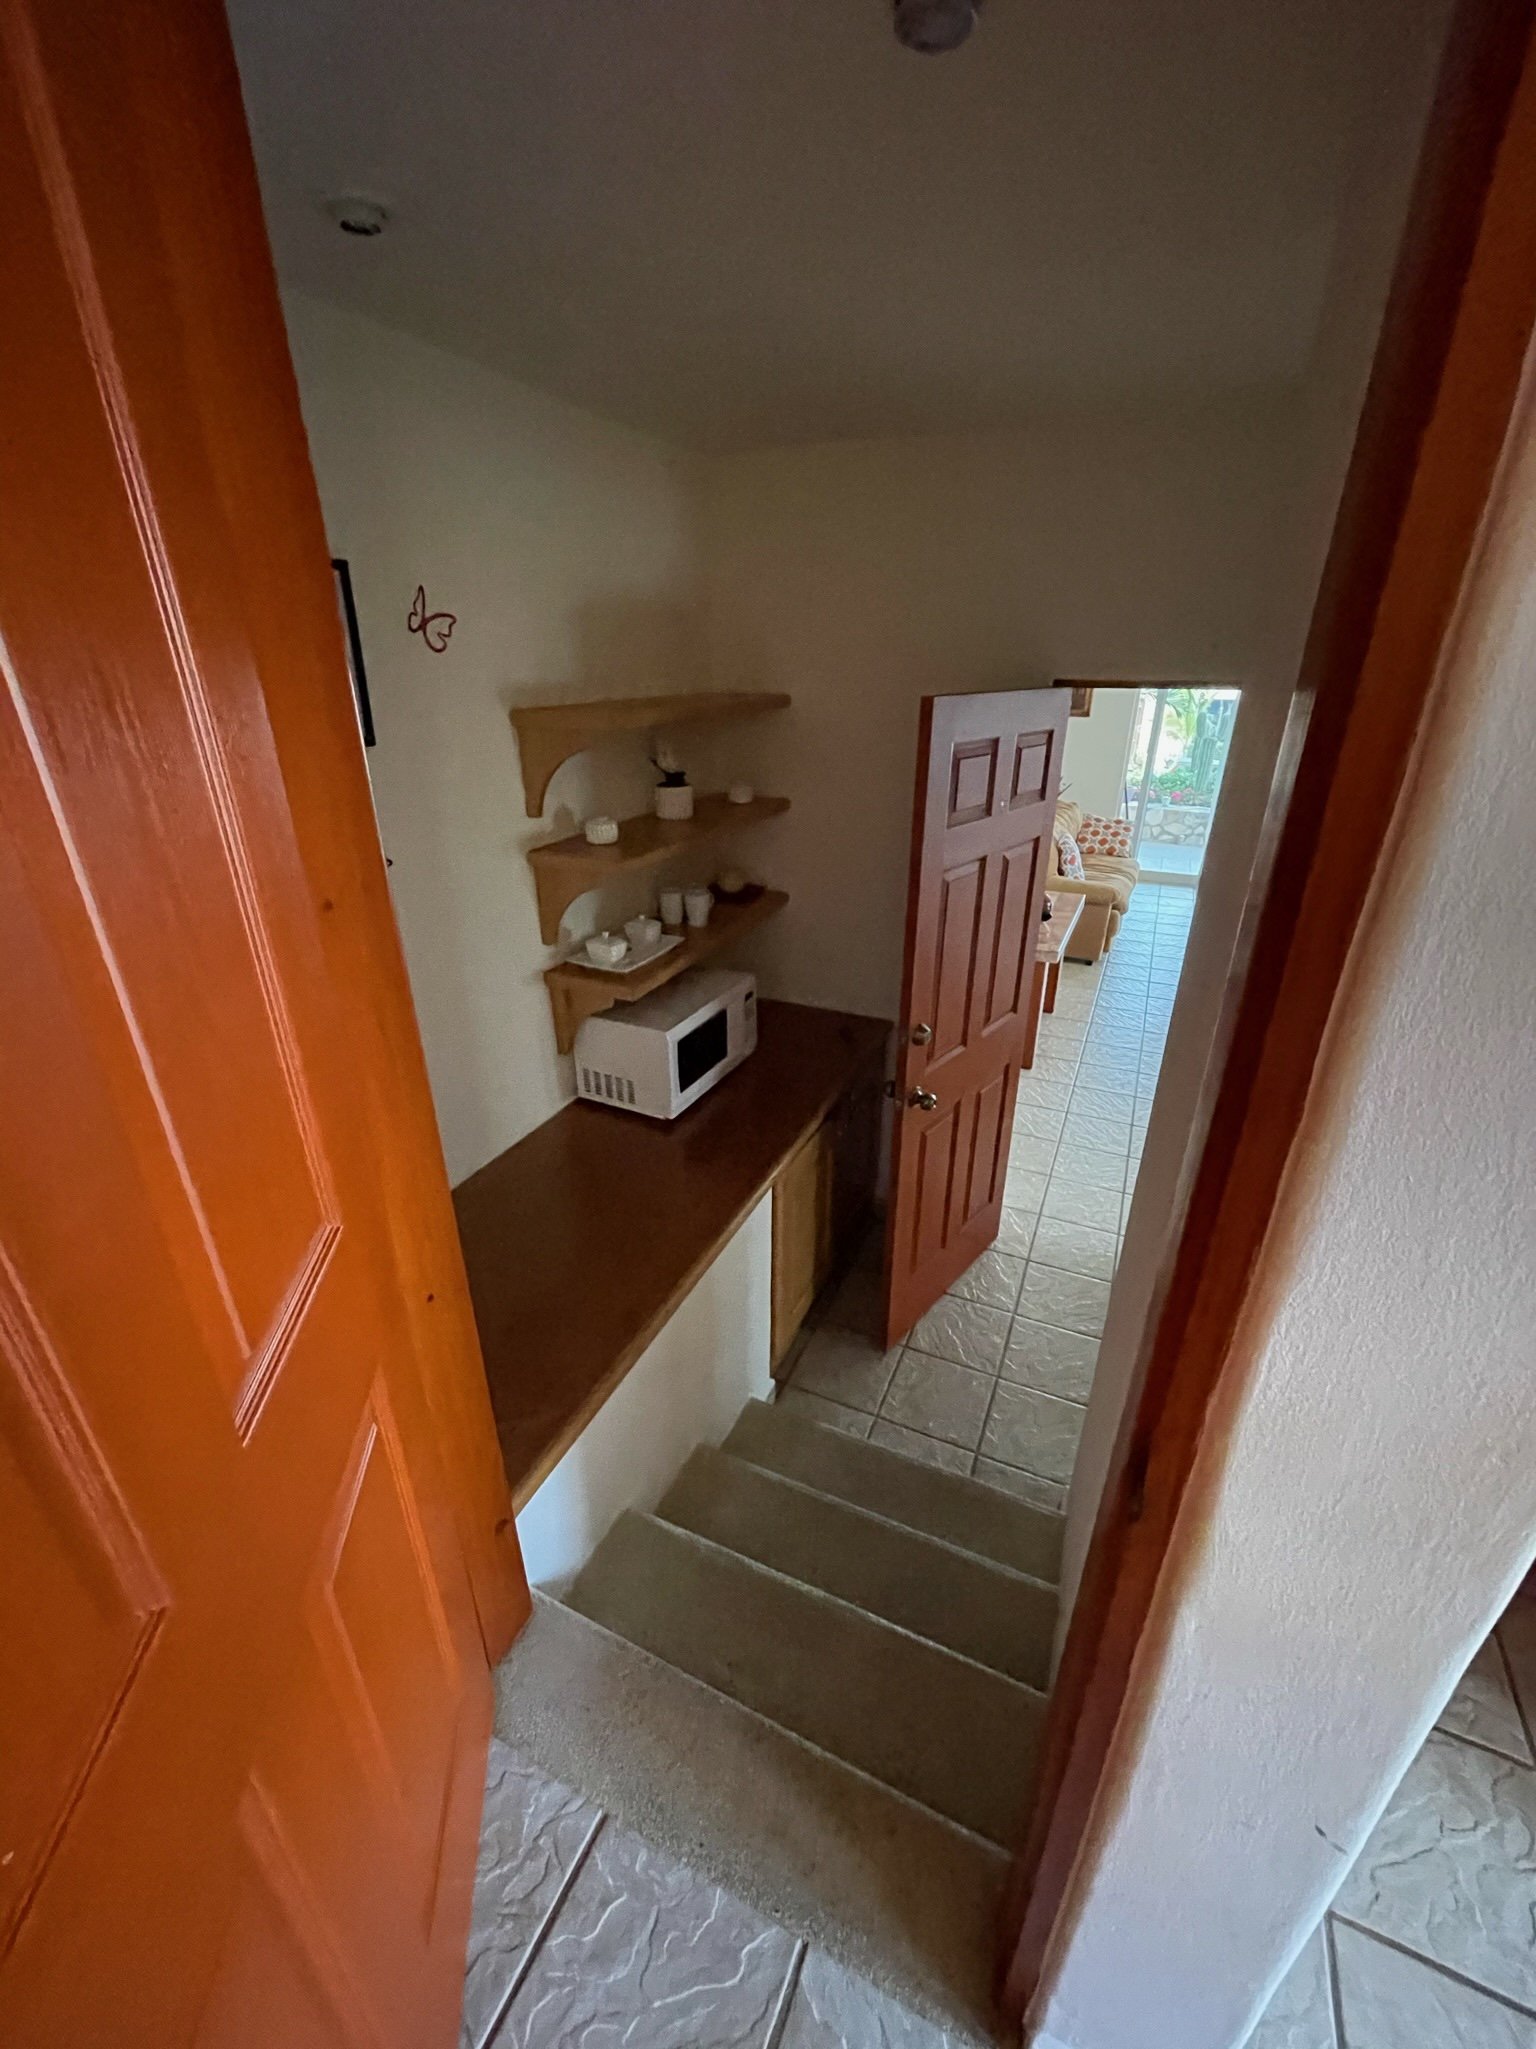
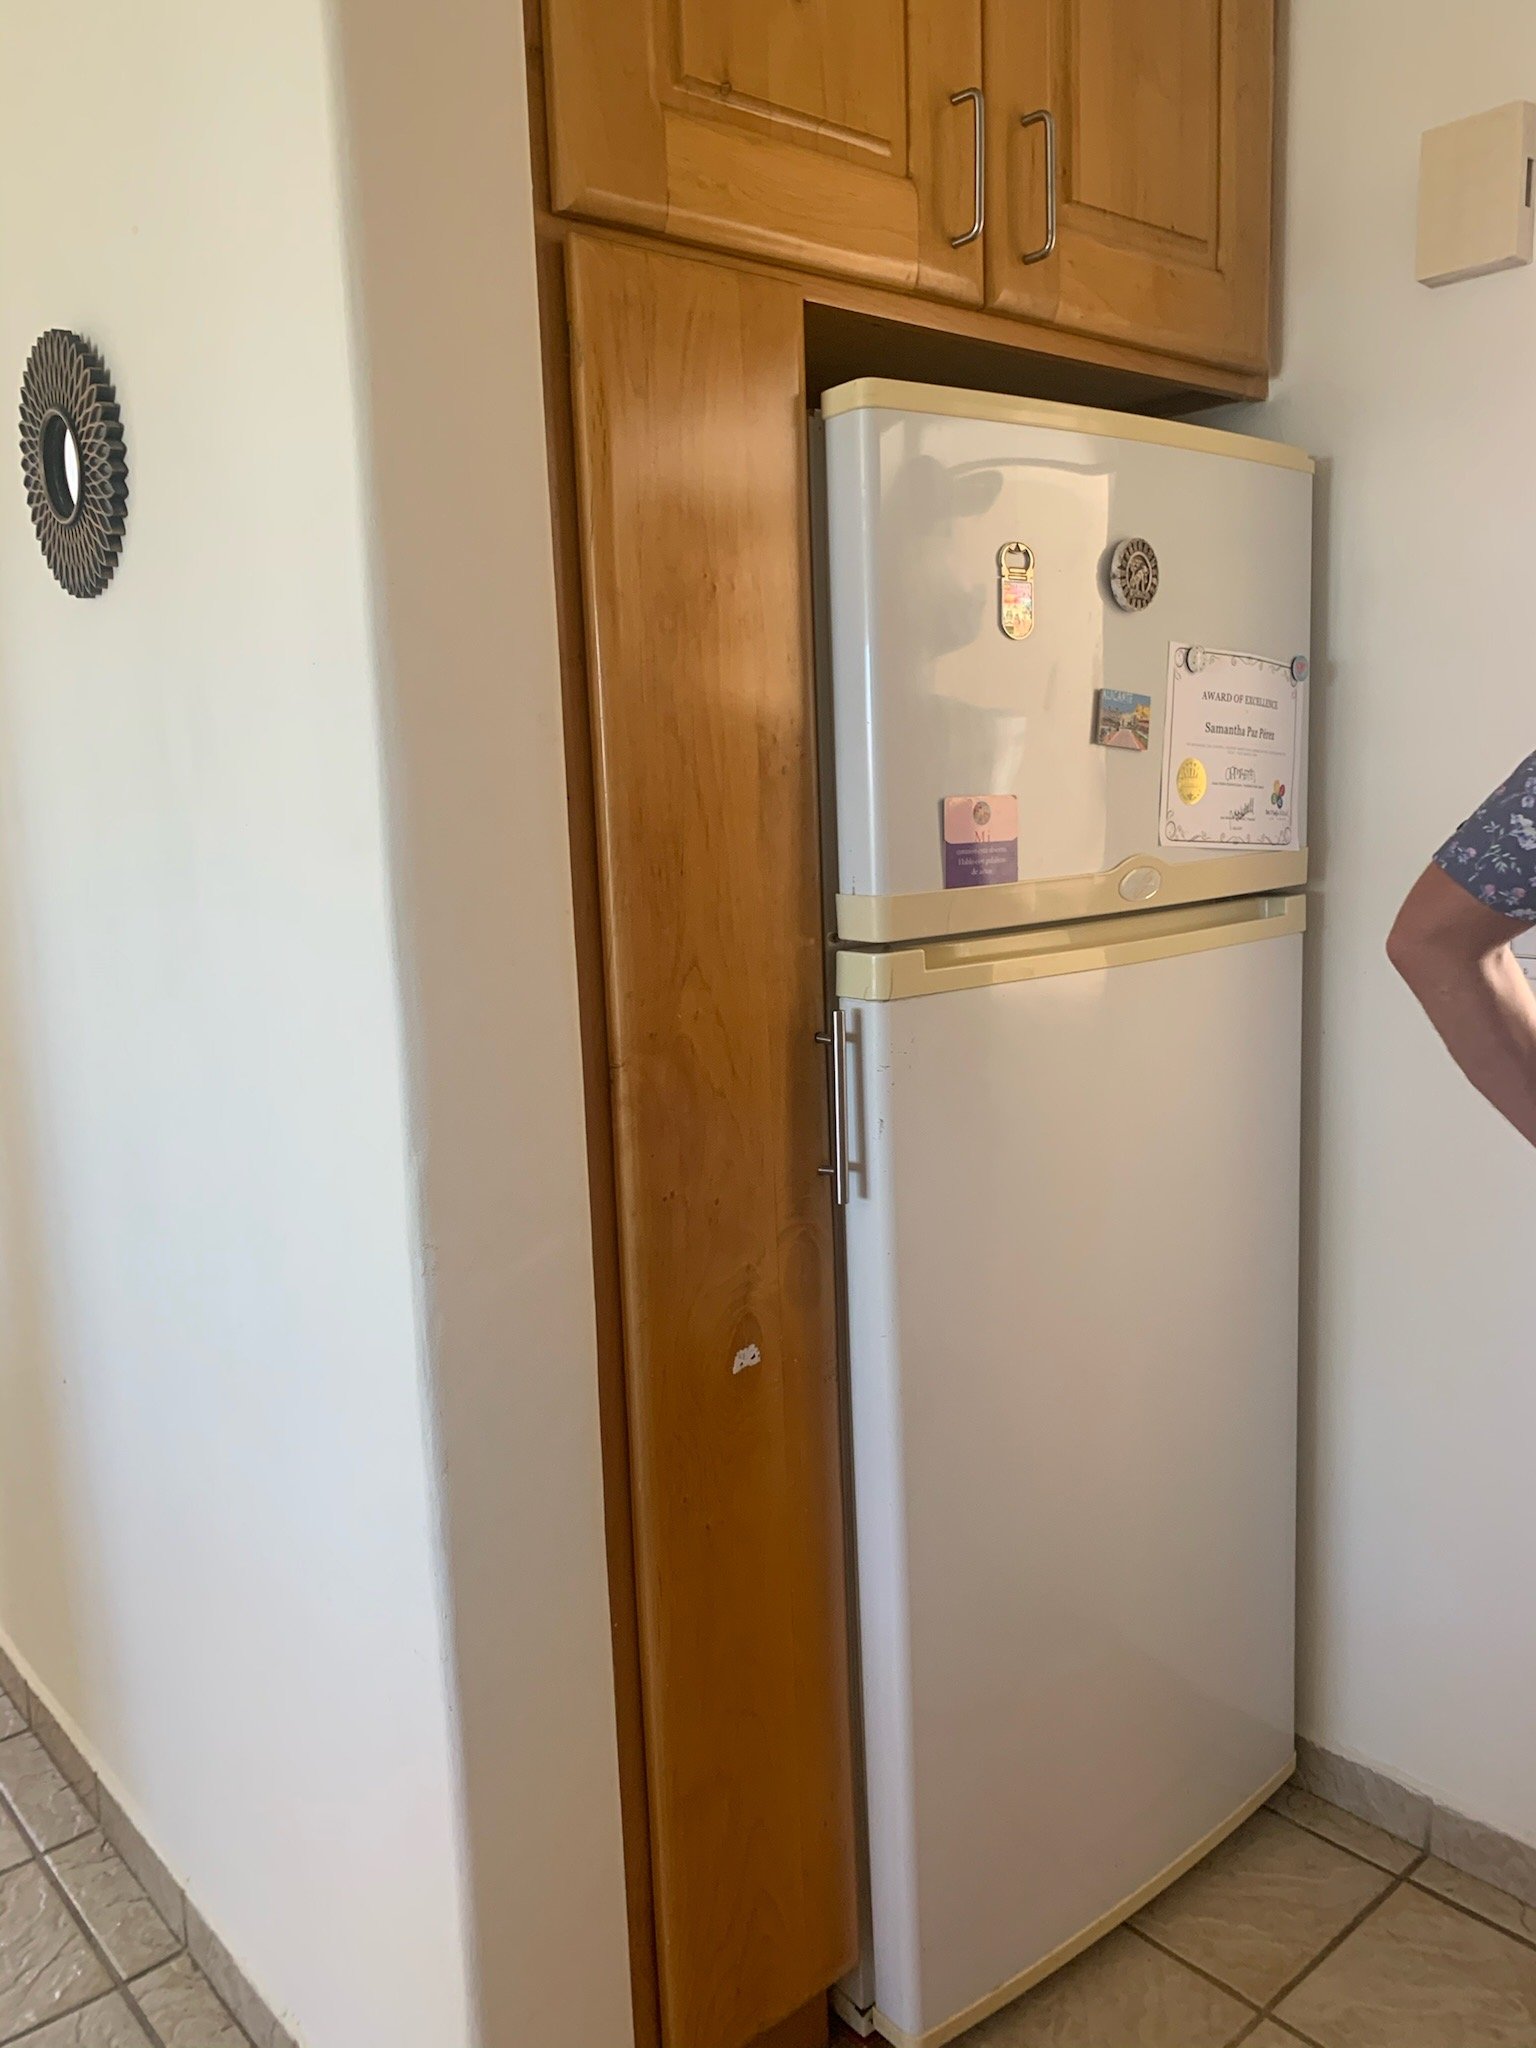
HALLWAY INTO DOWNSTAIRS GUEST ROOM/BATH
The previous owner had the downstairs Guest Bedroom setup so it could be locked off from the rest of the house, to use as a private room AirBNB. We brought the wall forward to eliminate the wasted space, which created a perfect space for the refrigerator and more kitchen storage on the other side of it.


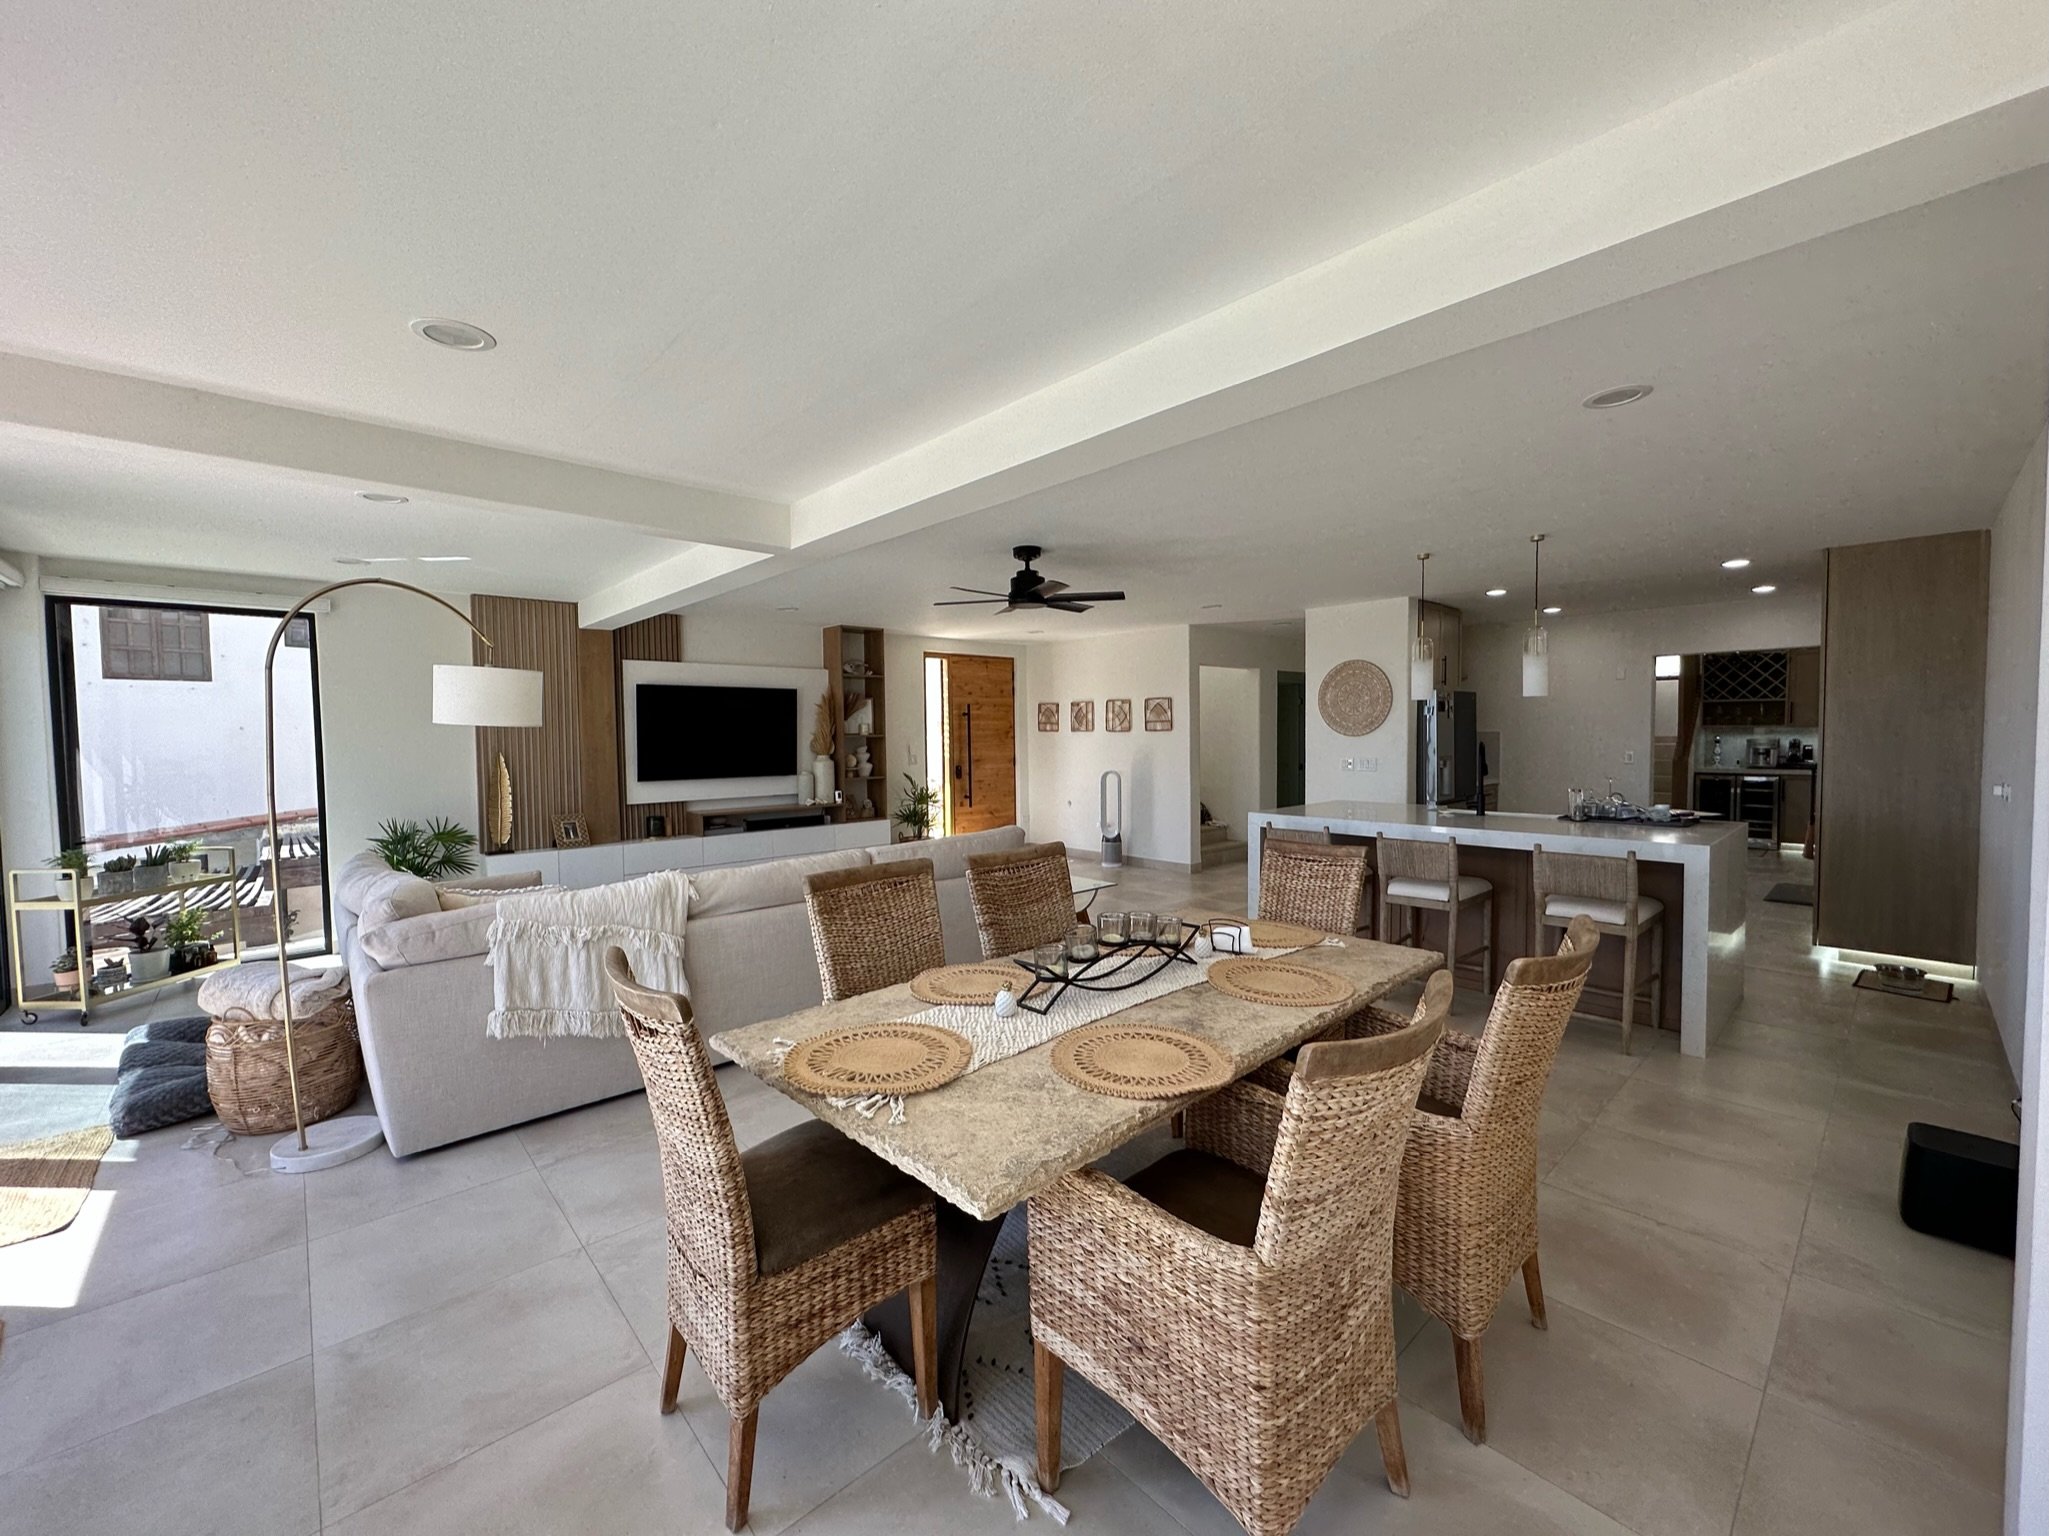
DINING
This is the table that unfortunately got moved outside a bit too quickly during the reno phase. We were able to find a new dining table (Facebook marketplace for the win!) that has the travertine look/feel we love, which came with a set of rattan chairs that fit right in. This was a great cost-efficient find — who knew a dining set was so expensive?!

BEFORE
AFTER
downstairs GUEST BATHROOM
No reno here — just a fresh coat of paint, new lighting fixtures and new decor.

BEFORE

AFTER
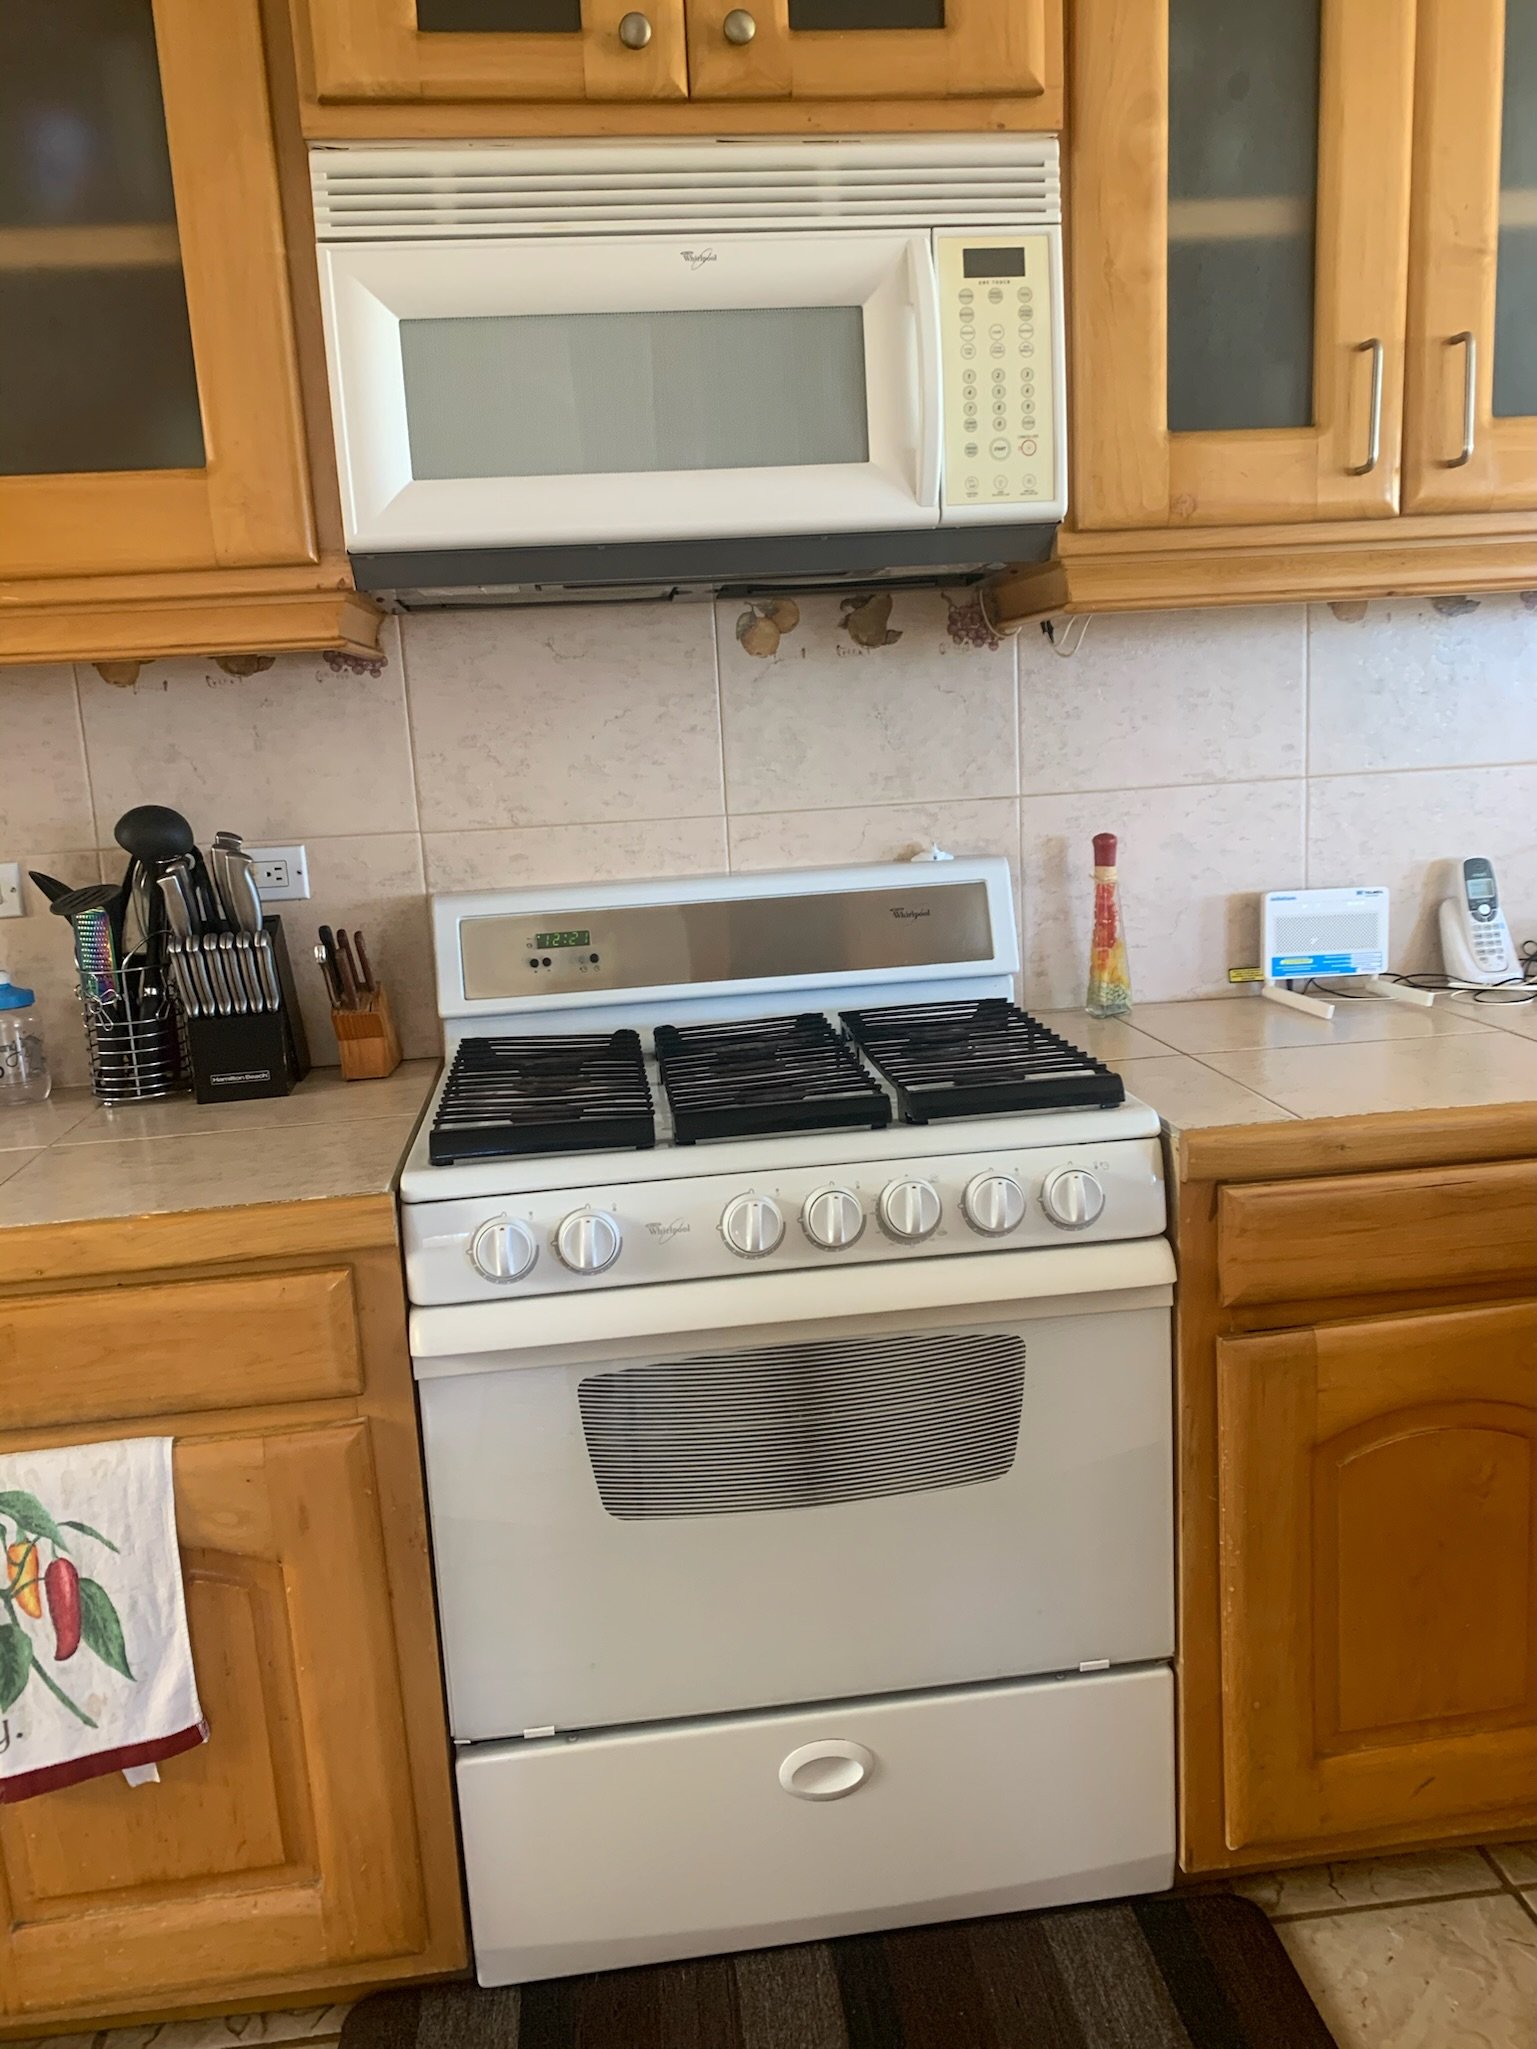
Kitchen
BEFORE >>>


DURING

PLANNING

DURING

PLANNING

AFTER

DURING >>


PLANNING

AFTER

AFTER
The farmhouse kitchen sink and faucet came from Costco. The kitchen island pendants came from a cute light shop (Ann Illuminacion) in downtown Cabo San Lucas.

PLANNING

AFTER

BEFORE
DURING

DURING
PLANNING
AFTER
OFFICE #1
The main office is on our second floor. We replaced the floor tile and removed the built-in shelving. This is currently Kyle’s office space and the room is not finished. We hope to have a glass sliding door here to close off the space in the future, as this room is exposed and the first area you see when you walk upstairs. For now, it’s the old bookcase that divides the space and is used as a backdrop for Kyle’s work calls. We also hope for an awesome light fixture to hang from the dome.

BEFORE
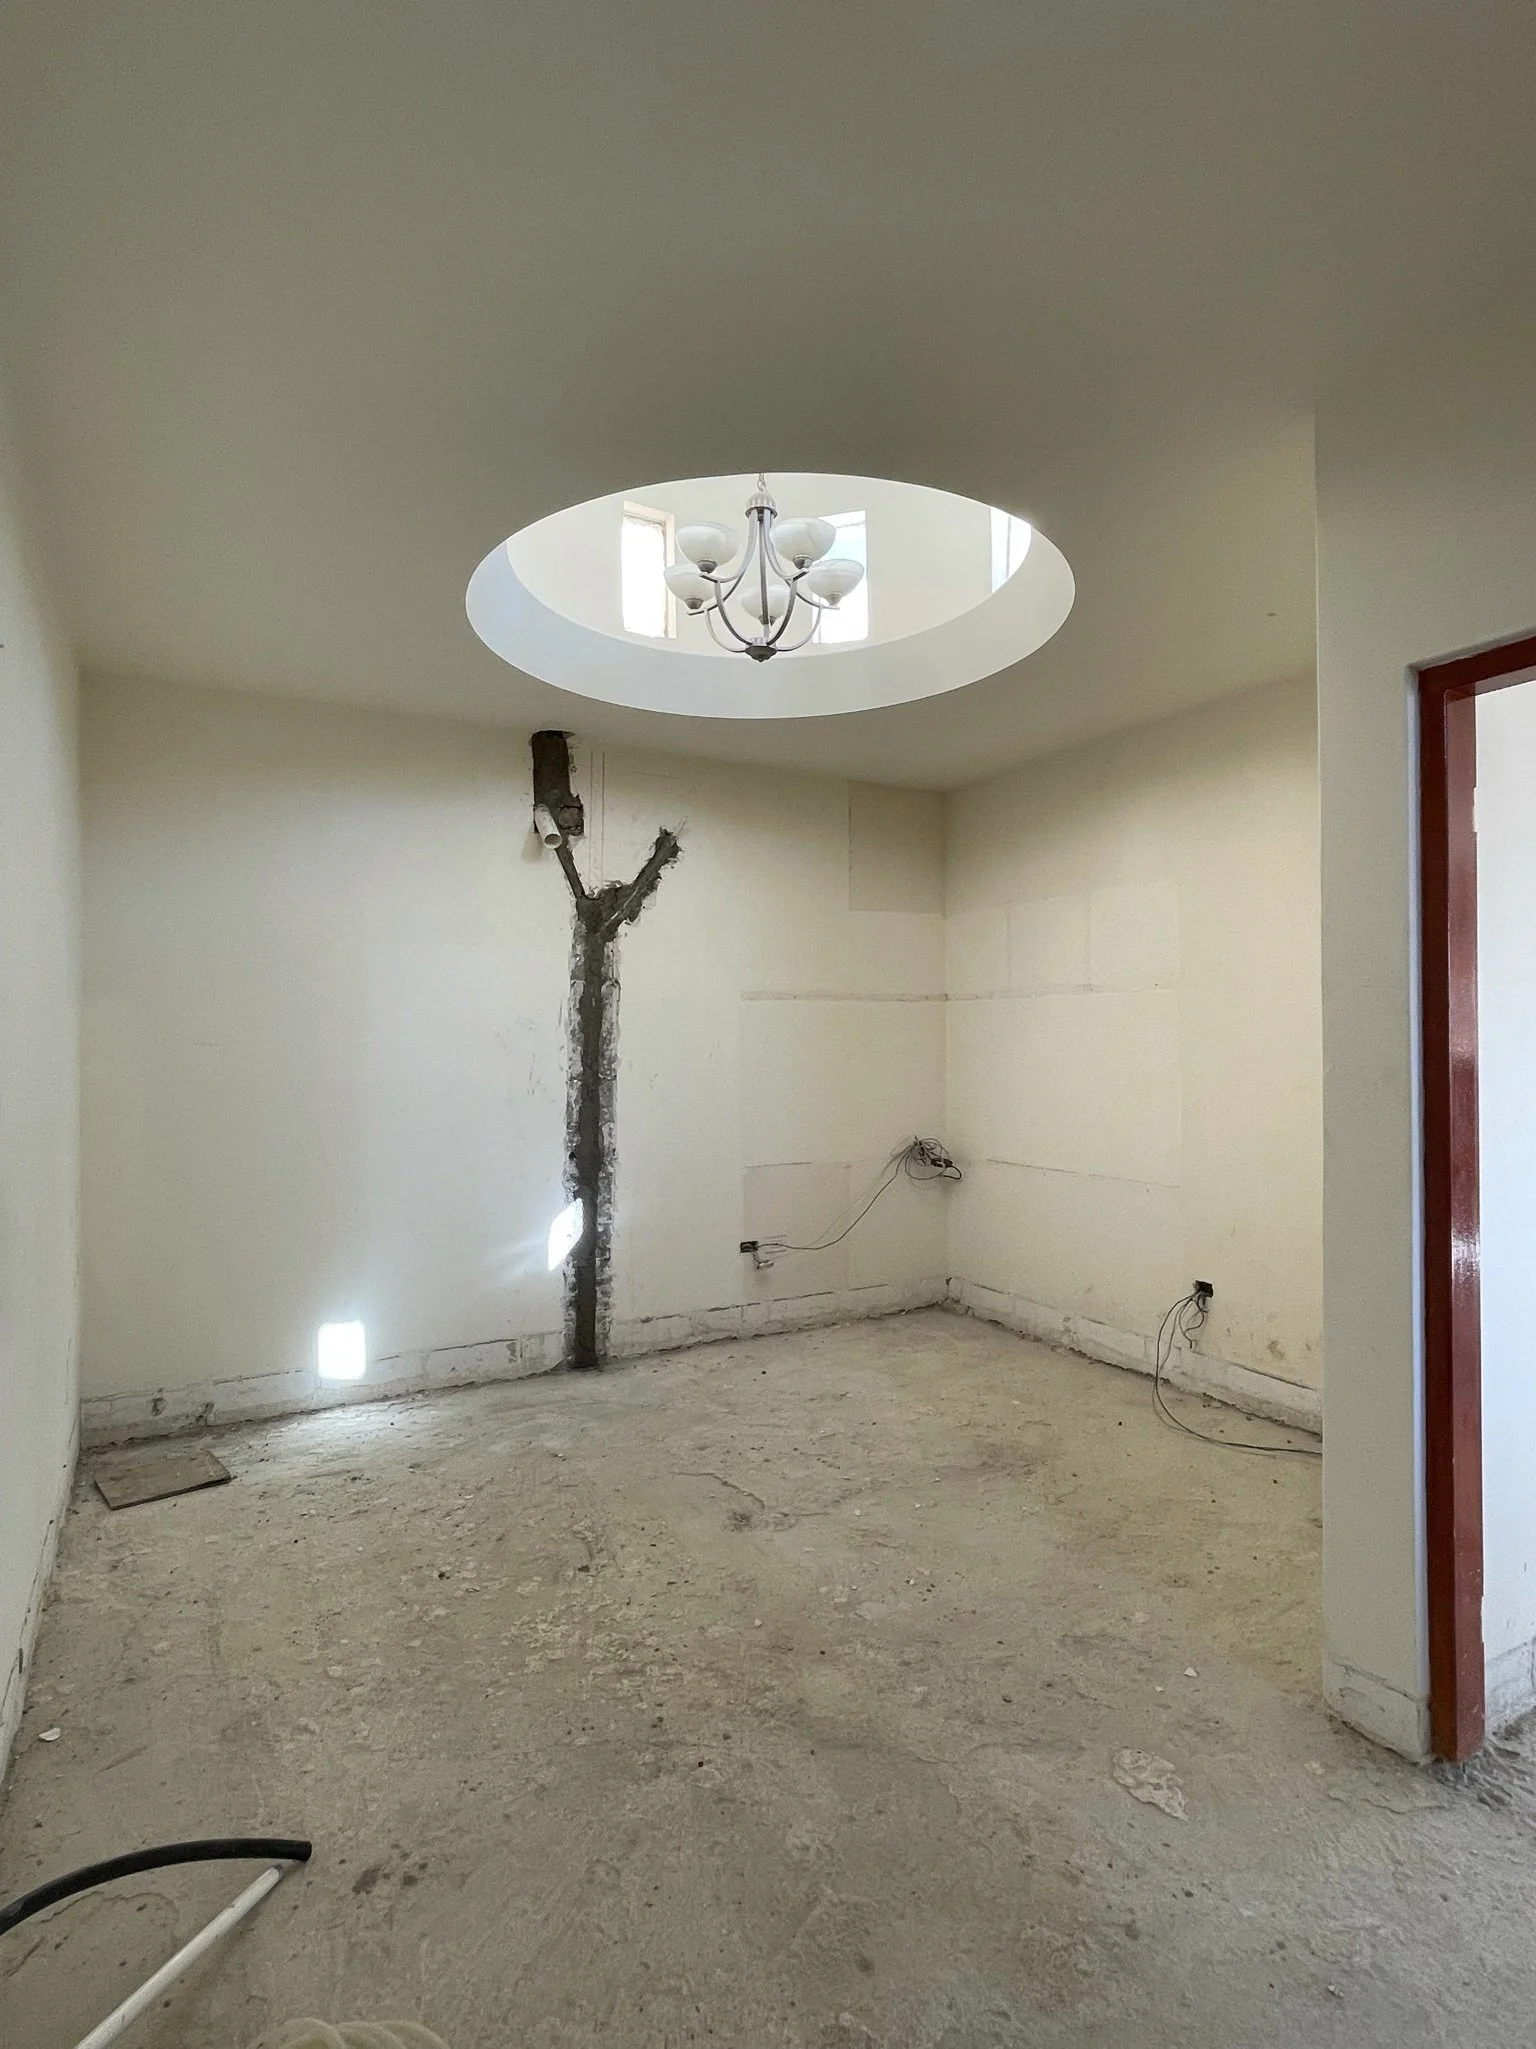
DURING
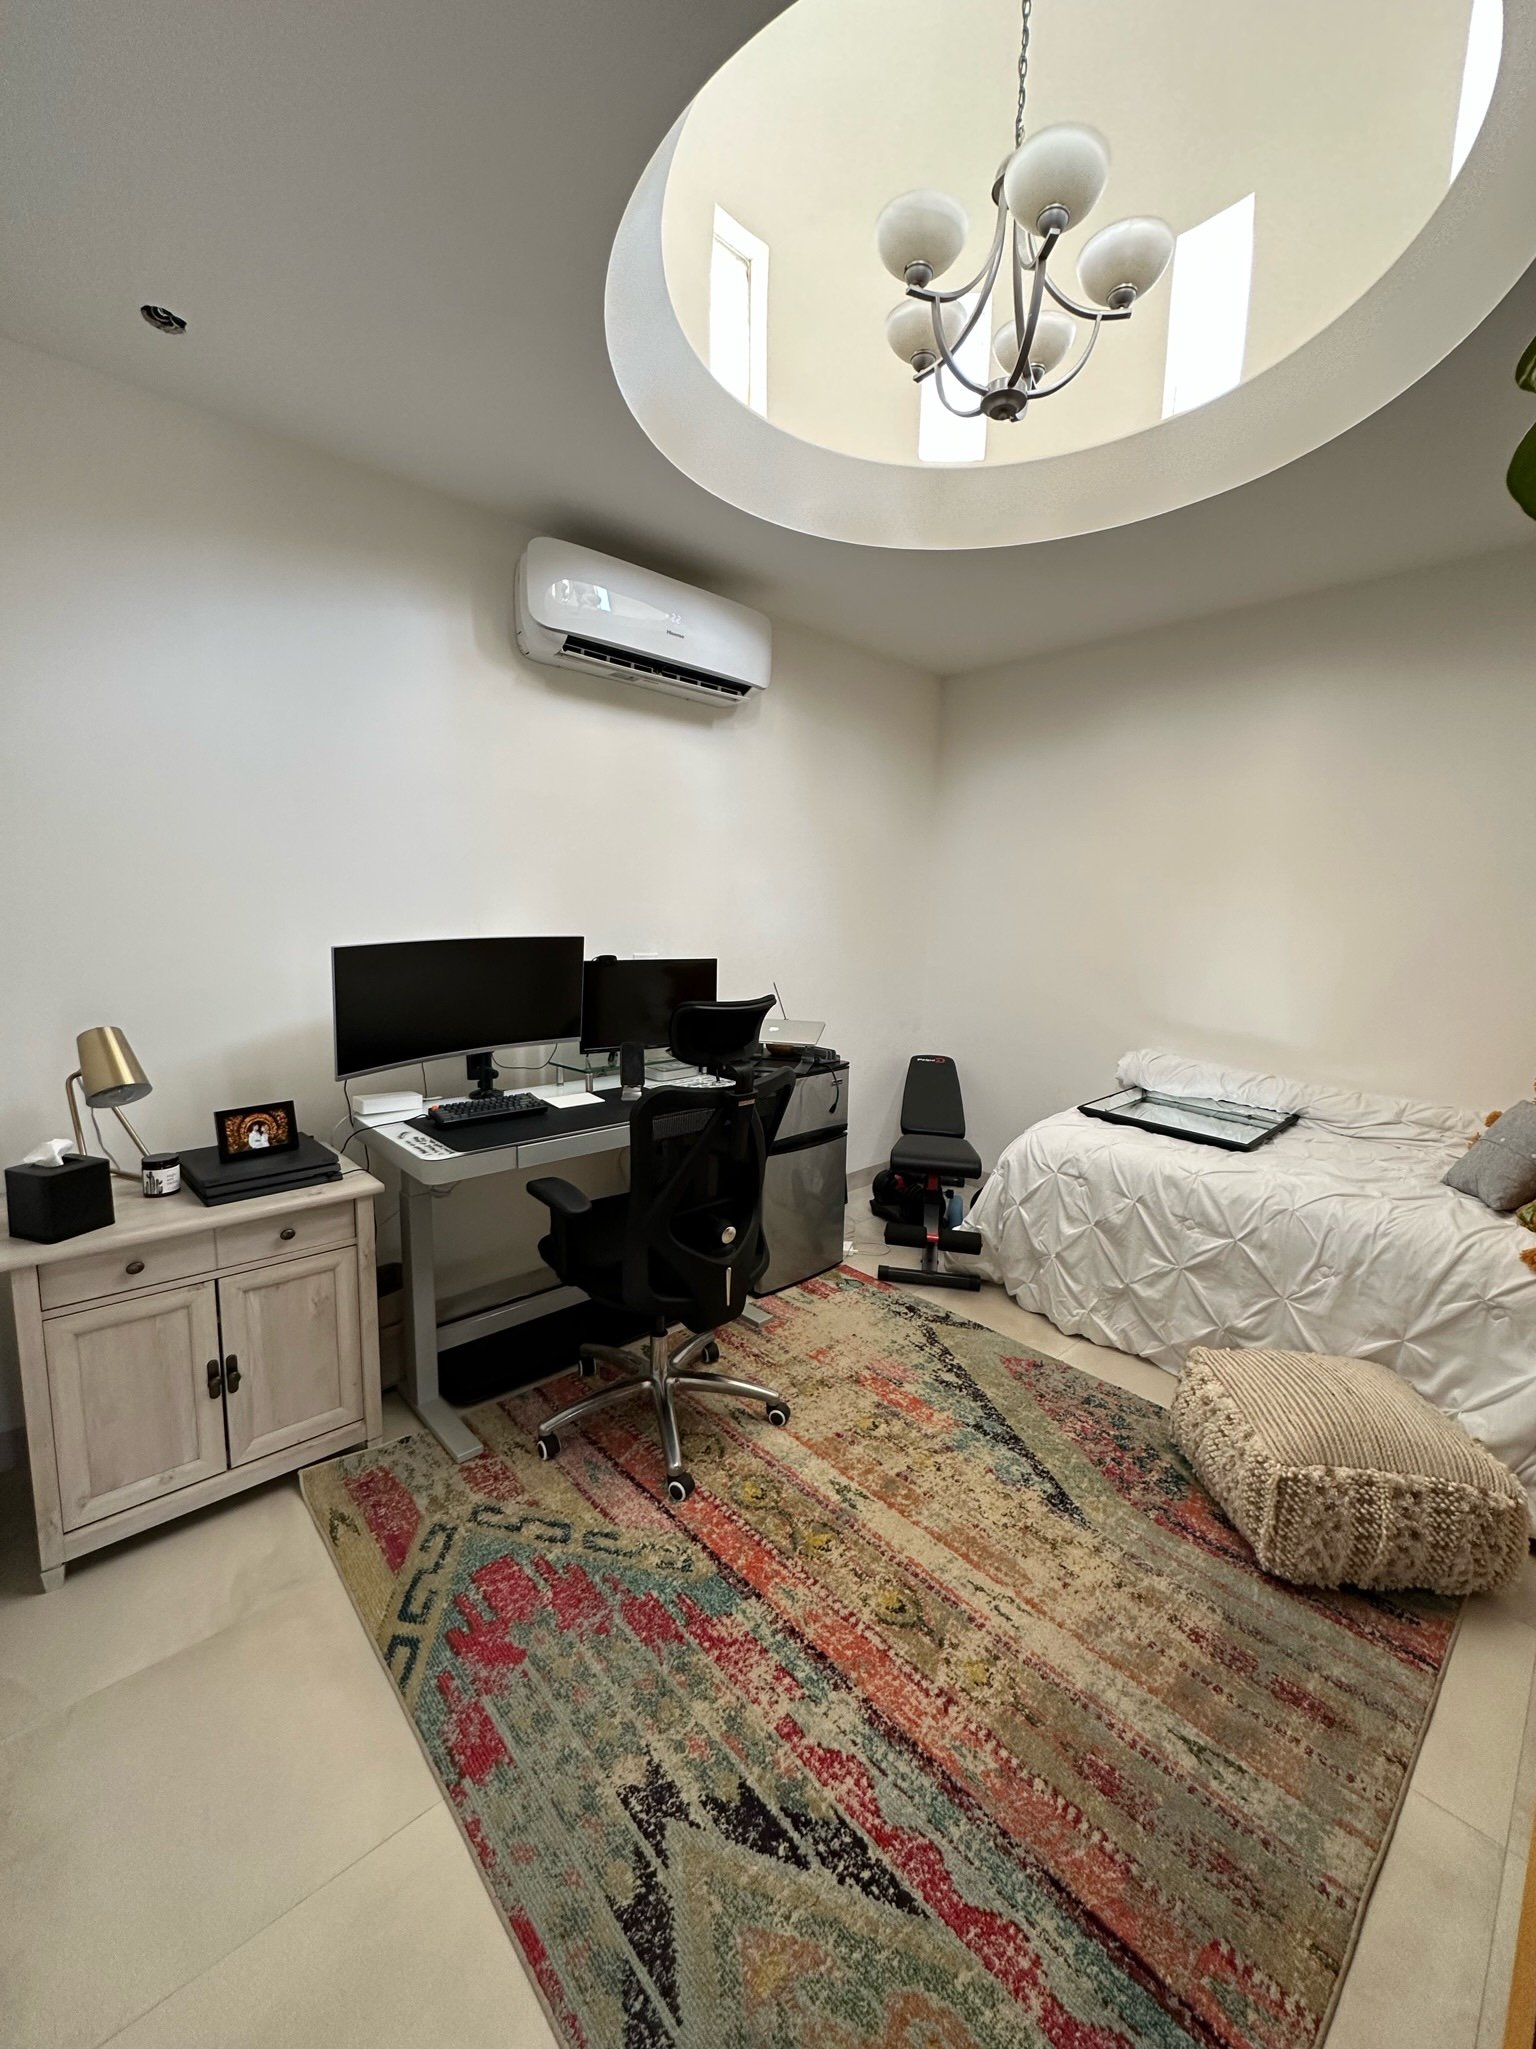
AFTER>>

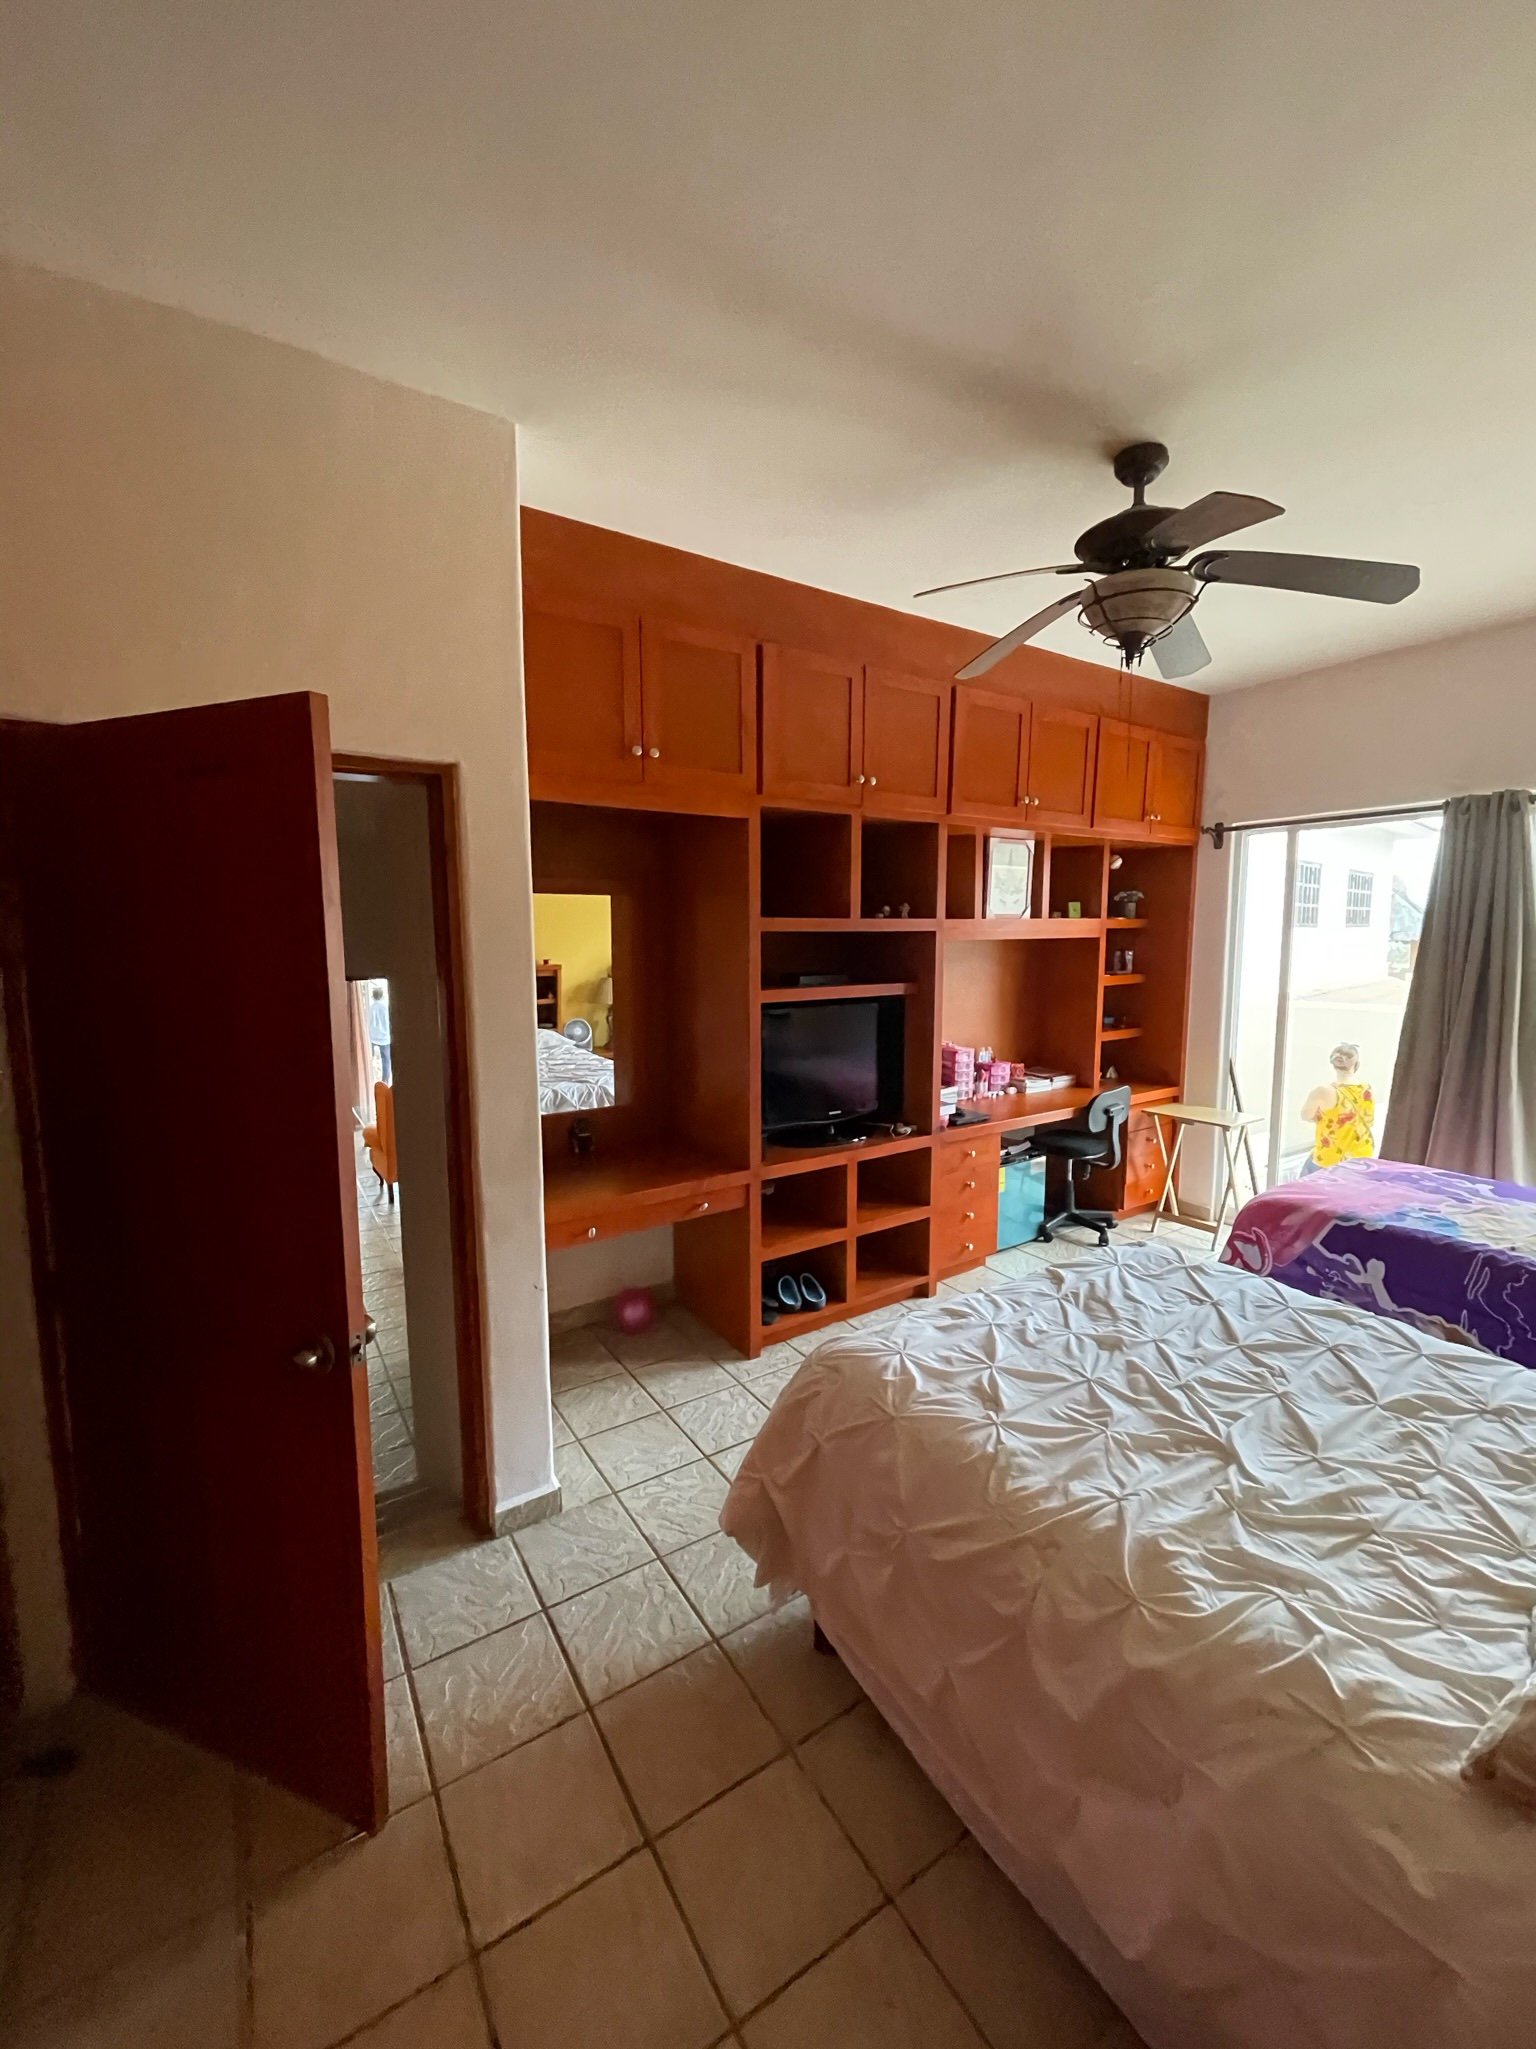
GUEST BEDROOM/OFFICE #2
Below is our ‘before pic’ of this first floor guest room. We didn’t do any major changes in here — just some paint (no more yellow wall), decor and replaced the ceiling fan. One of the beds went upstairs into Kyle’s office to free up a little space. Kyle recently ripped out part of the built-ins to create room for a standing desk, as Leigh works to make this room her official office space. In the future, we hope to paint the built-ins to remove some of the ‘warm’ wood tones to fit more of our style. Since this will be a future key guest room, potentially getting a nice pull-out sofa bed, rug, nightstands and good lighting to make it a bit more welcoming, but still functional as an office.
BEFORE>>

UPSTAIRS GUEST BEDROOM
No reno here - just cosmetic upgrades with some fresh paint and decor. Similar to the downstairs guest bedroom, we would love to paint the built-ins to get rid of the warm, wood tones and add a nice rug, lamps, etc.


MAIN BEDROOM
During the reno, we replaced the floor tile and switched up the room’s layout to optimize the ocean views from our bed. We installed automatic blinds for privacy and to prevent heat, but are still working on curtains for the windows. The bathroom door was shifted down to the end of the room to create more closet space on the other side of the bathroom. The rest is mostly the same. We hope to eventually upgrade our furniture, setup a makeup vanity and workout corner, look into some cool wall paper and overall make the space feel much cozier.
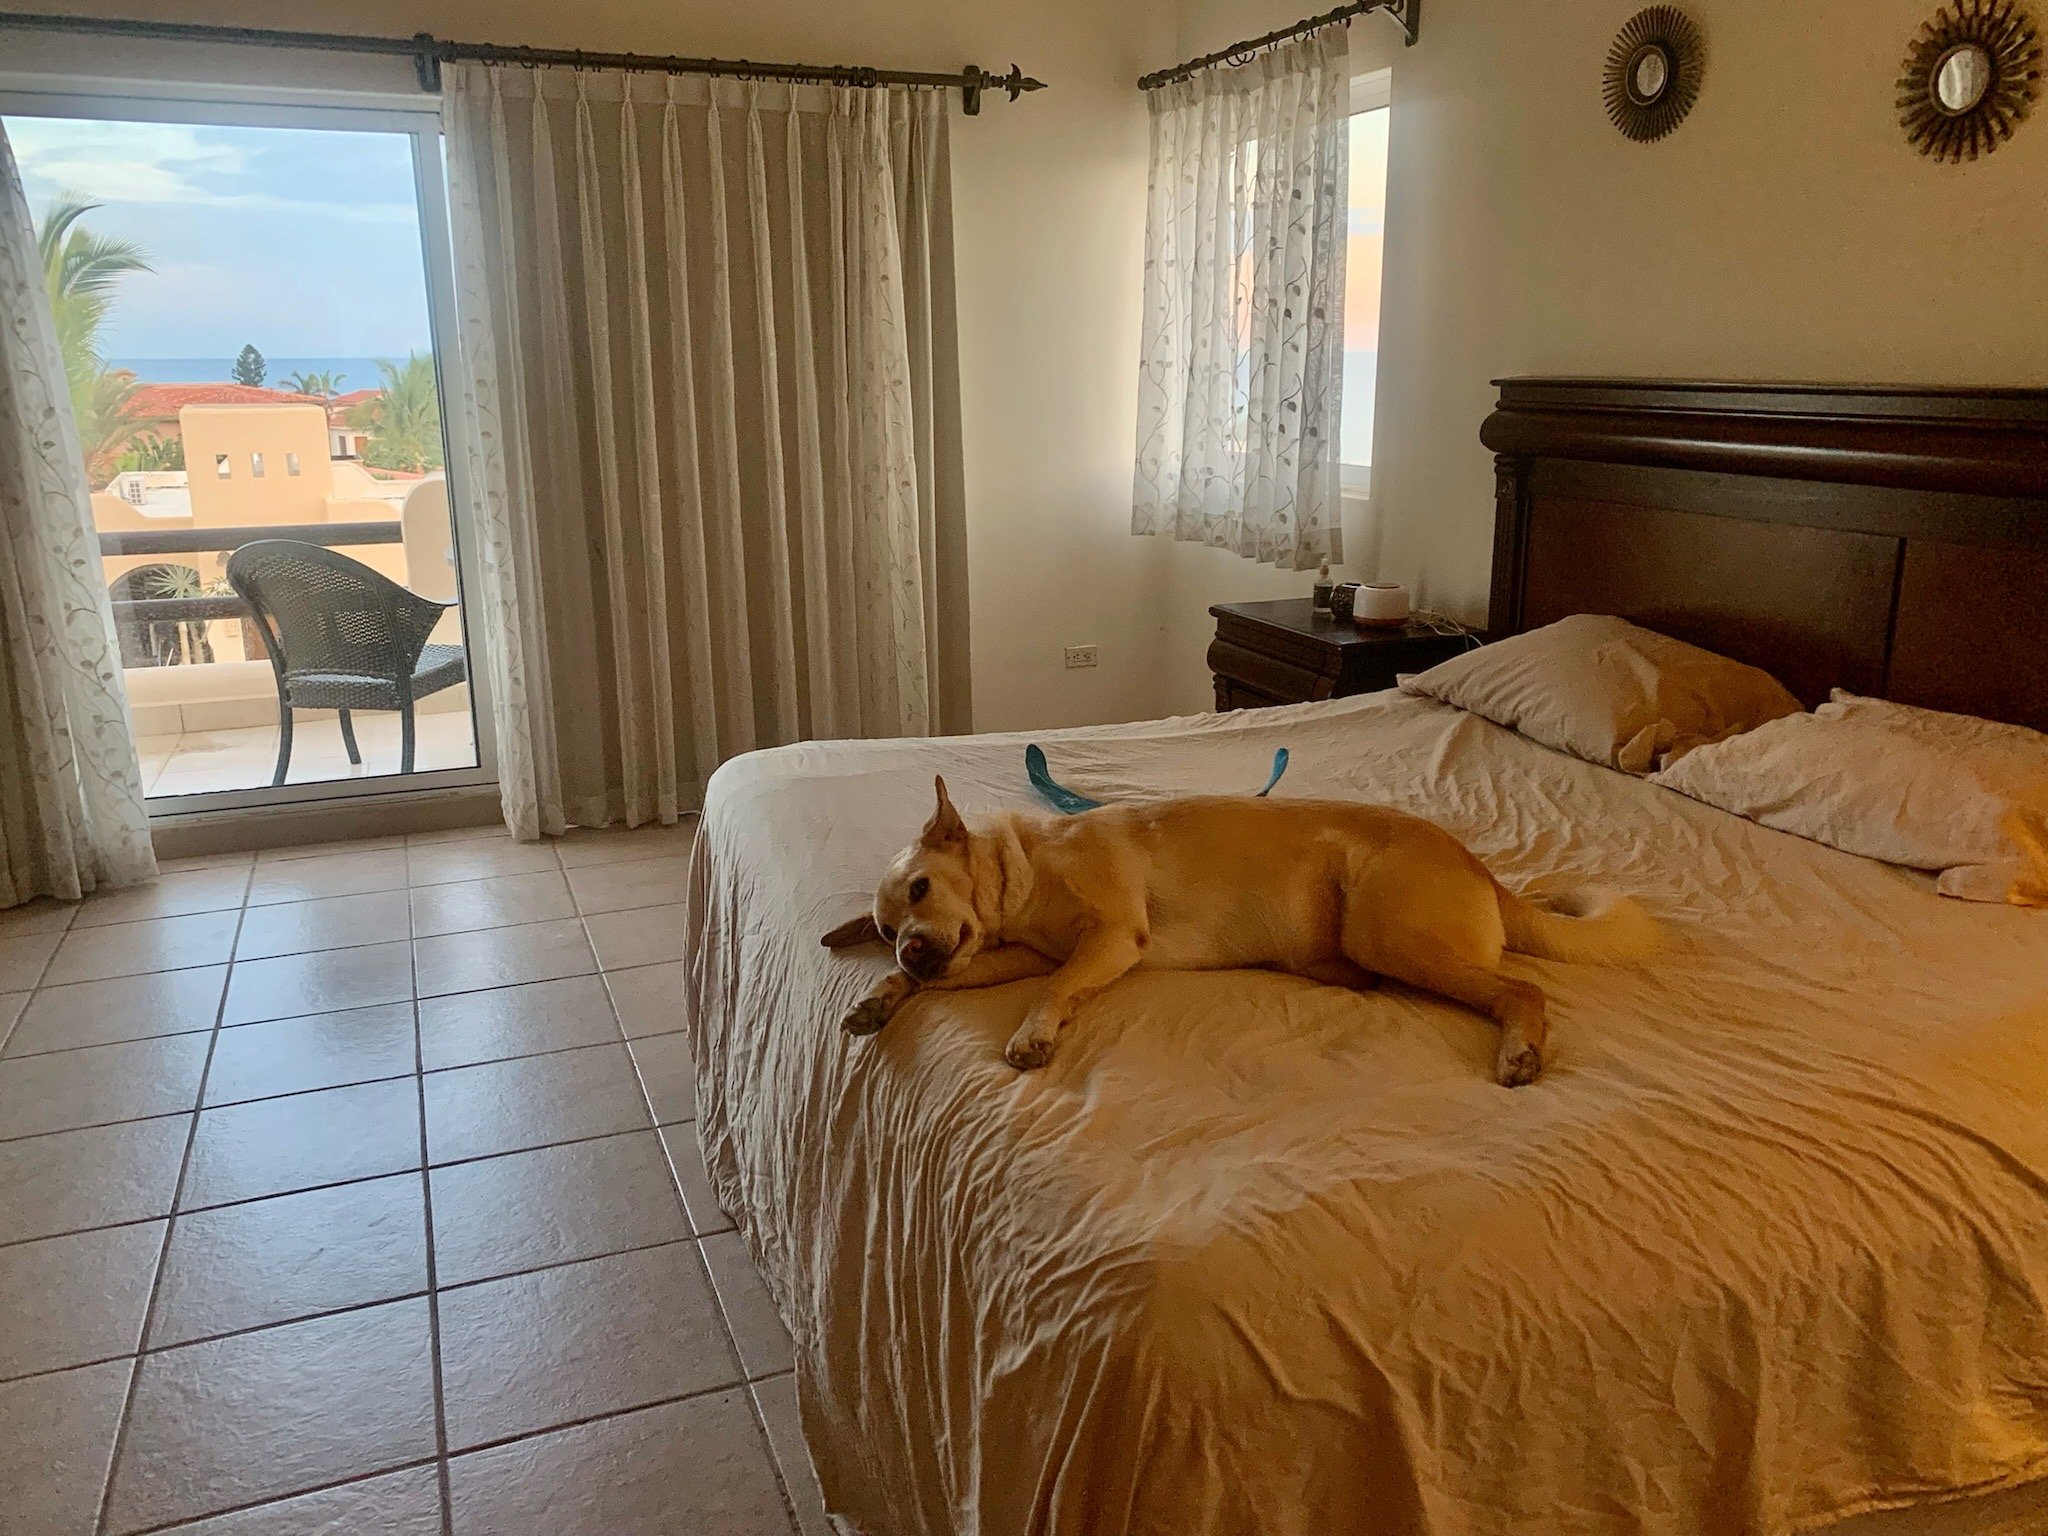
BEFORE

PLANNING
DURING

AFTER
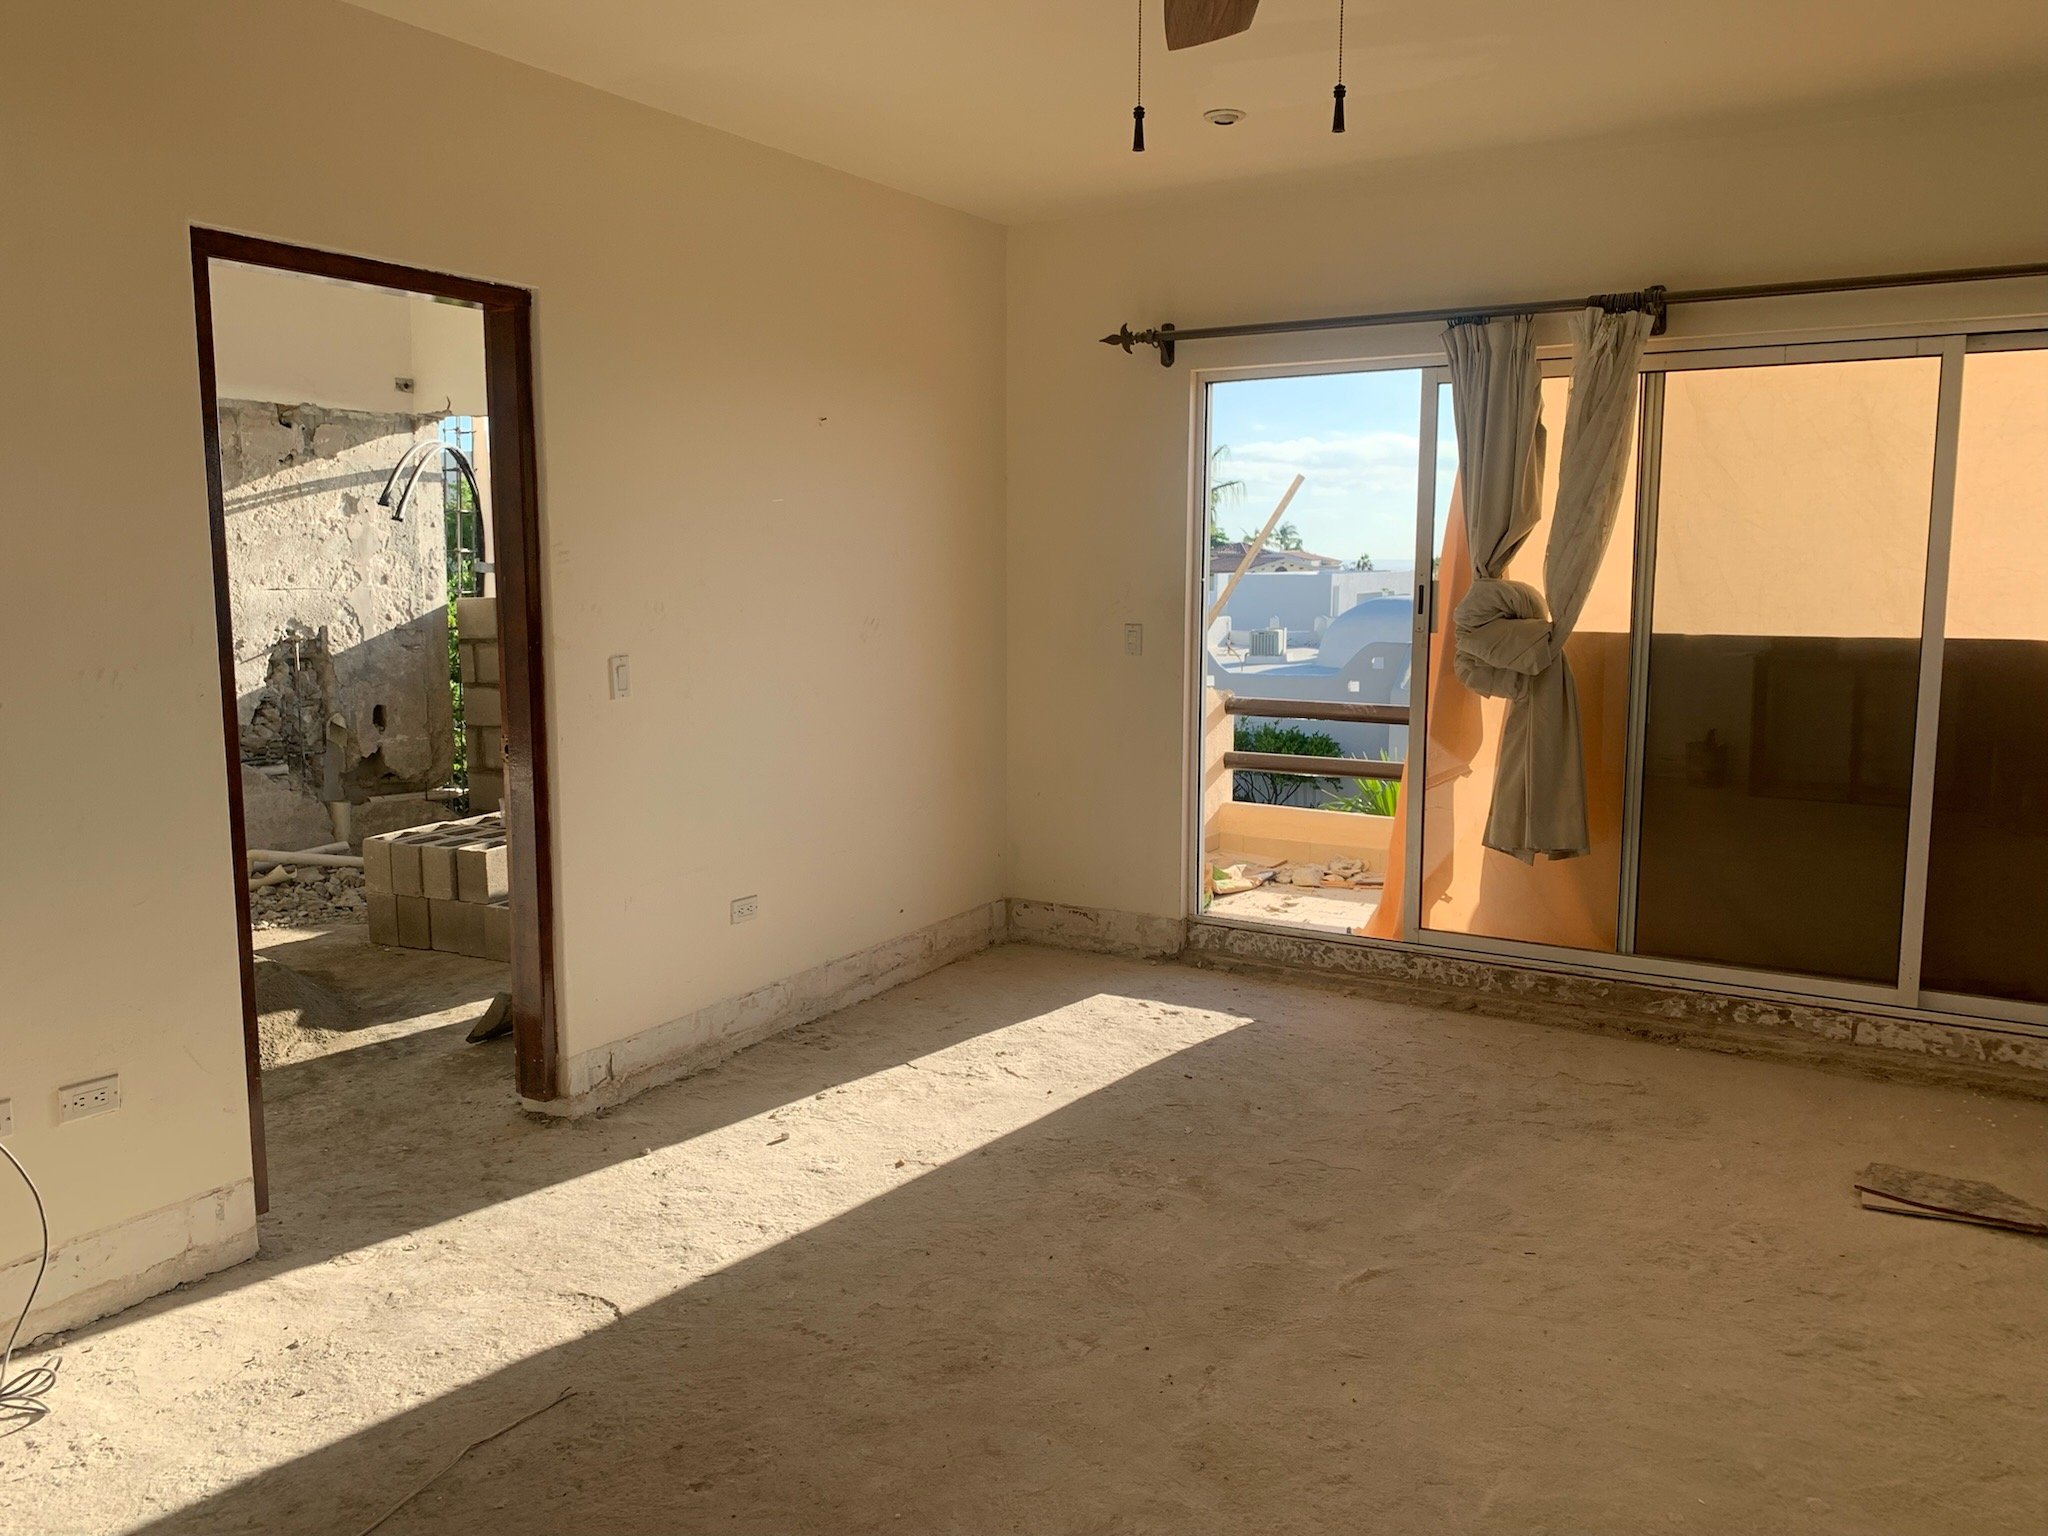
MAIN BATH
By extending the downstairs living space over the front patio, it also allowed us to also extend out the bathroom. The extension space supported a large walk-in shower and more room for a double-sink and vanity. The washer dryer was built into the bathroom vanity space, complete with folding station to create ease for laundry day. The mirror was custom made and included an LED backlit lighting feature.

DURING
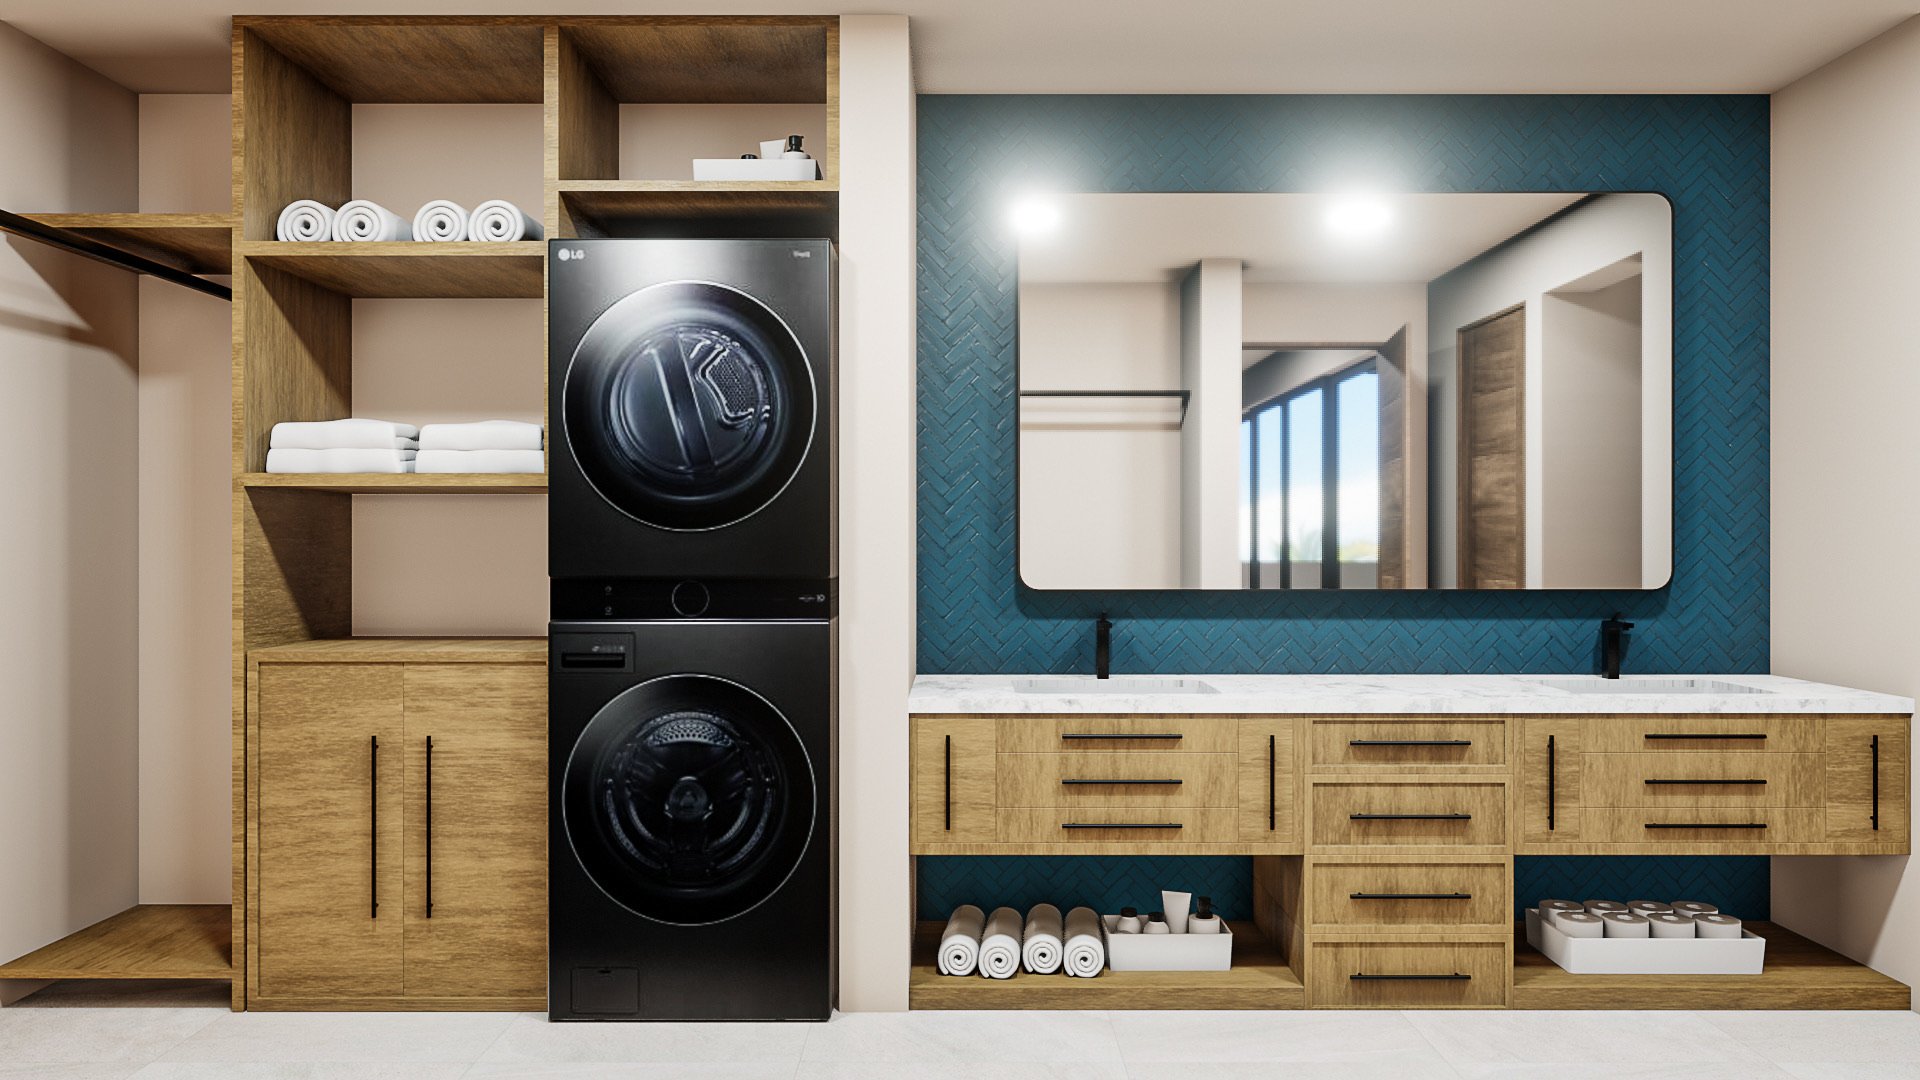
PLANNING

AFTER >>


BEFORE

AFTER
The original closet was a tiny enclosed space with built-ins, which would now be turned into a wrap-around, open concept closet. The shelving was all also custom made, with pull-out drawers for the shoes and built-in closet LED lighting which look great at nighttime.
The original bathroom had a giant (slippery) marble step up into a step down tub/shower combo, along with a marble step up to the toilet. No mas!
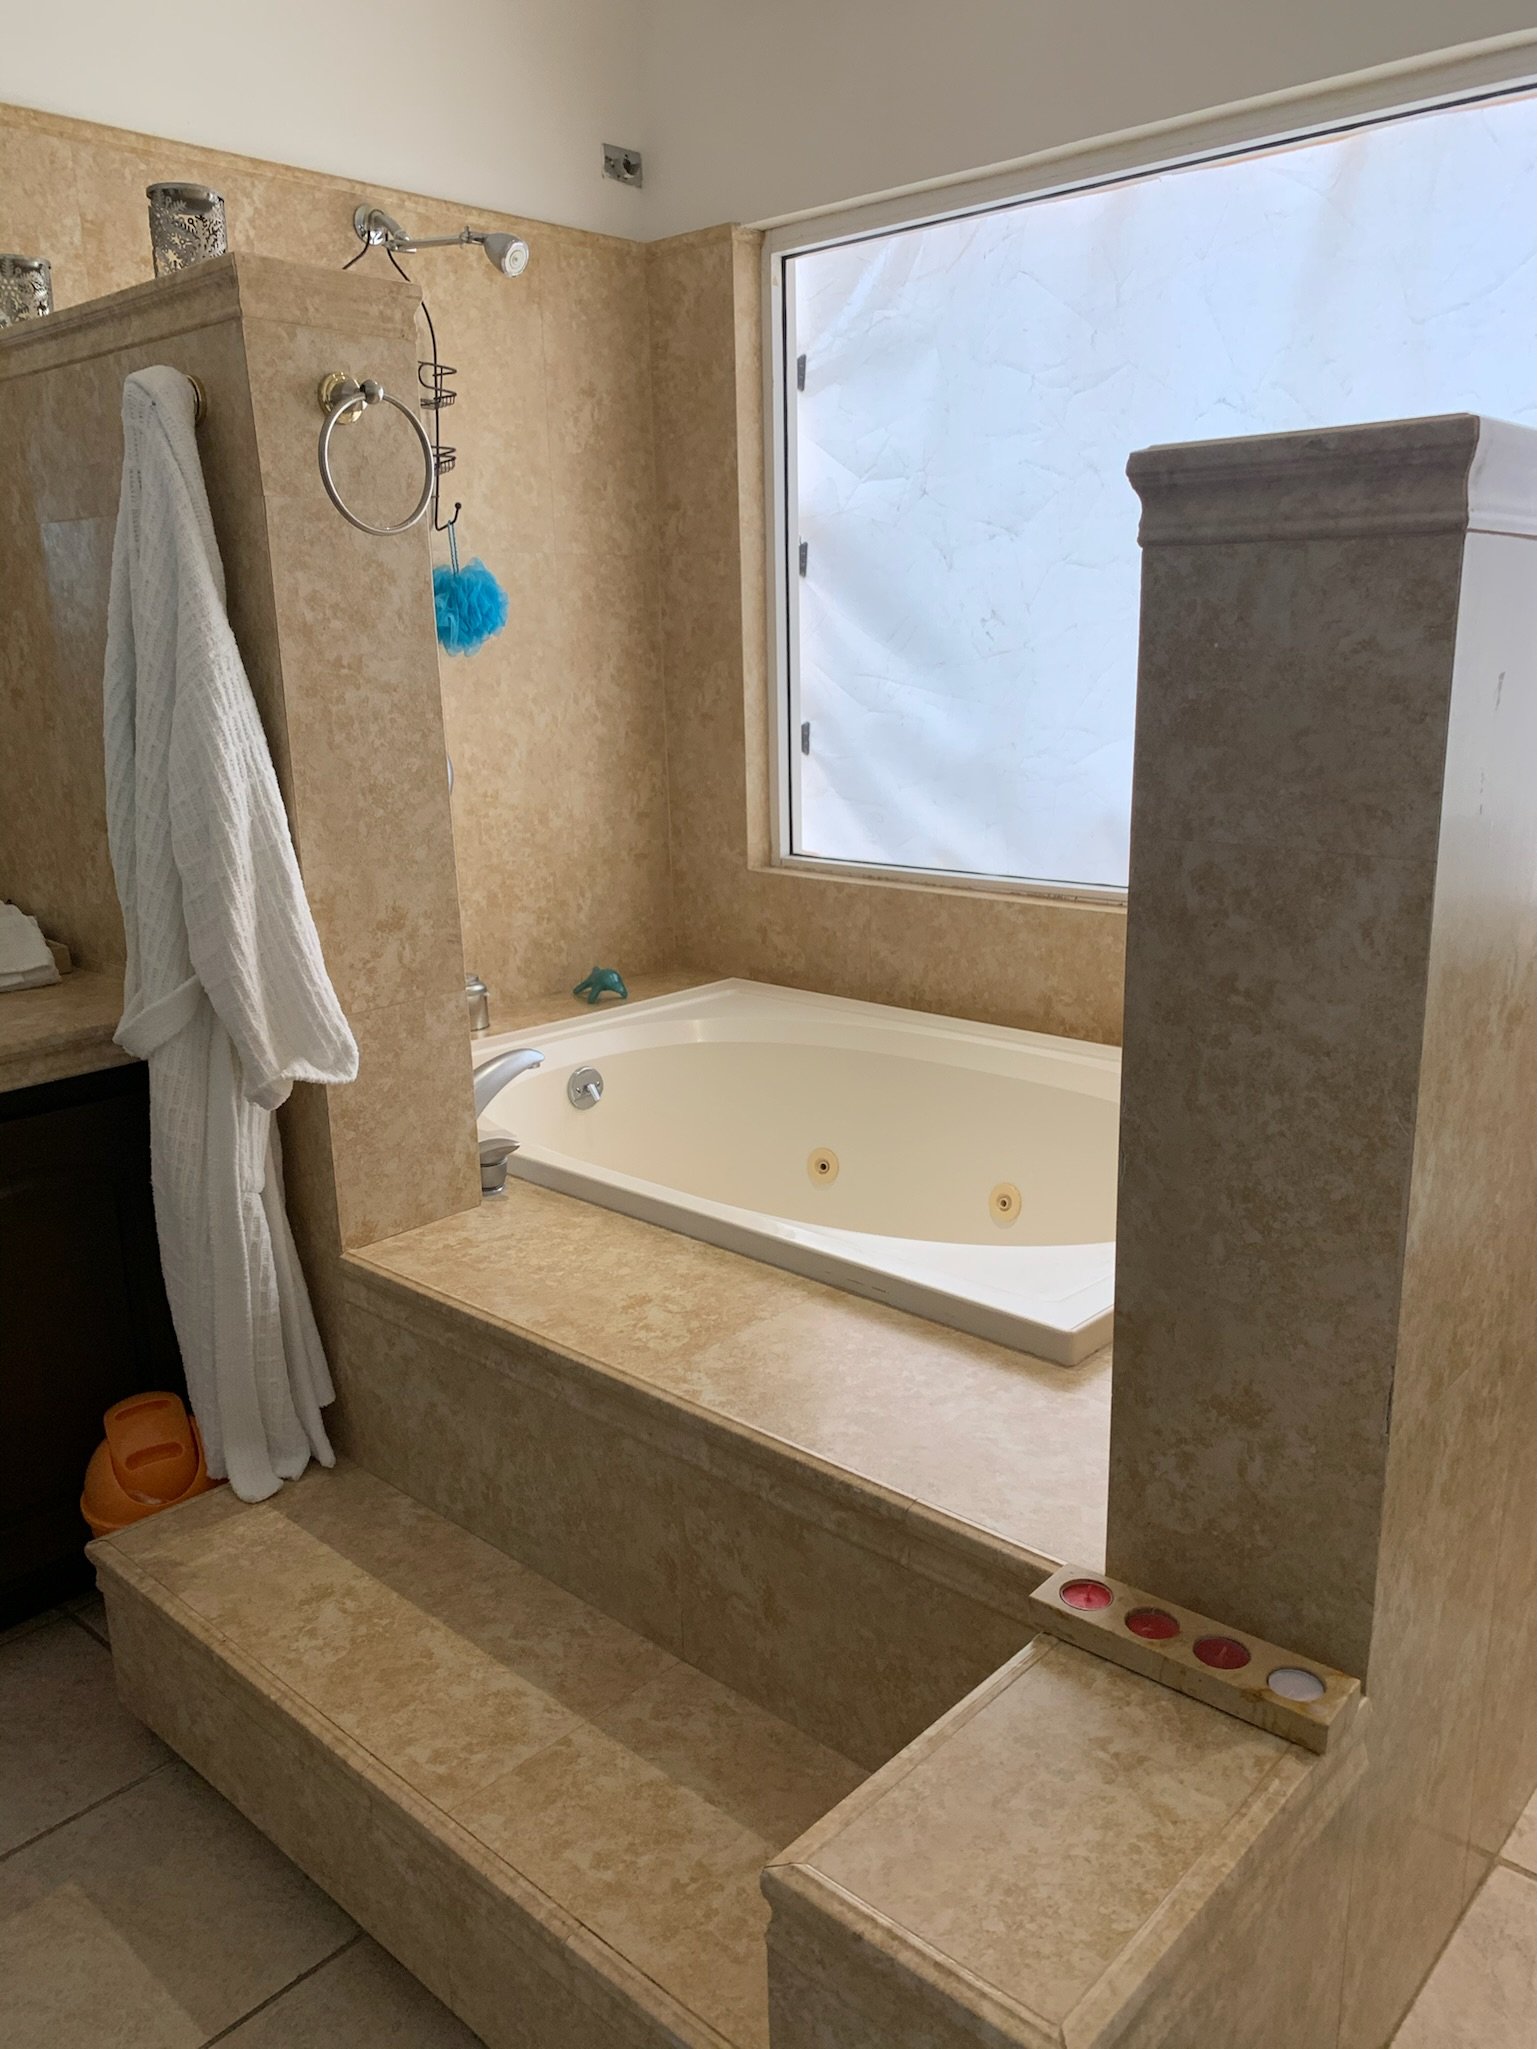
BEFORE

DURING

AFTER

BEFORE

AFTER
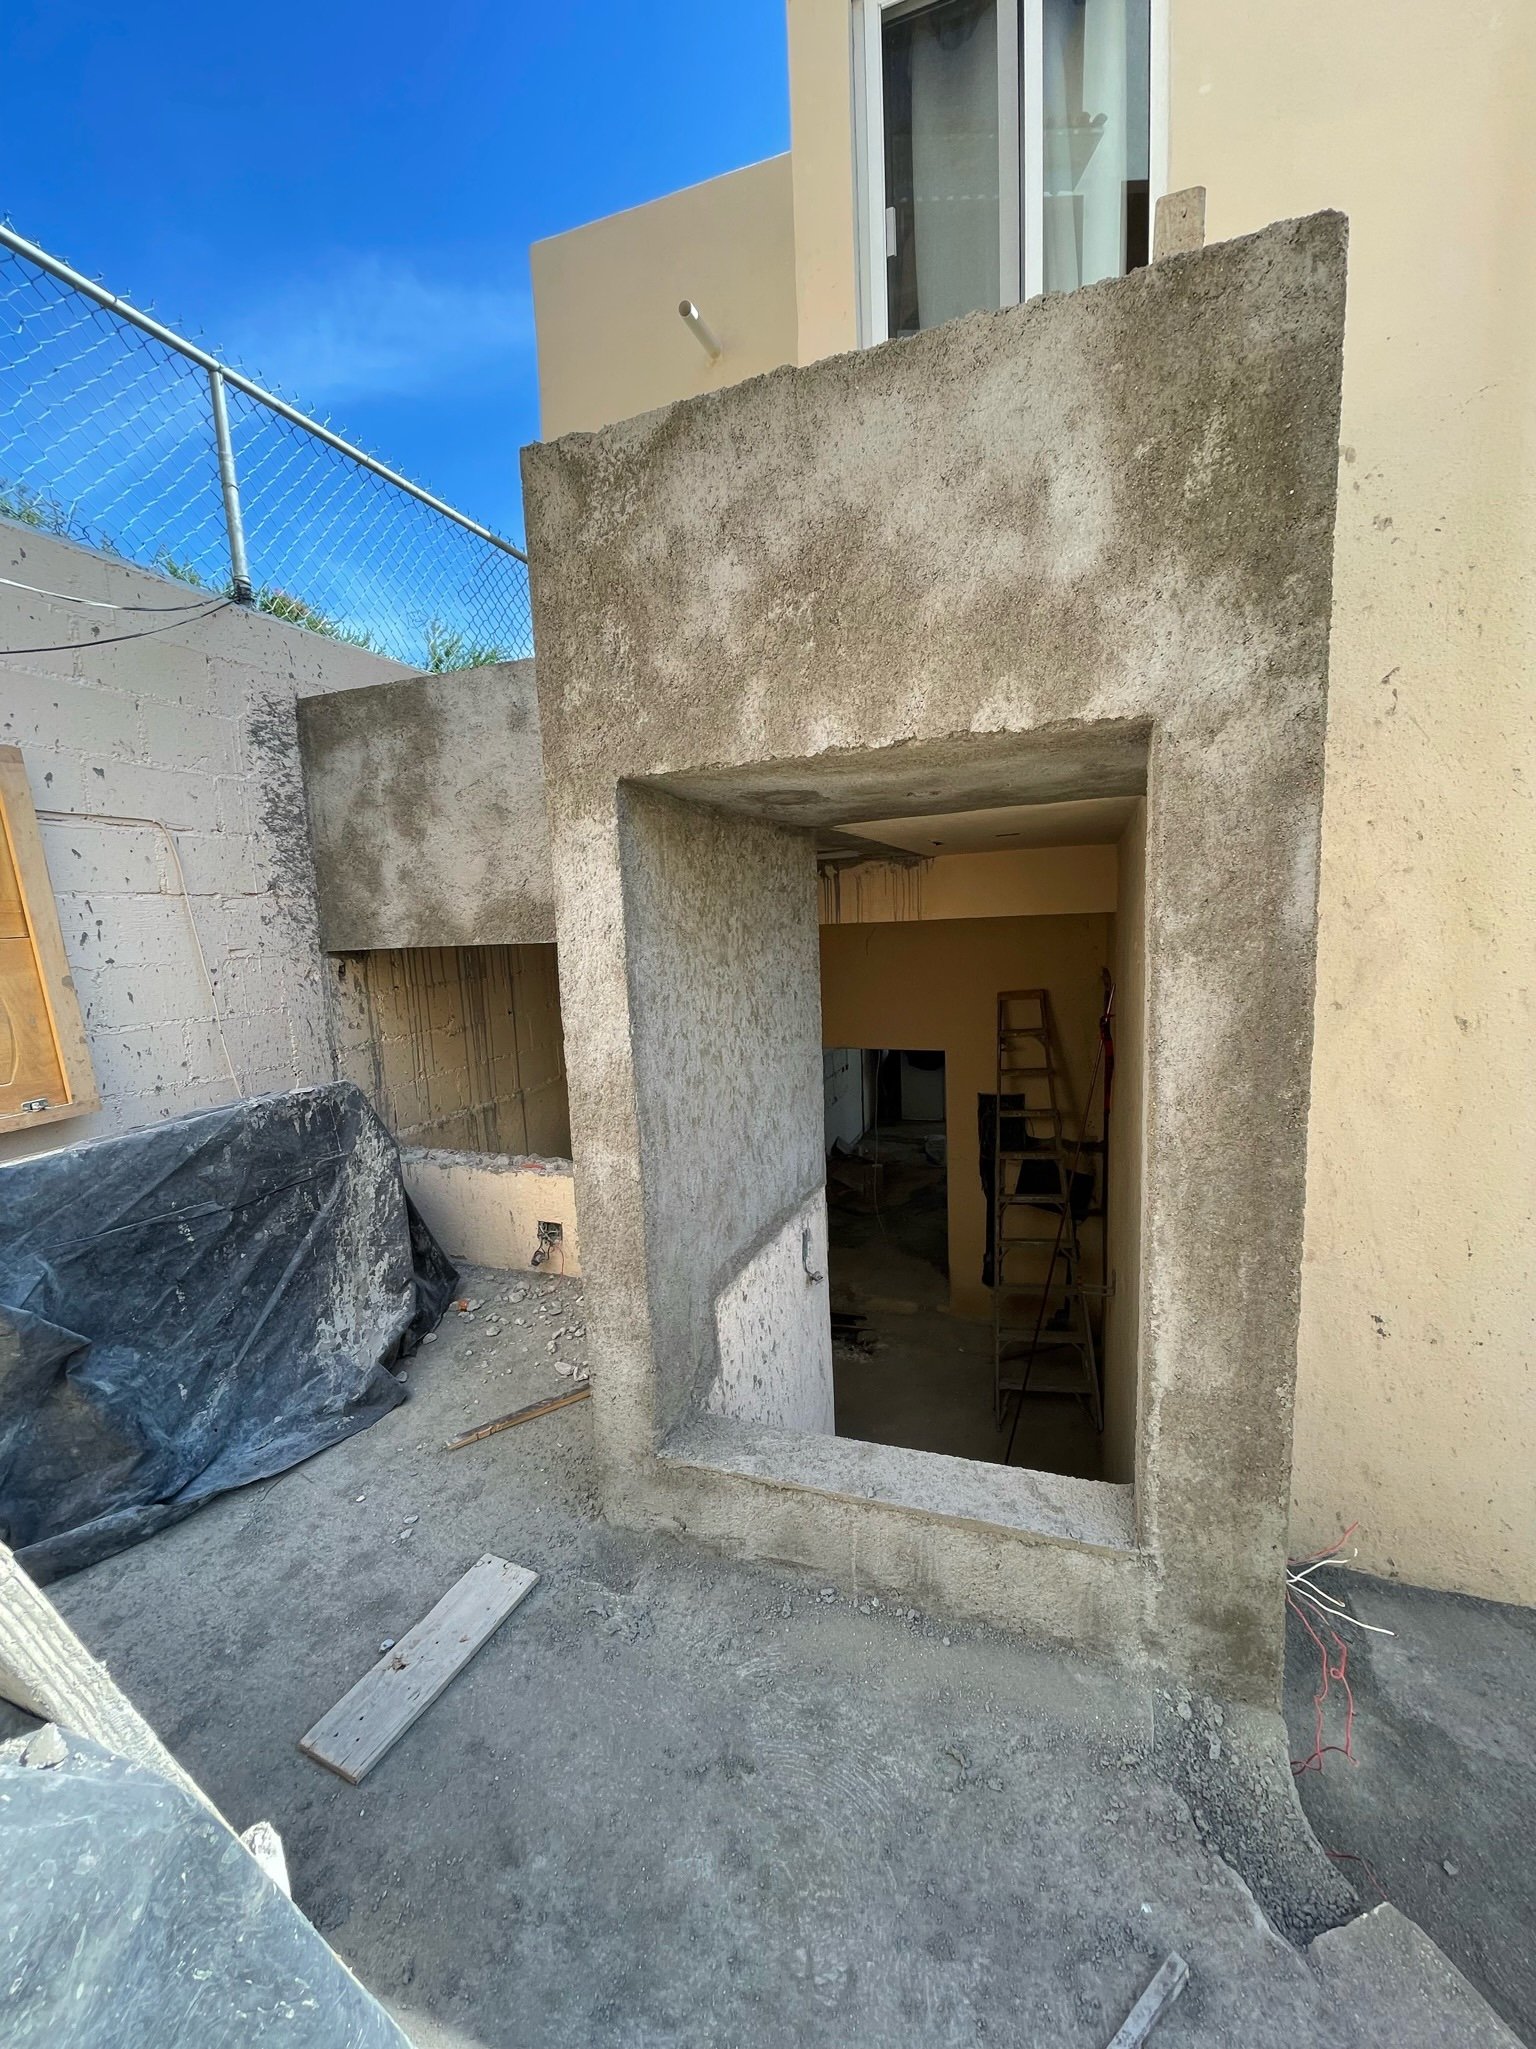
BACKYARD
These photos show the mudroom getting enclosed and the backdoor now added in to walk down into the kitchen extension space. We added in a new concrete planter boxers on the right sides to create an area for an herb garden and soon, will be planting more palm trees and tropical flowers to match the left side planters. The back wall will eventually be re-painted to match the house.

BEFORE
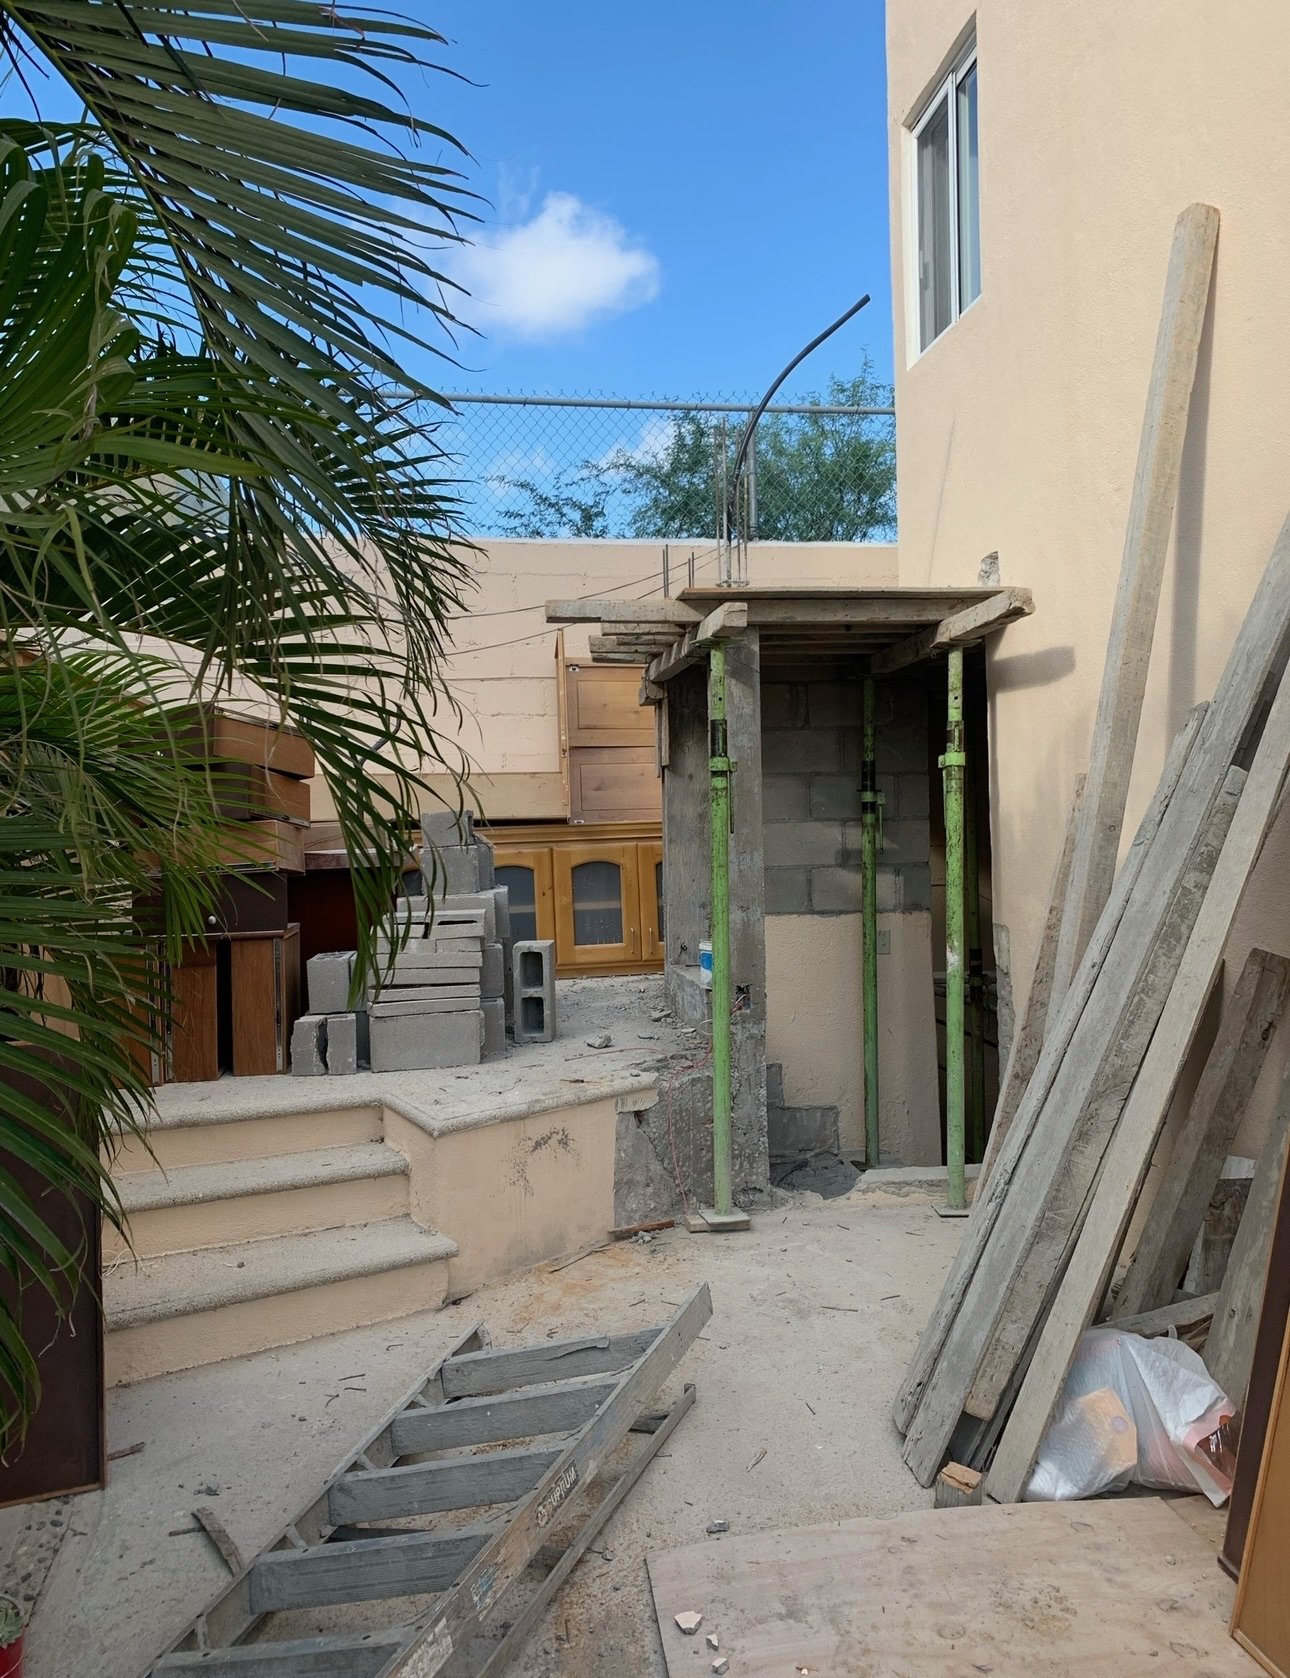
DURING

AFTER

Kennedy modeling with the herbs.
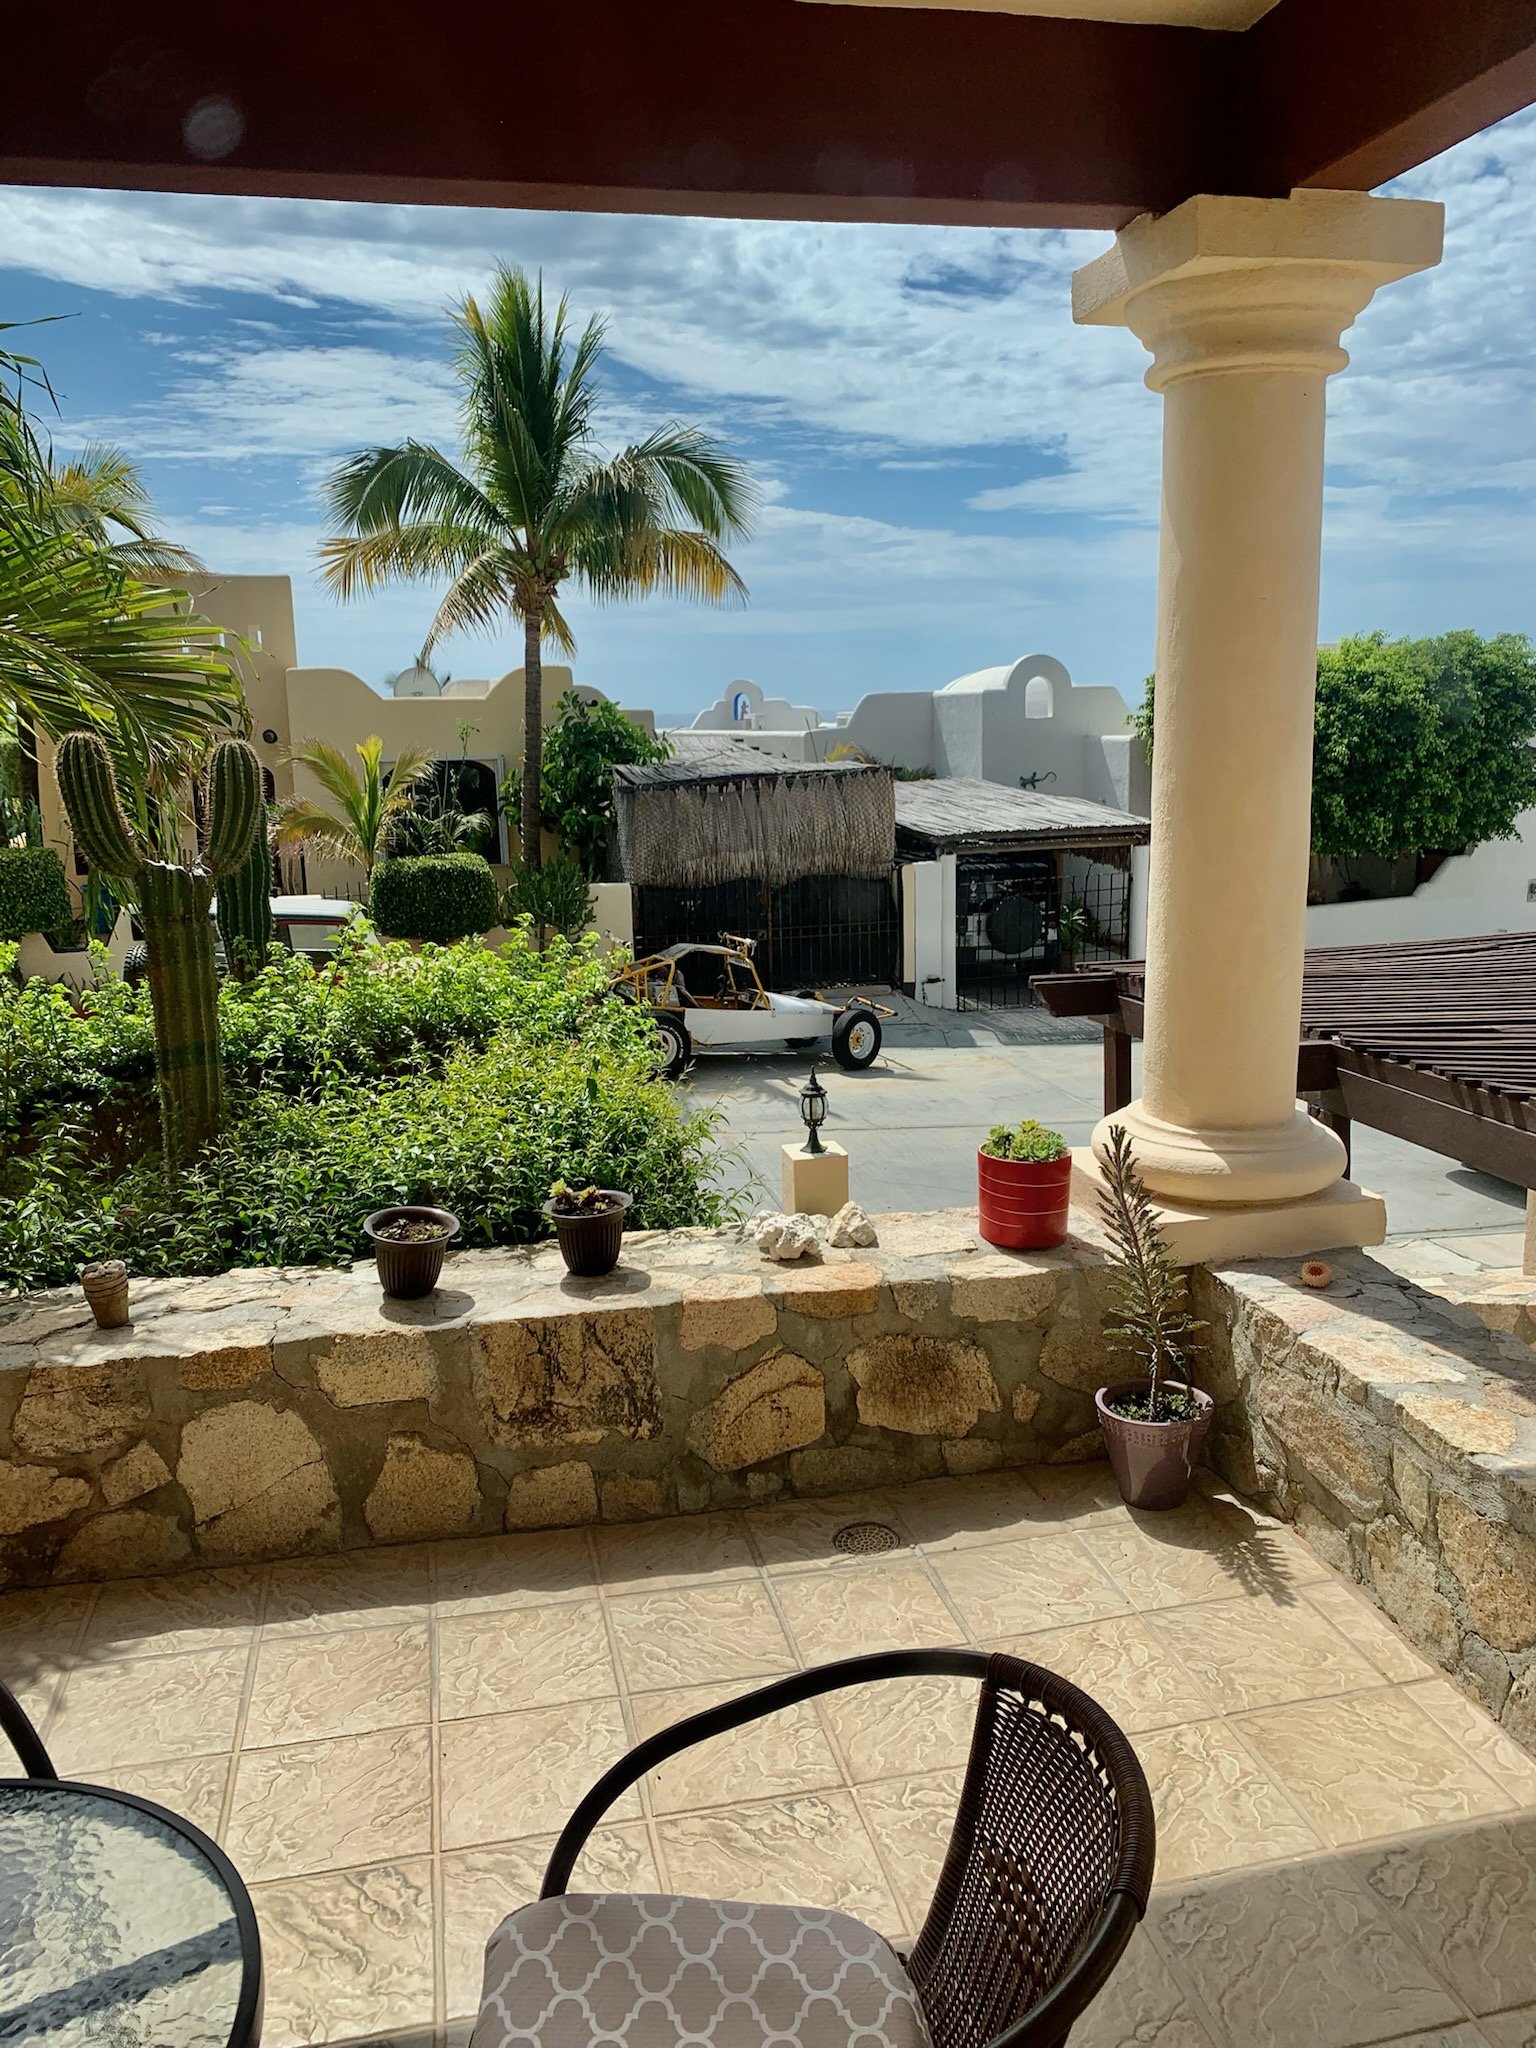
FRONT PATIO
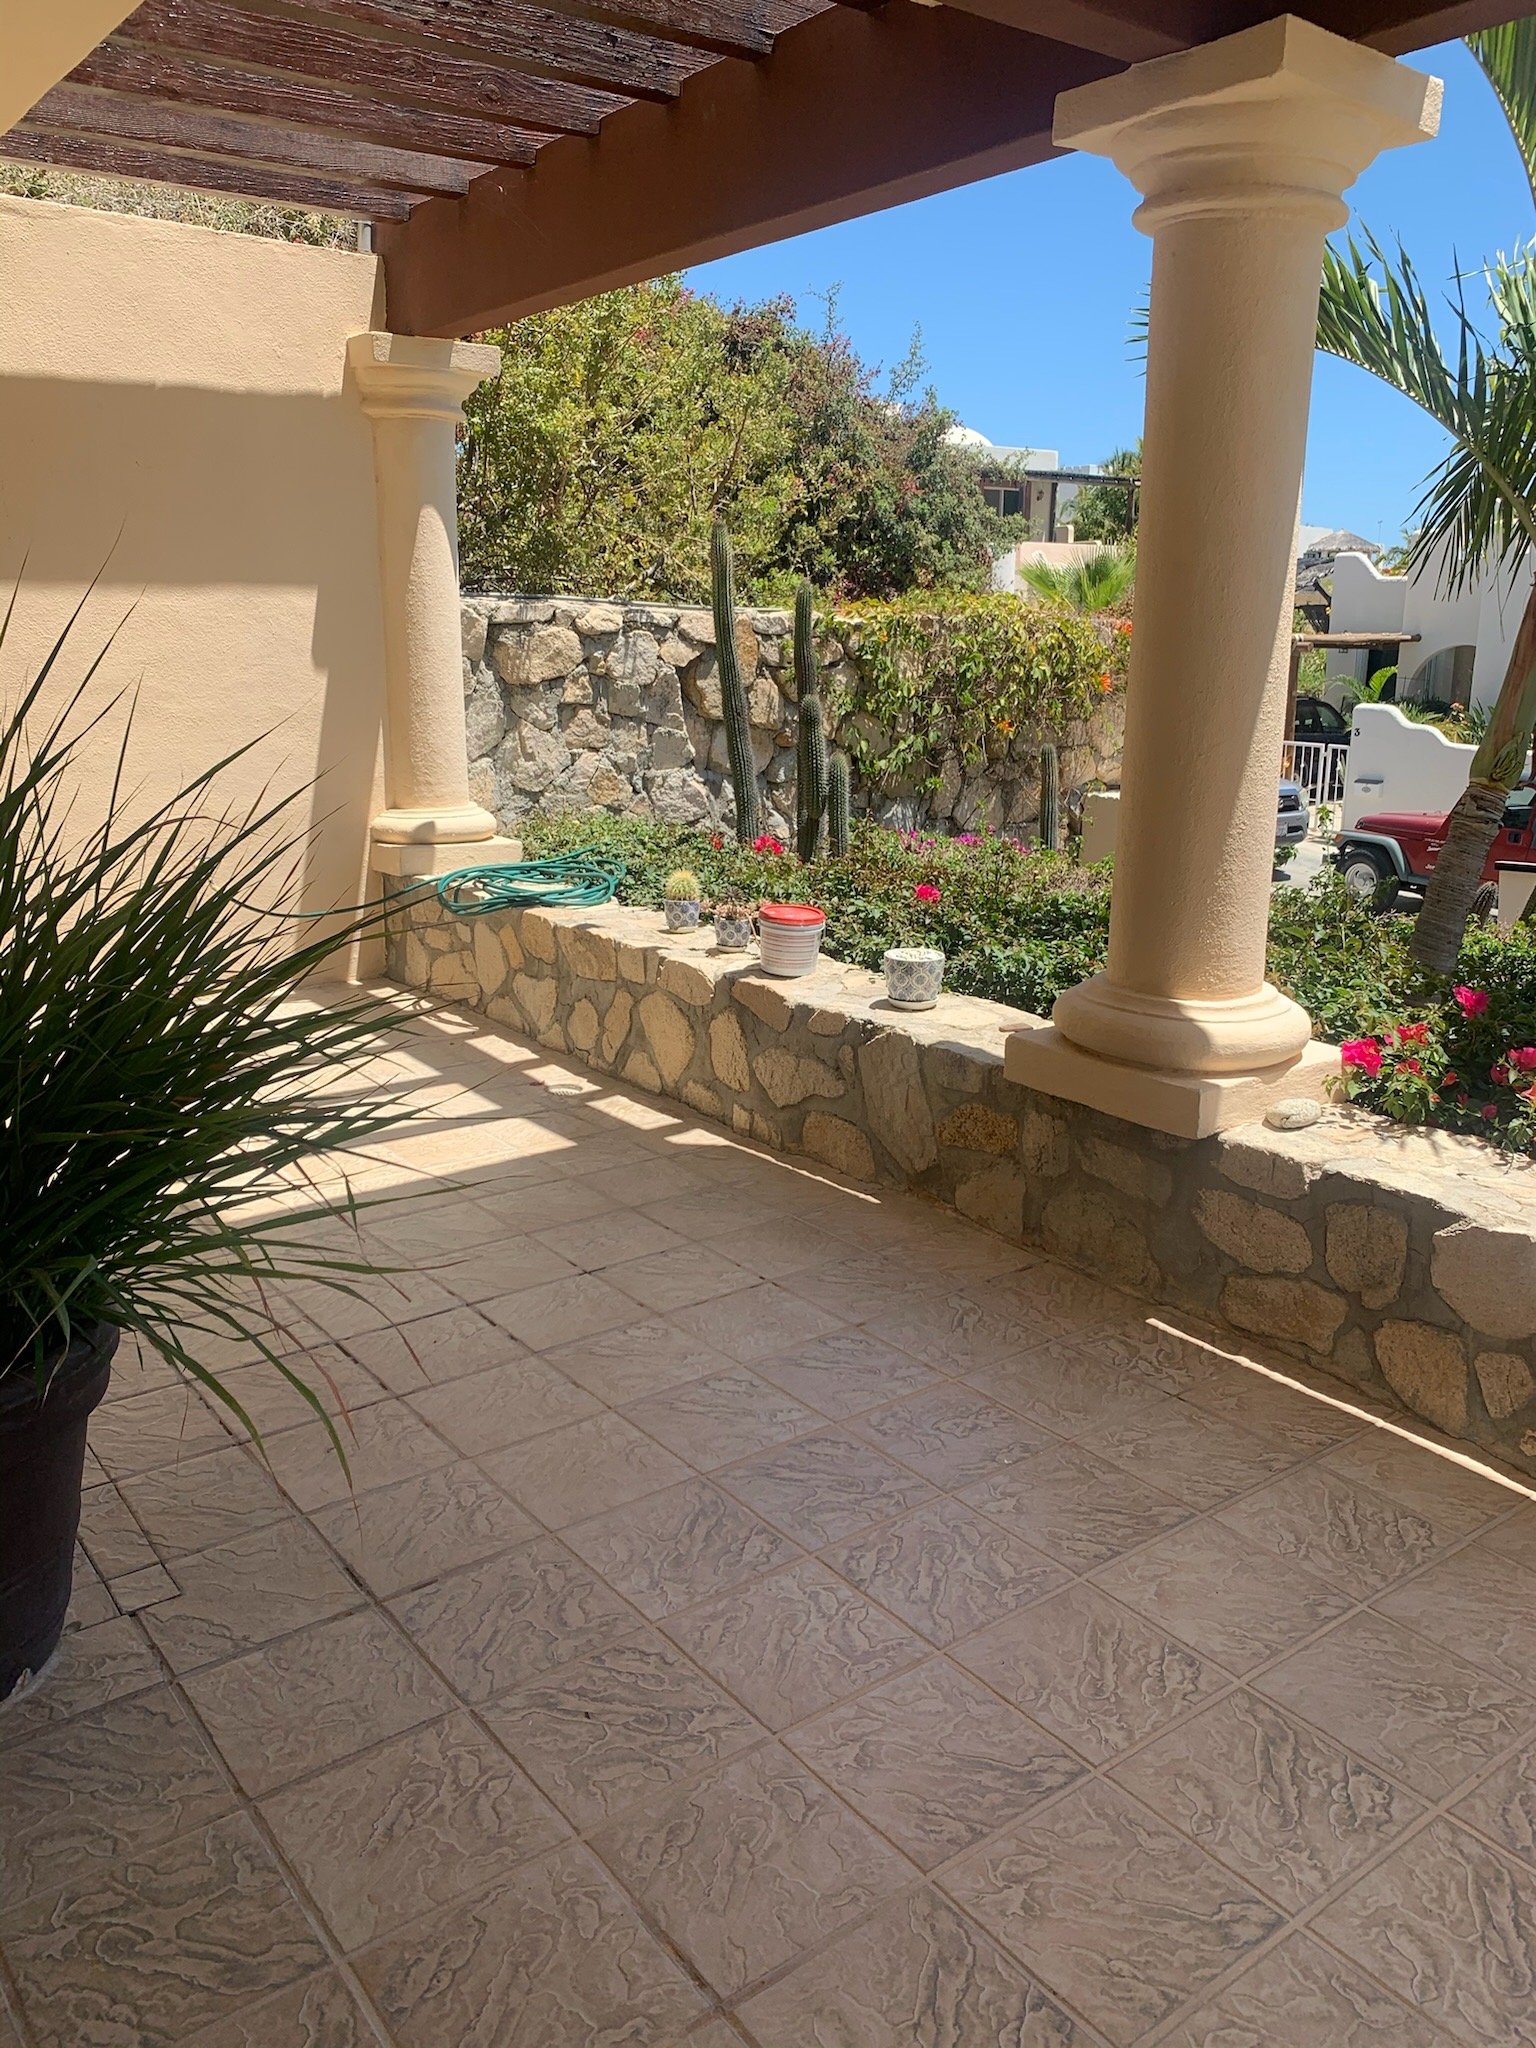
BEFORE >>


DURING >>


DURING

AFTER
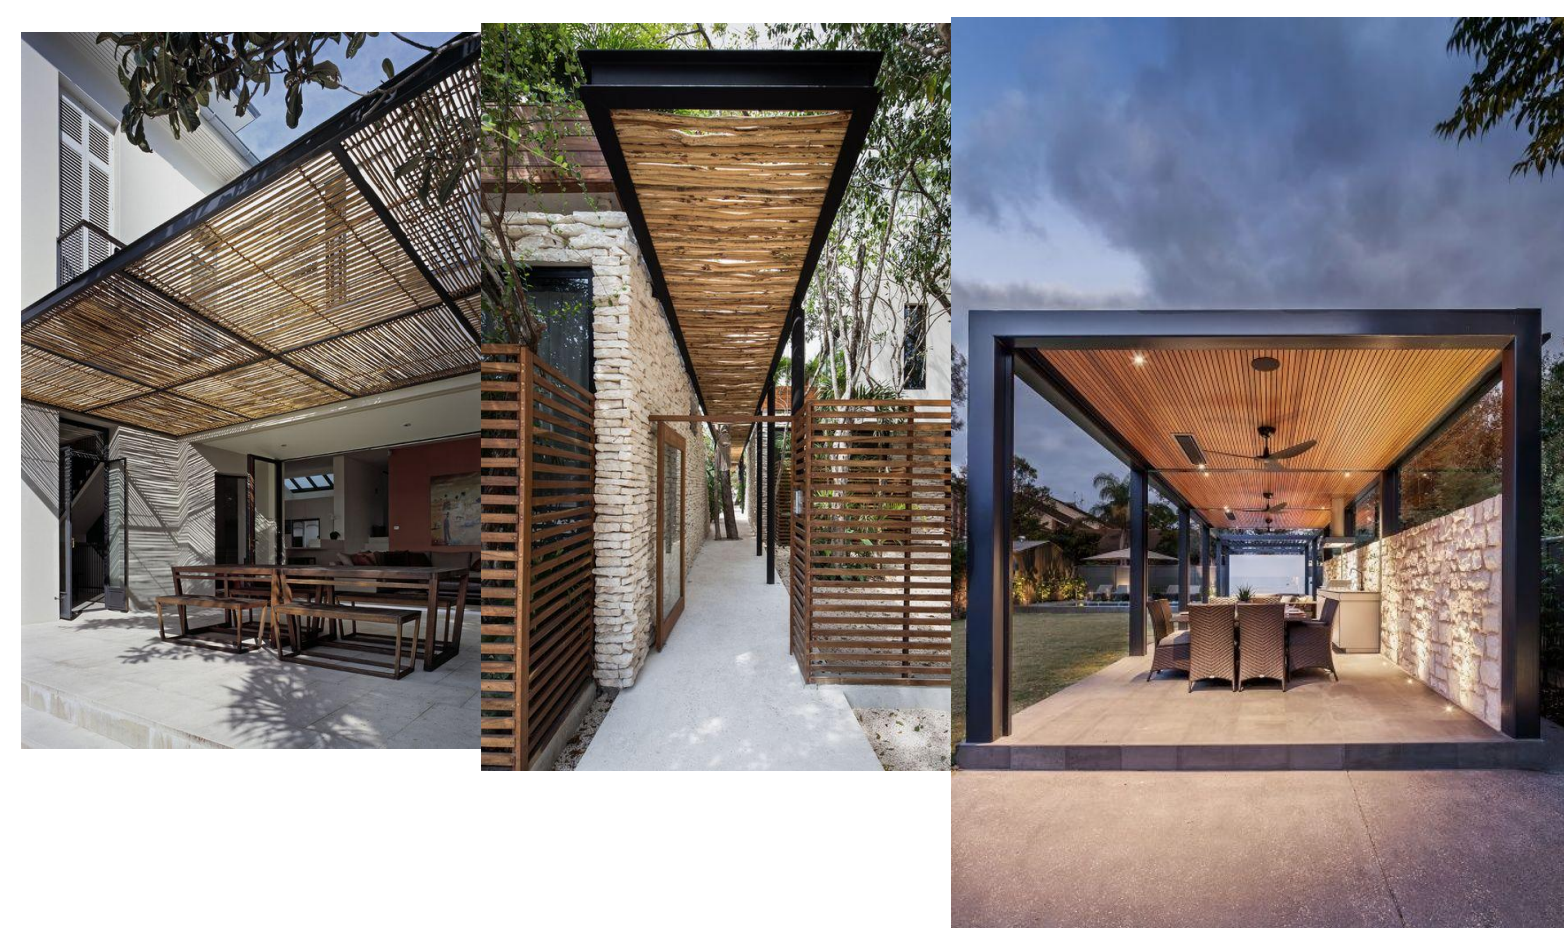
Next steps will include decking out the front patio with some cozy patio furniture — maybe a few lounge chairs or a conversation set. and an outdoor rug. We would like to add a long, rectangular firepit feature for ambiance and some warmth out there in the winter months. For privacy from the new lot construction next door, we hope to add a pergola on the left side of the patio which will match the one above our front door.

AFTER
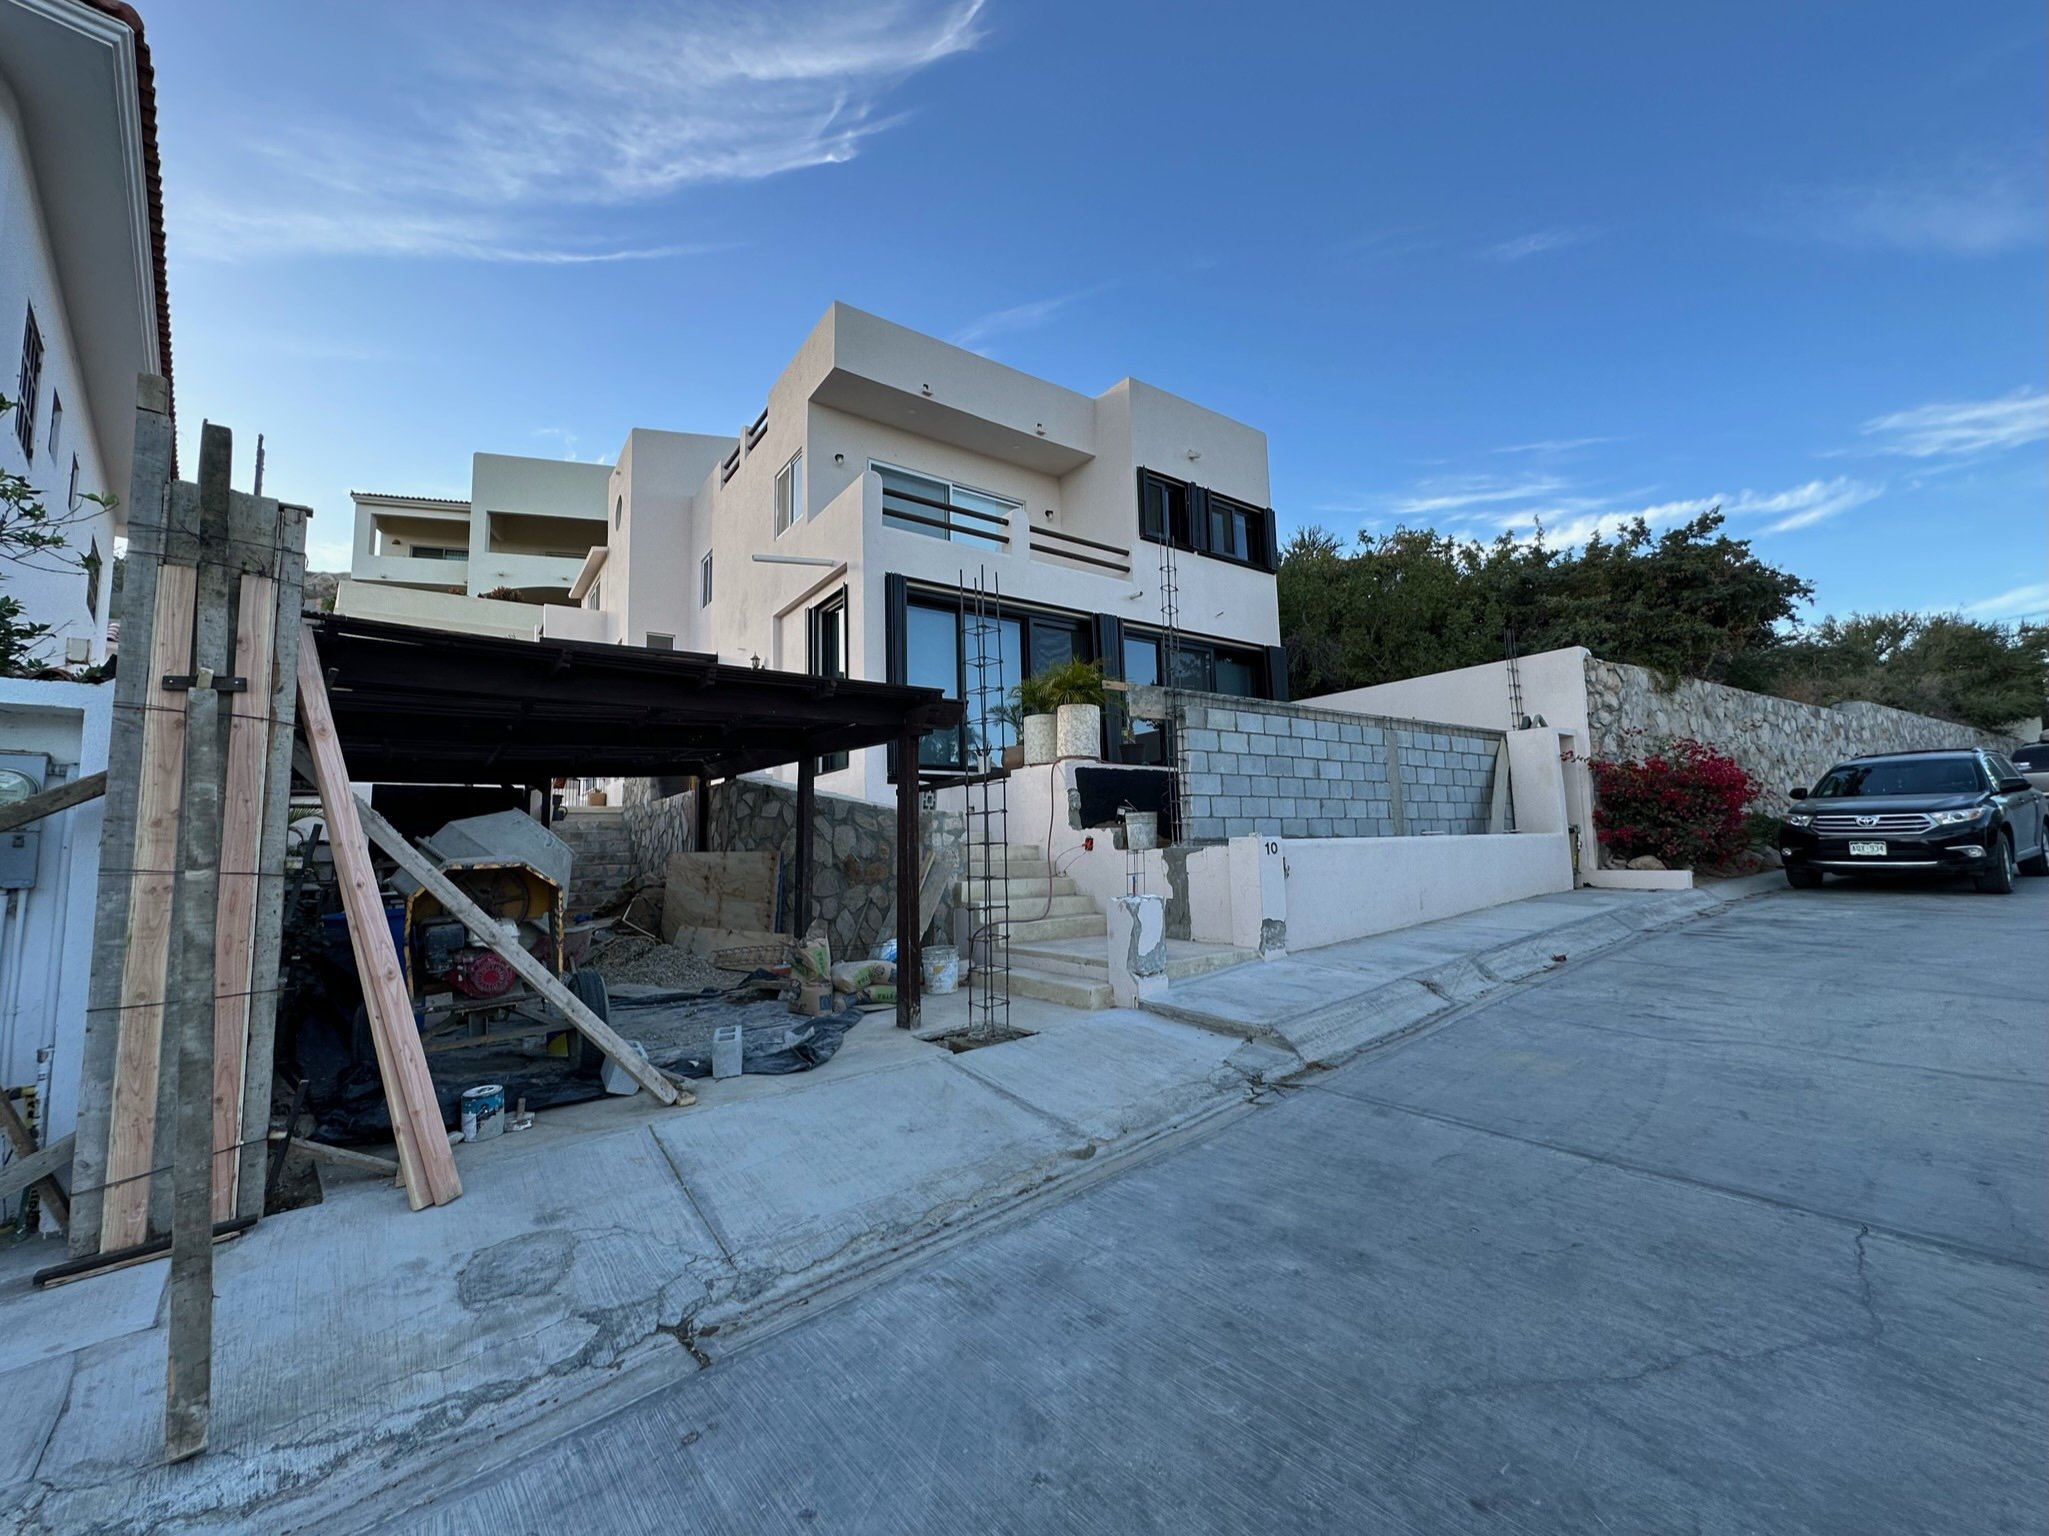
THE FINAL, FINAL
As we continued to delay finishing this blog, we moved into Phase 2 in January 2023 with a few outdoor projects, transitioning to invest in security. What previously was our ‘Next Steps’ section is now here, as we just recently wrapped up the project (shout out to JYC construction).

BEFORE

AFTER
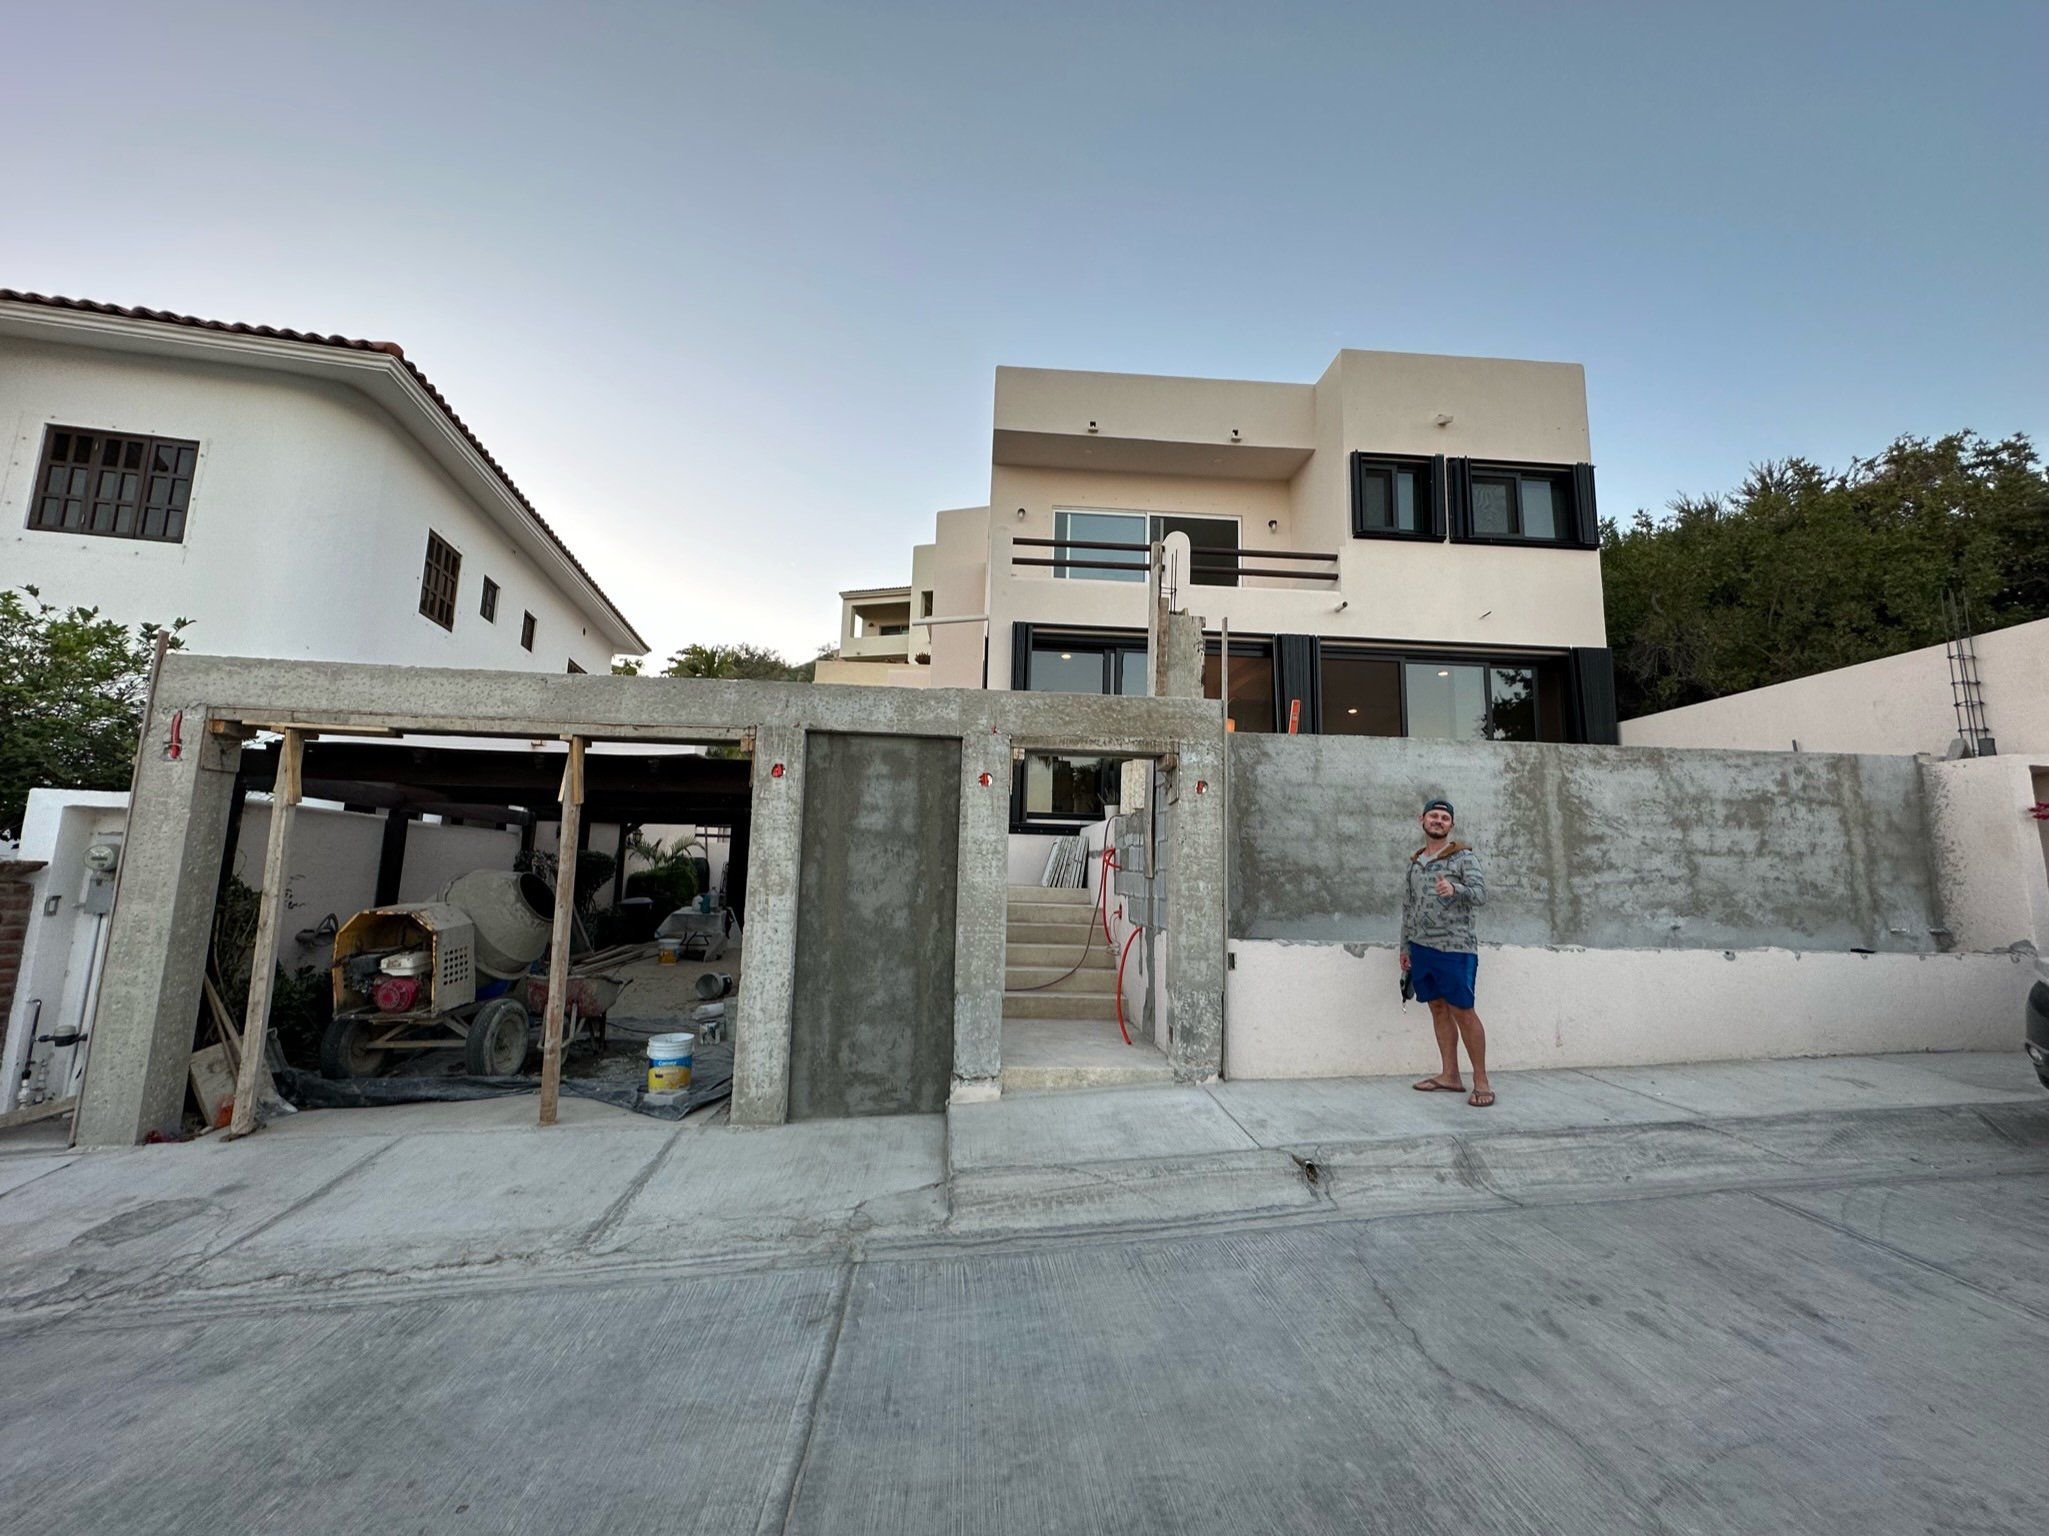
With Kyle’s vision brought to life from the Live Home 3D renderings he created, we figured out a great way to gain privacy and security for the front of the house. With the enclosure of the patio, complete with triangle wall, we added space for palms and plants out front.

Trying to decide how tall the patio wall should be. One Kyle high wall, por favor!
To have a more traditional entrance, we created a door entry with custom-made, black metal door. From the existing patio walls, we extended the concrete structure to the left, from the new door area and over to box in our garage. A matching automatic garage gate was installed. Lighting was purchased from Novus Decor in the US and shipped down, which gave a modern touch to the front. We also installed smart landscape lighting (purchased on Amazon), which are remote-controlled and color-changing. These changes helped to give us the curbside appeal we were envisioning, while also now making us feel more secure as well.

PLANNING
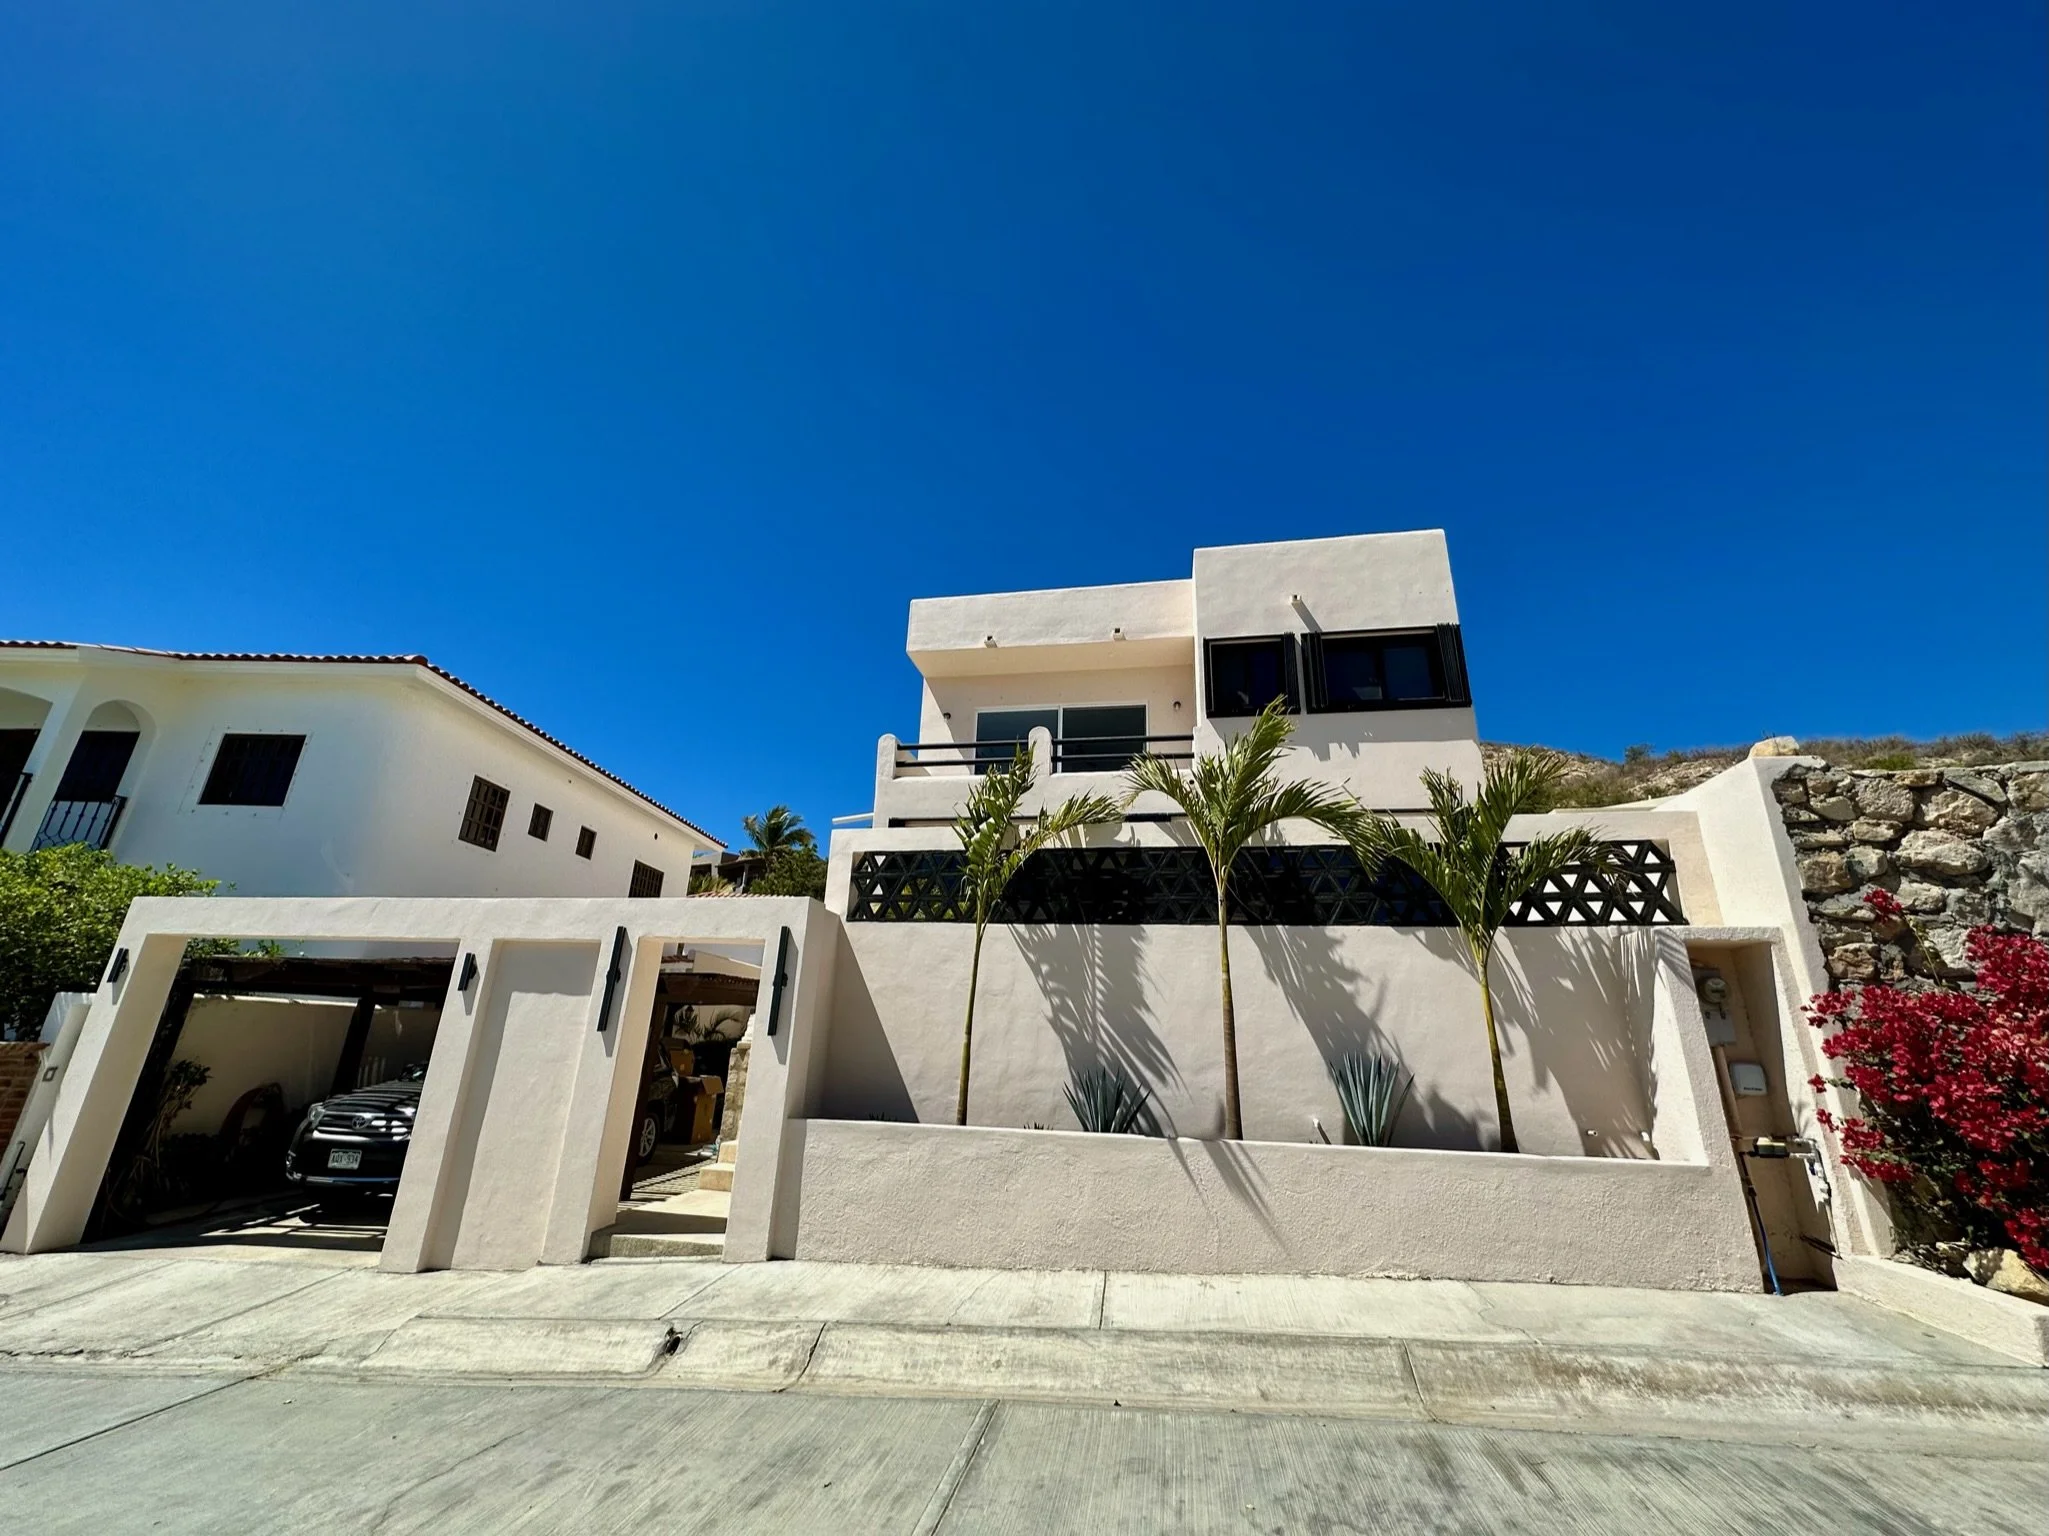
THE AFTER, AFTER - Patio, Front Gate and Garage Door included.

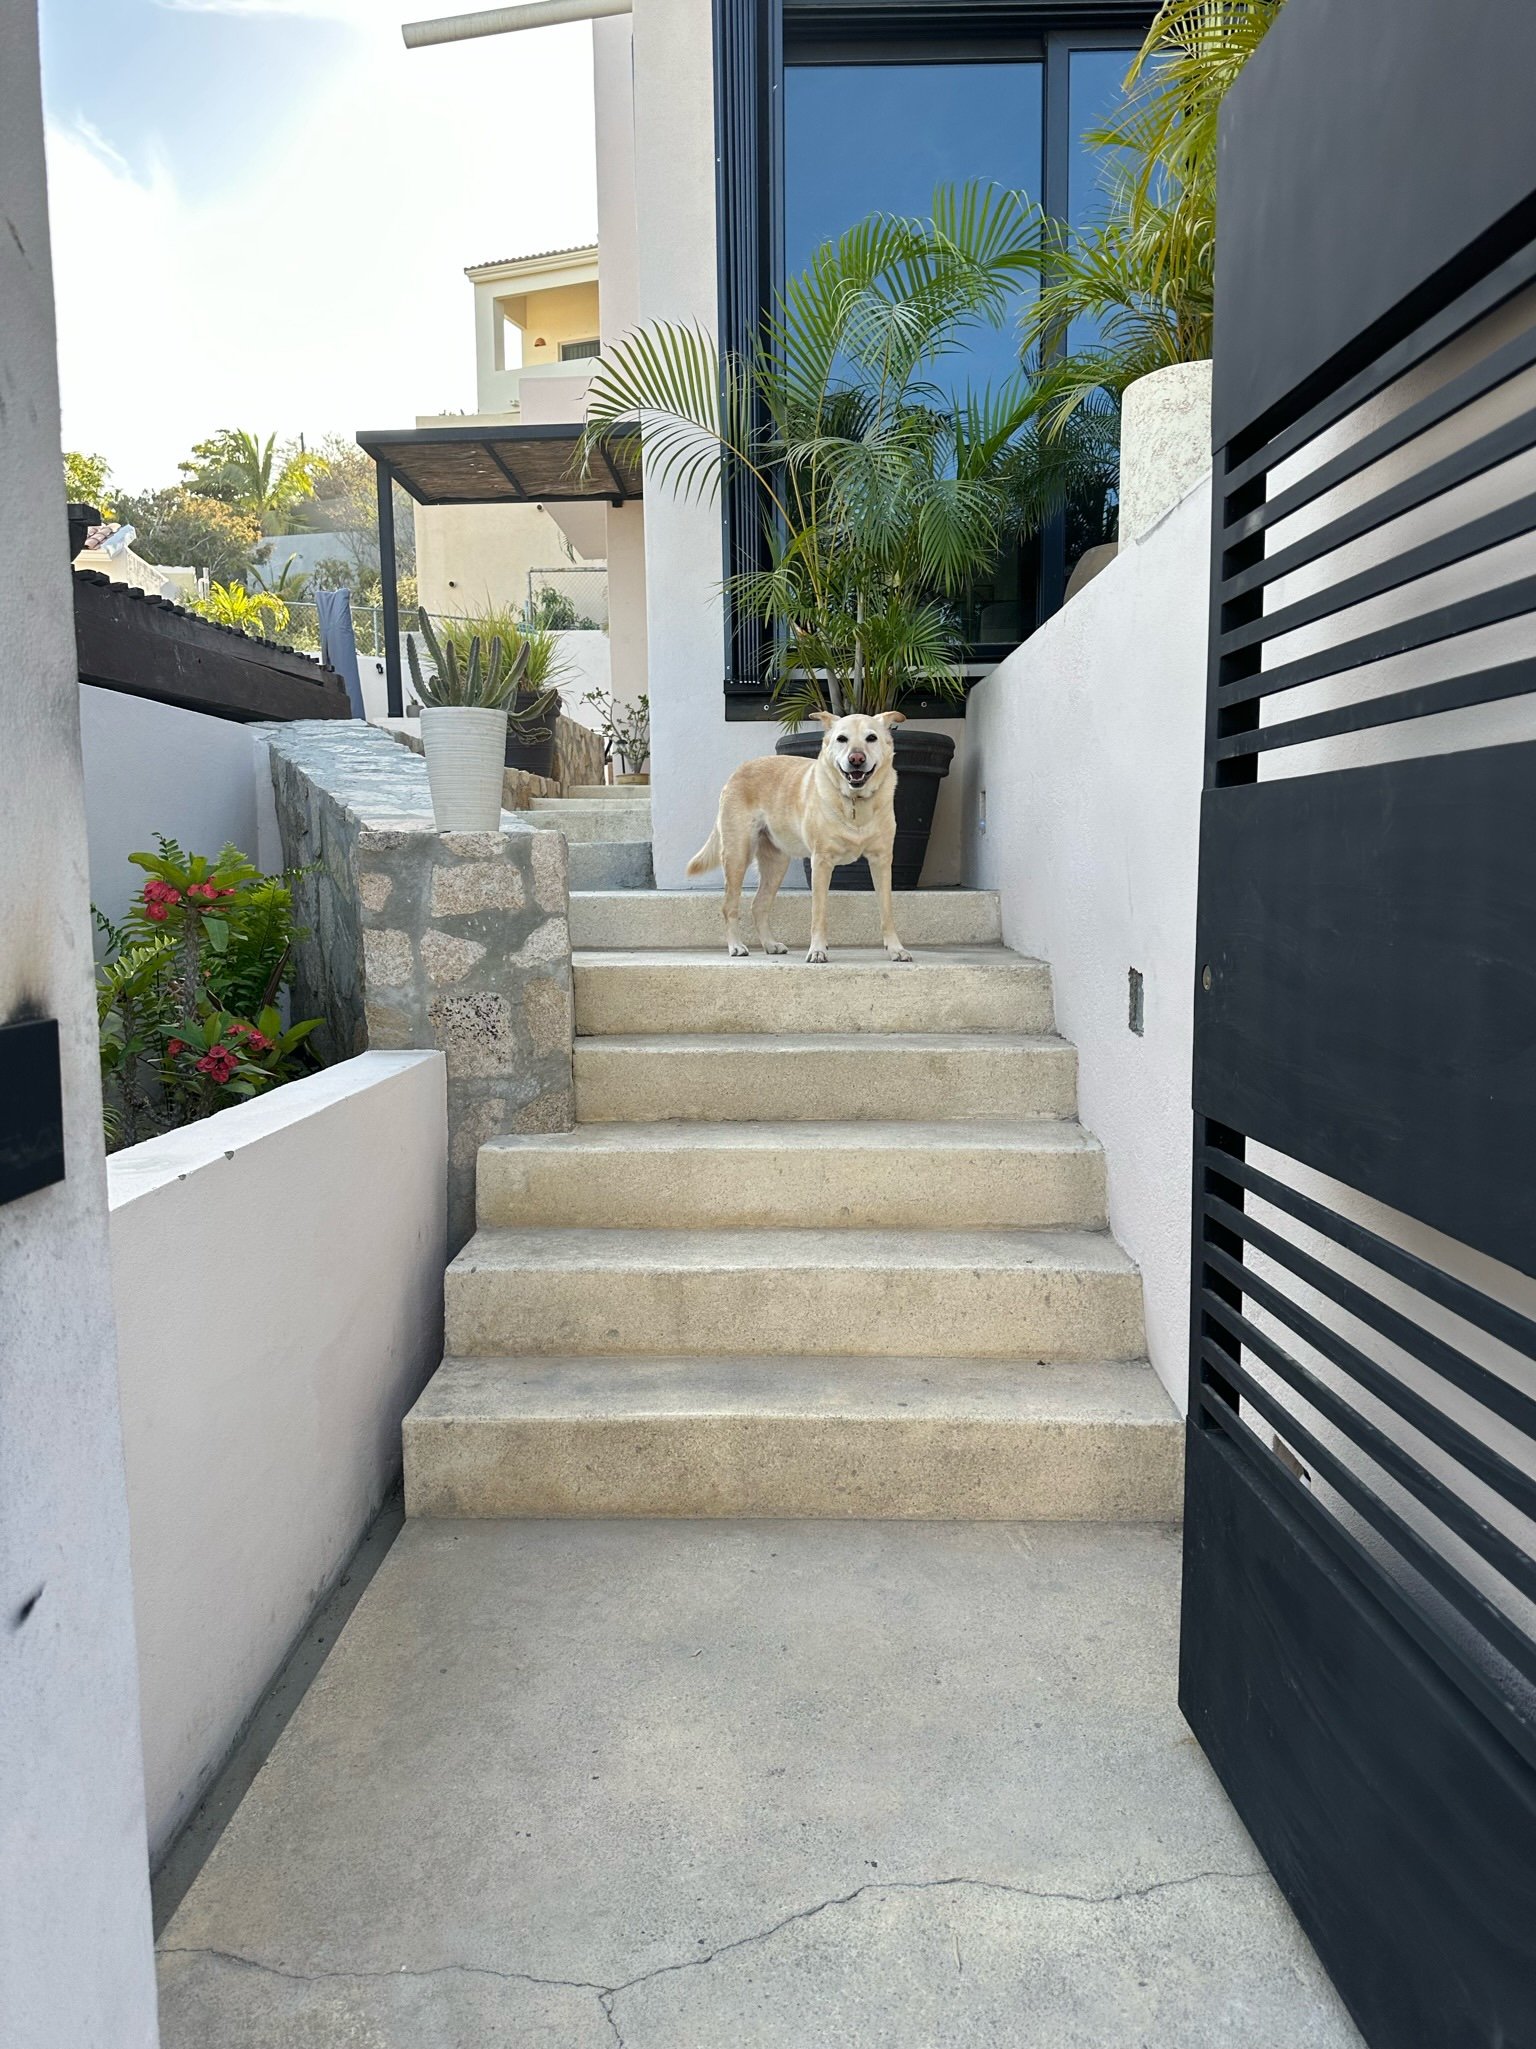
Upon entering through the front gate, a wall was added to separate the garage on the left from the front stairs. This would create two separate house entry points, not only from the outside, but now the inside too.
This area also provided us space to add a planter bed on the left side of the entry. This would create ambiance with our goal to have a lush, tropical feel when you walk in the door.


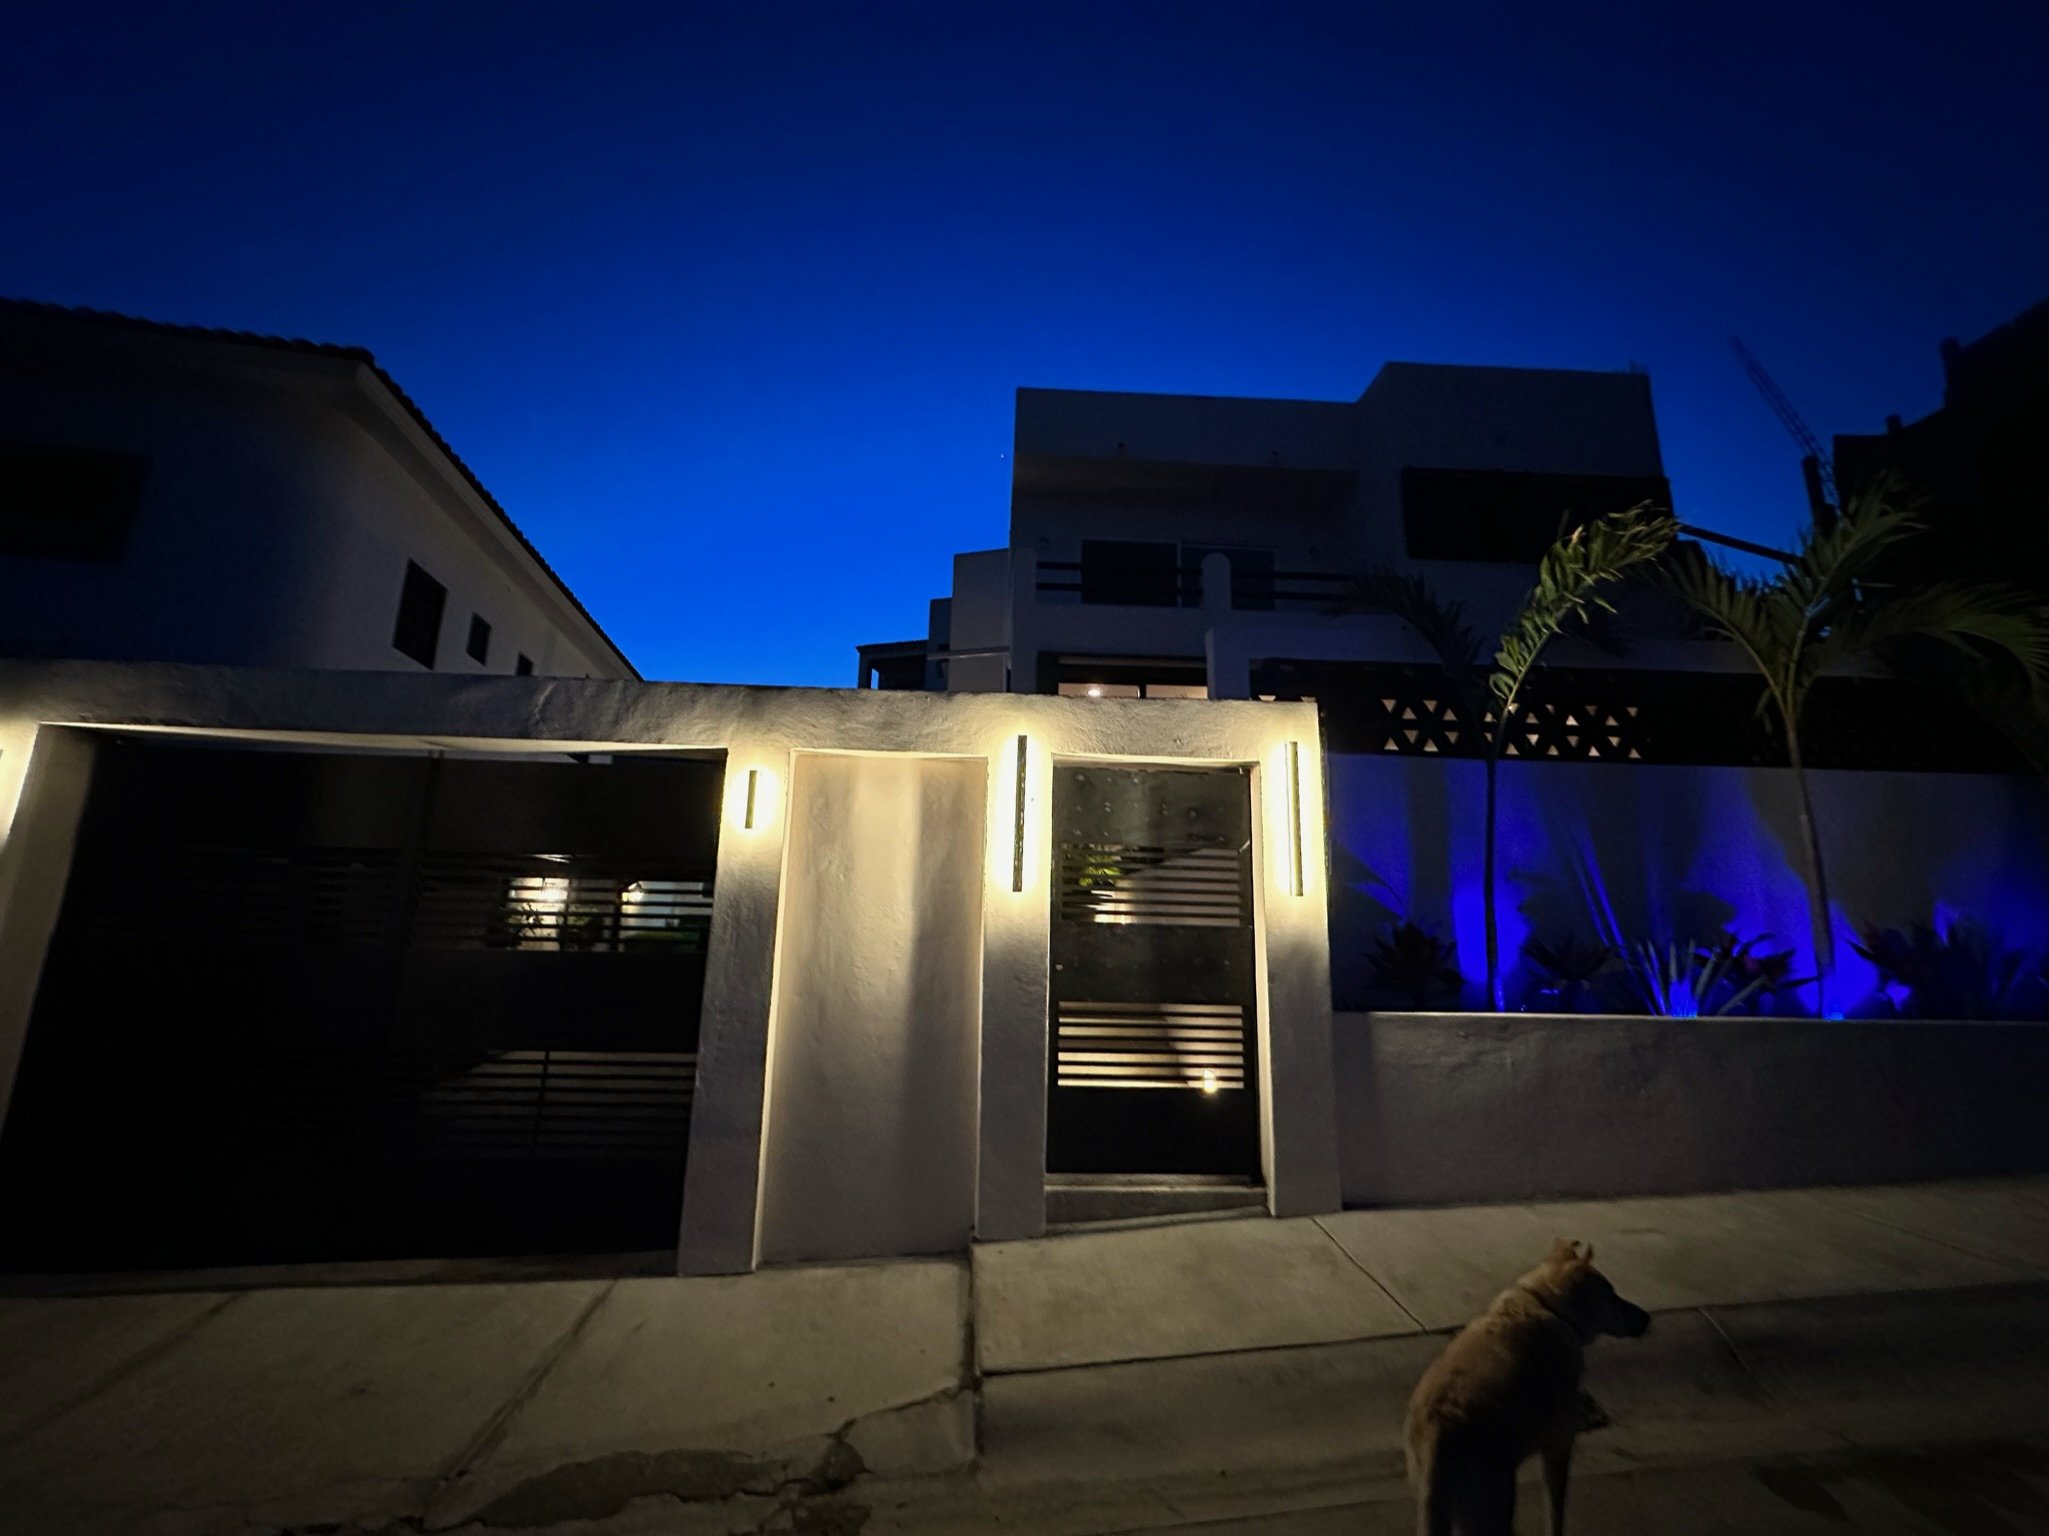
The new front lights are a bit too bright so we’ll be installing a dimmer to return to Casa Turner vs. Club Casa Turner.
Homeownership is a real challenge, especially when unexpected surprises show up. We’ve quickly realized there will always be something to ‘fix’ and there will always be a list of things we want to do ‘next’. So what’s on that list now? Nada, nada tostada (officially anyway). In the future we hope to tear down the existing car port/garage pergola and put up a newer, modern version that likely matches the one over our front door entrance .
For now, our focus will shift to decorating and finish out the new spaces to help them feel more complete (if only there was a HomeGoods near by…).
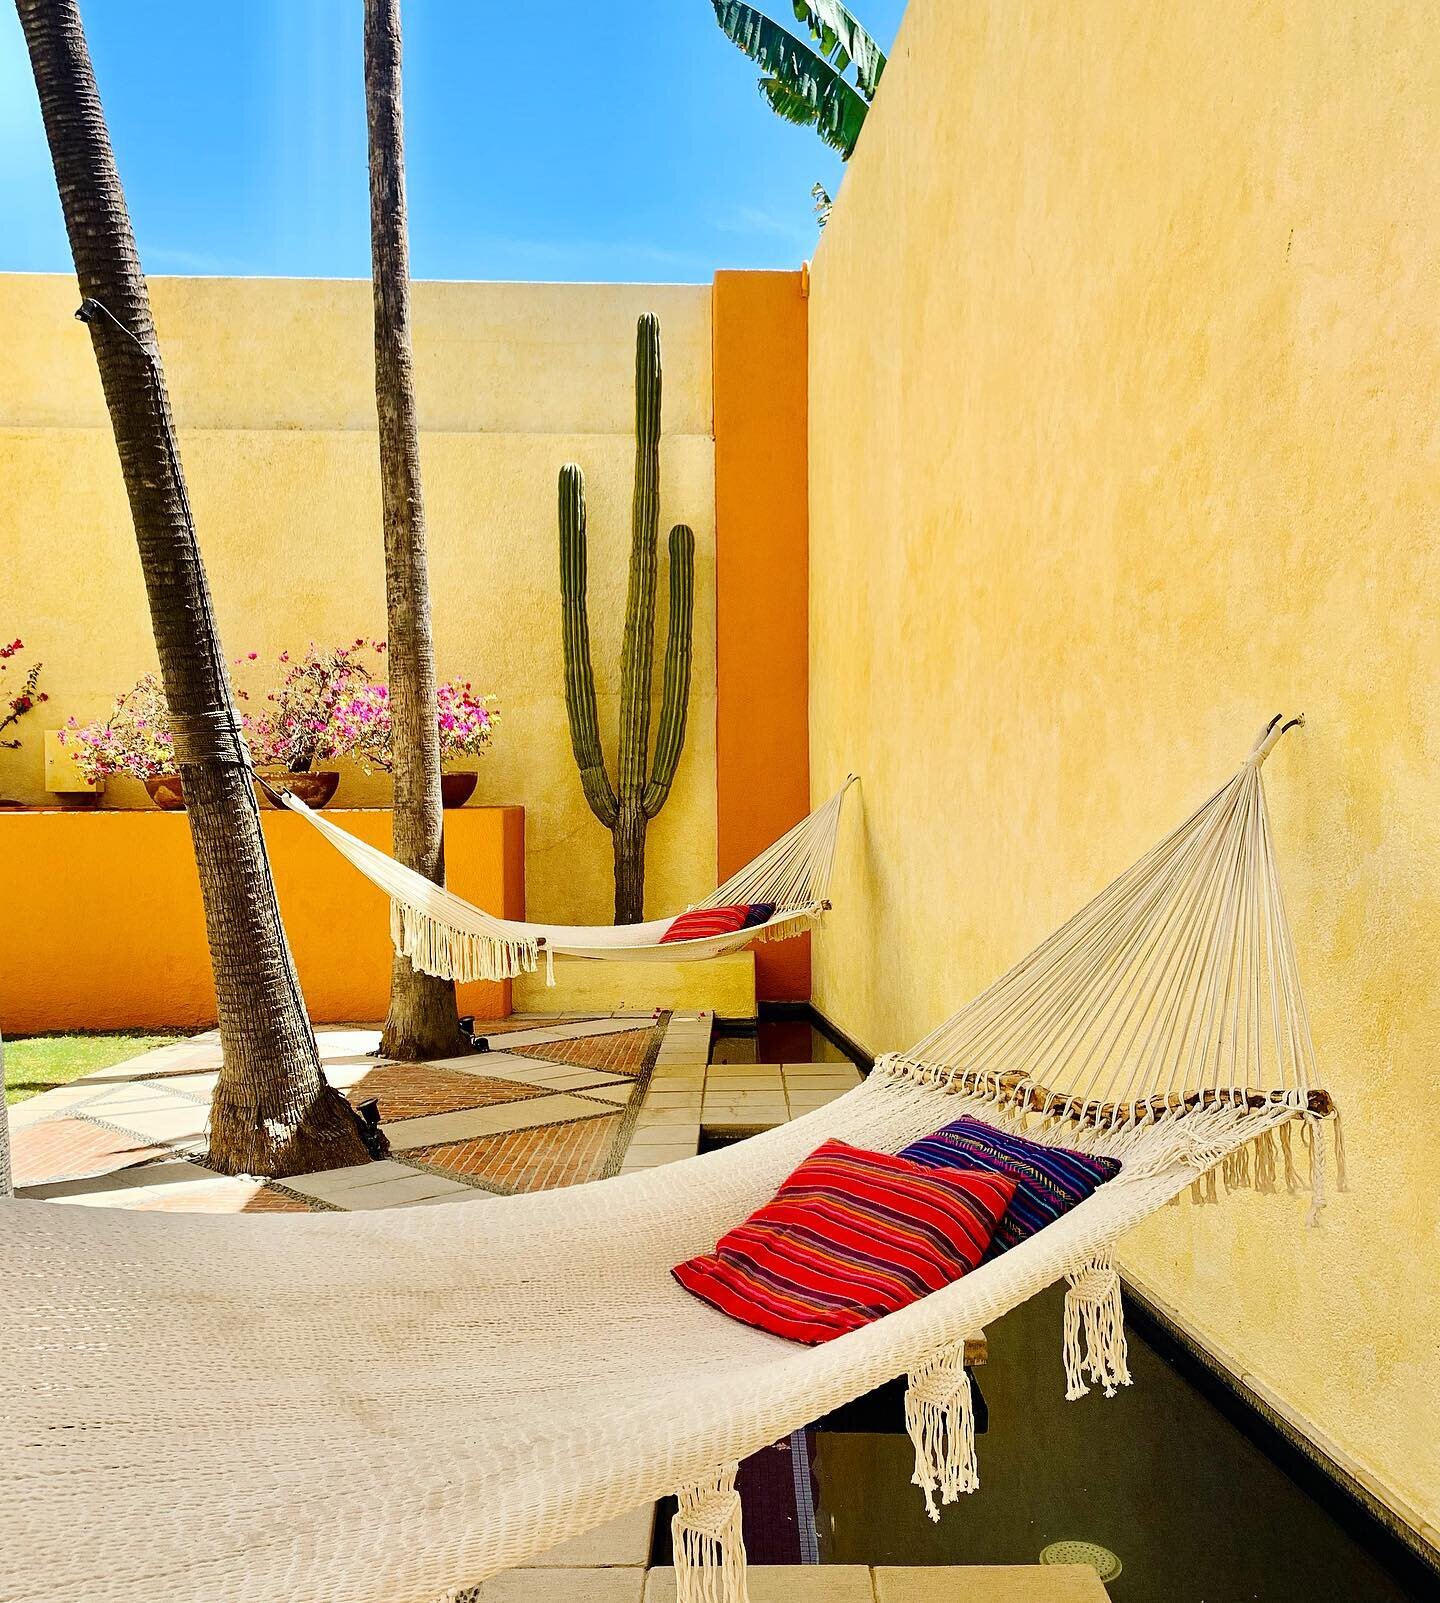
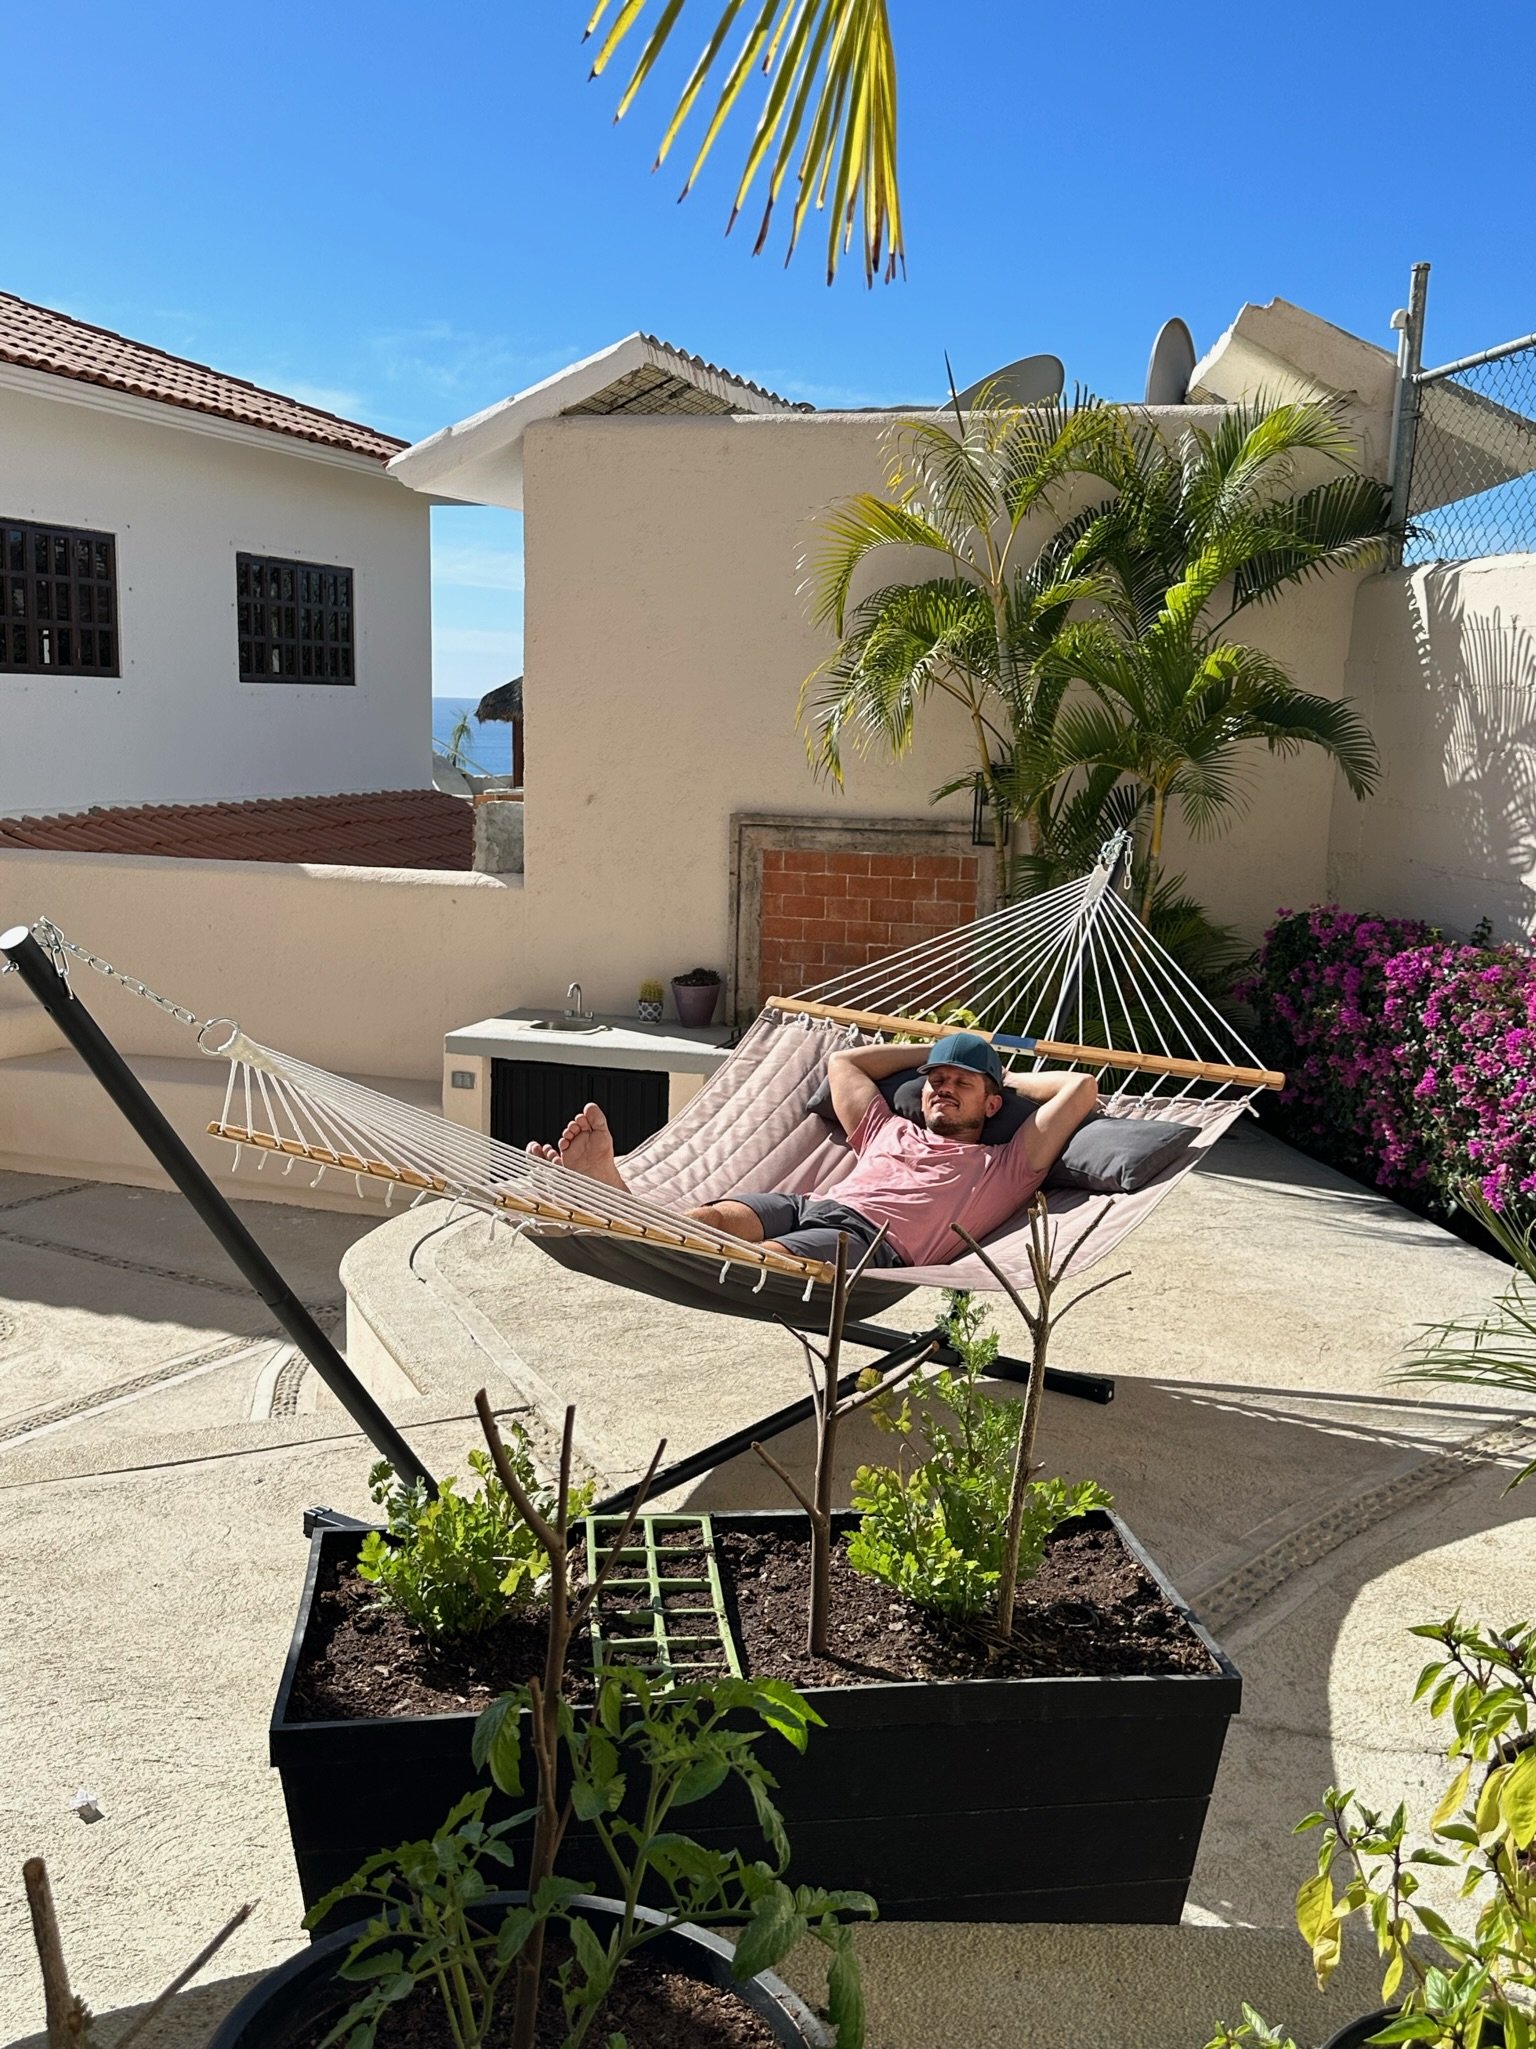
Kyle bought a new hammock for lounging and a patio table and large umbrella will be here soon. We planted some herbs in our new garden bed out back, so we’ll be figuring out how to keep them alive.
It’s been a long journey (and a long blog!). We appreciate you following along with us. Until the next time!